|
Index |
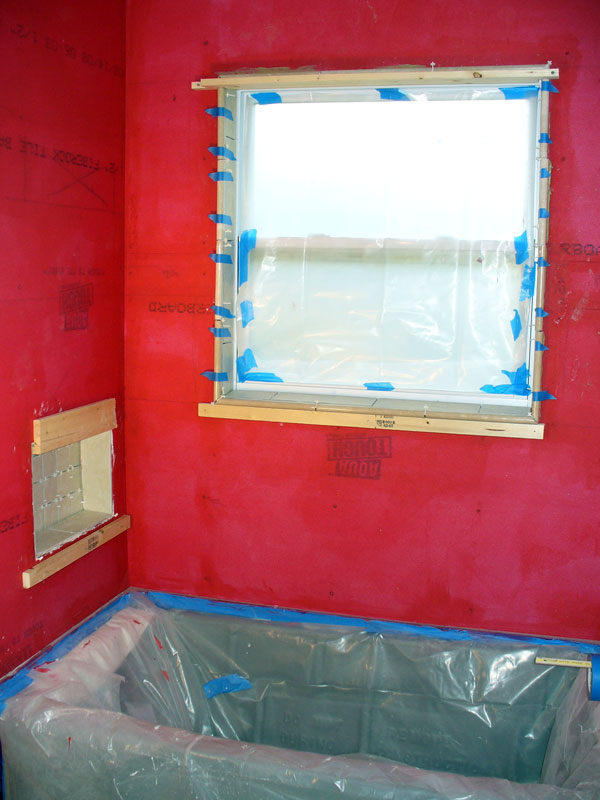
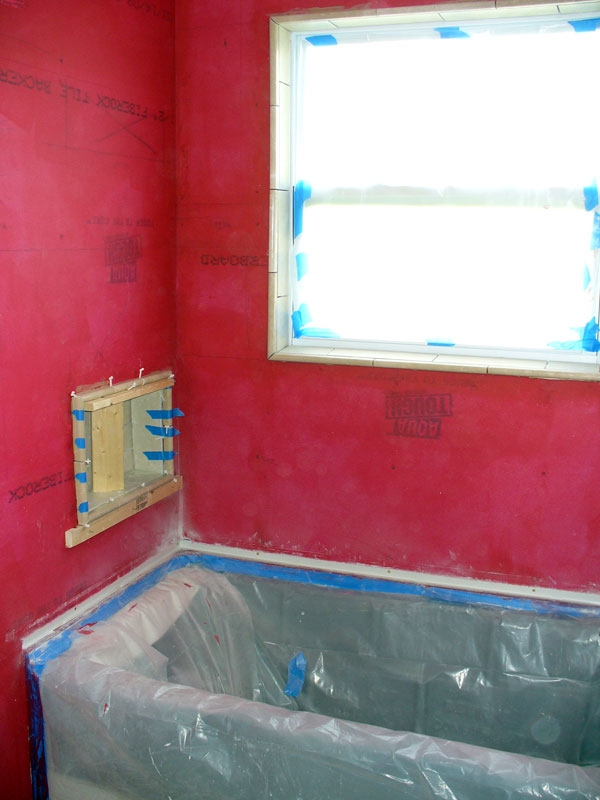
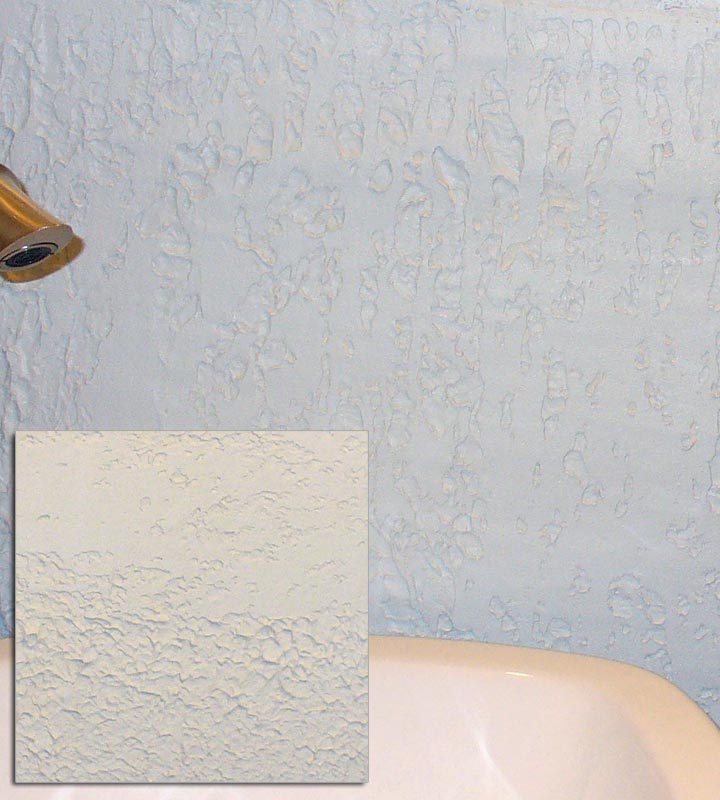
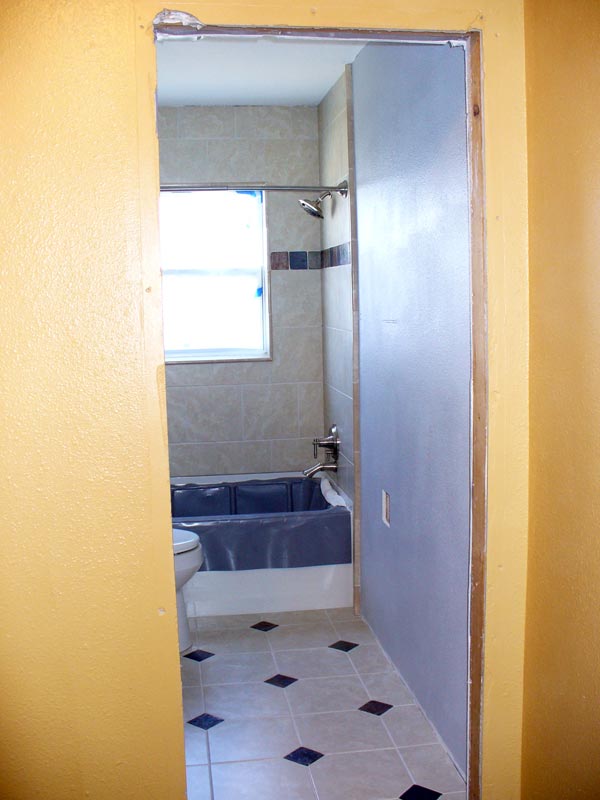
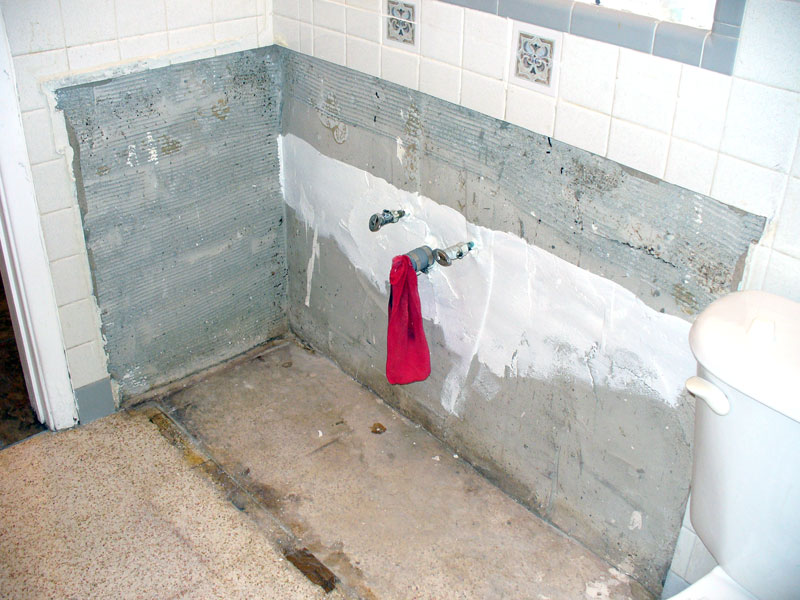
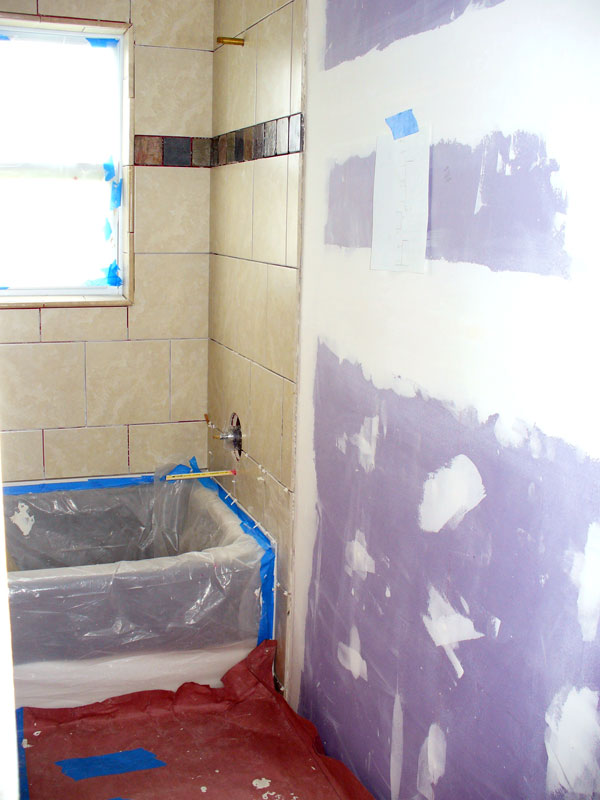
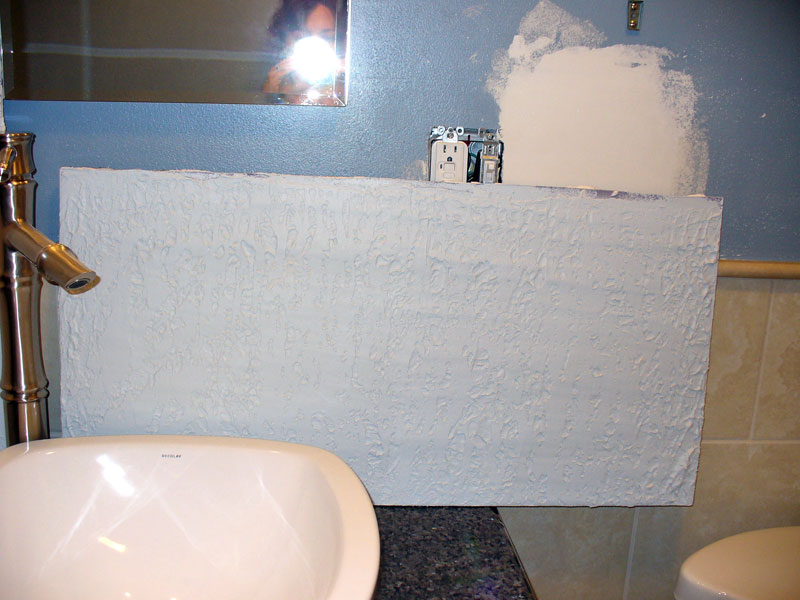
Homeowners Nancy and Paul share their bathroom remodel nightmare... Back Story When we removed the vanity, we discovered more issues. The prior owner had cut away all the wall tile where the vanity was going, then filled all that with concrete! And not even a smooth job of it! As Paul and I discussed how best to handle the transition between wall tile and the planned bamboo wainscotting, we talked about how difficult it was going to be replacing some of those cut tiles, then matching up bullnose to finish things off, plus making up the thickness on the removed portions… it was getting more and more real just how difficult all that would be. In the end we dropped the plans for the bamboo, and agreed to take it all down to studs, just leaving the tub. No!!! I swore after the kitchen there'd be no more gut-jobs! The saving grace is this is a much smaller space. And hey, I won't have to finish removing all that nasty texture with a scraper. So here we go again… |
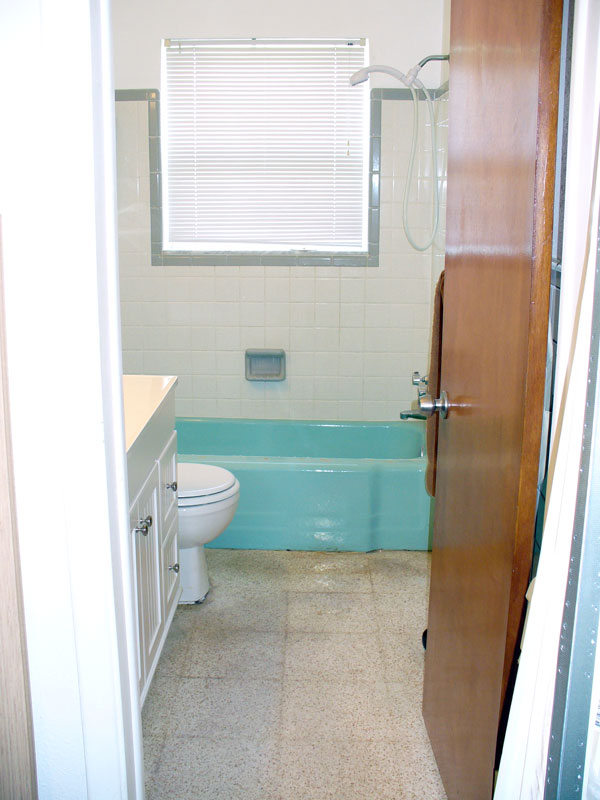
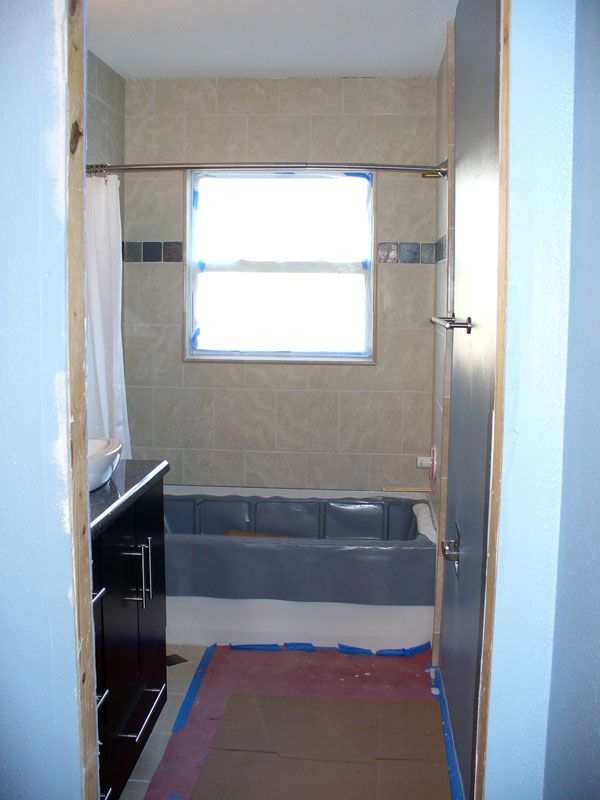
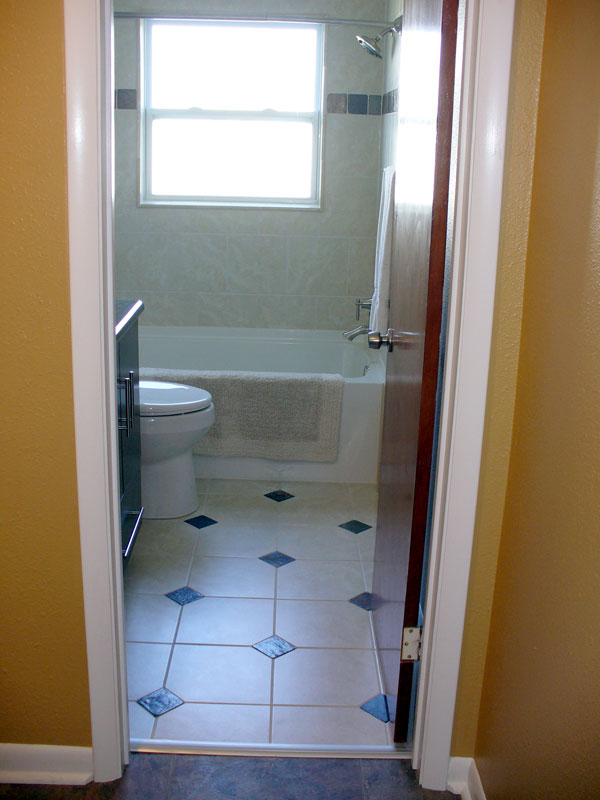
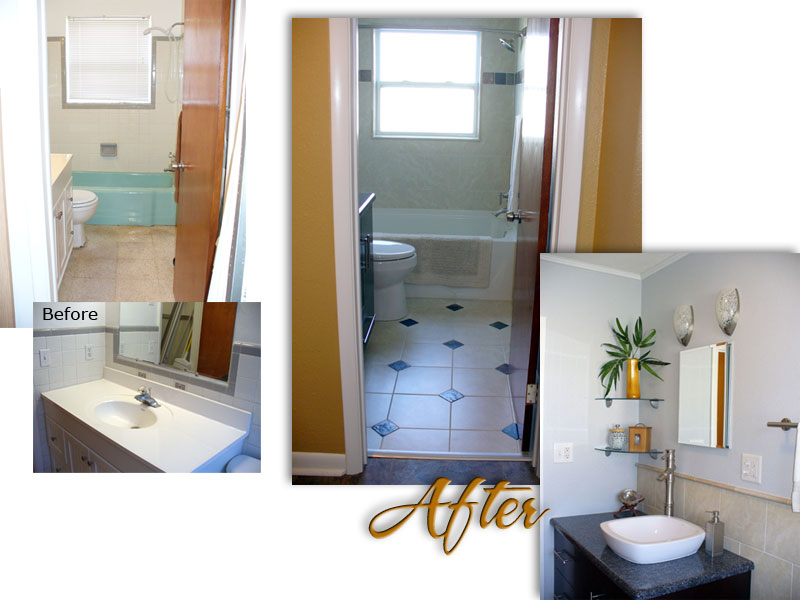
Click thumbnails for a larger view. Bathroom Before
|
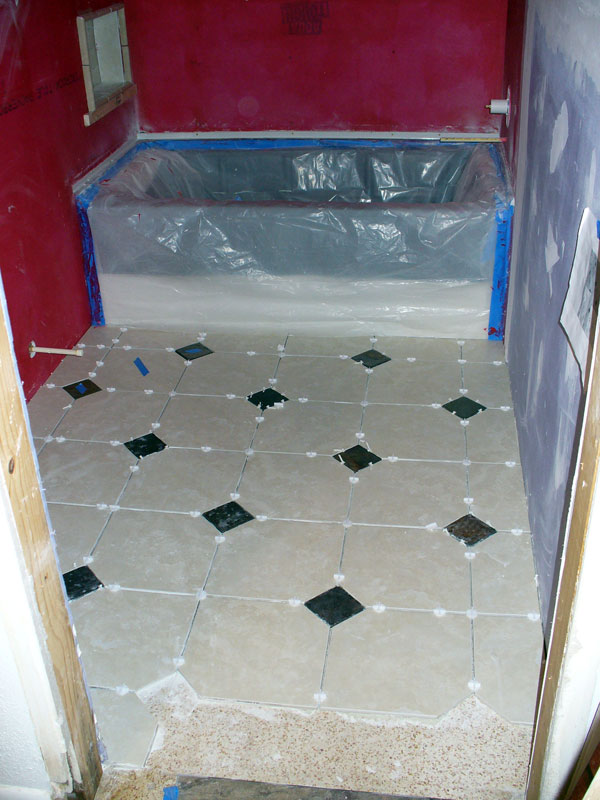
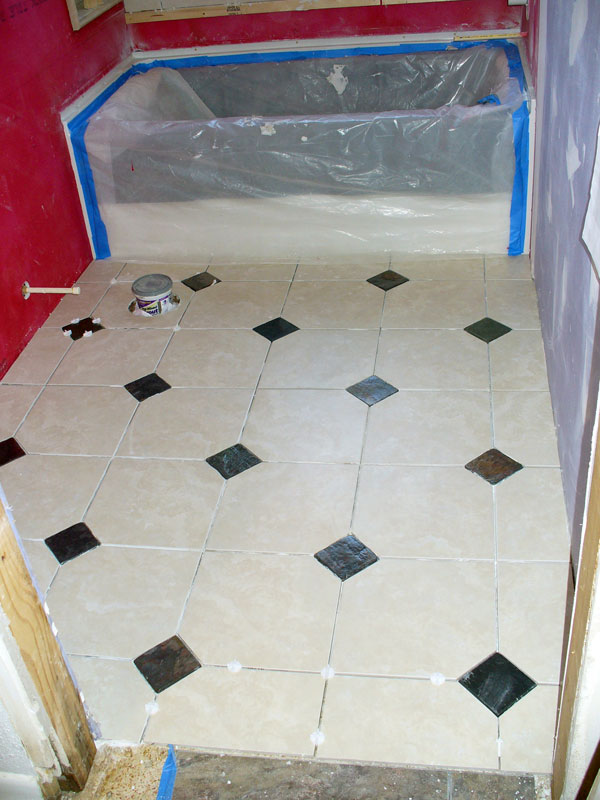
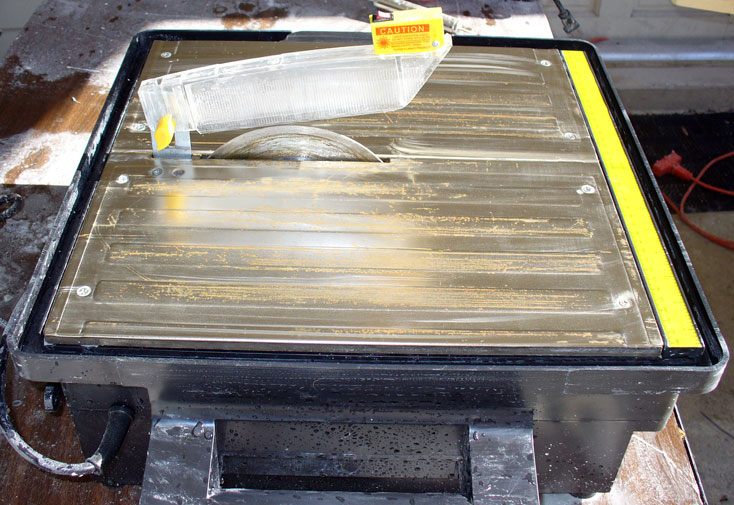
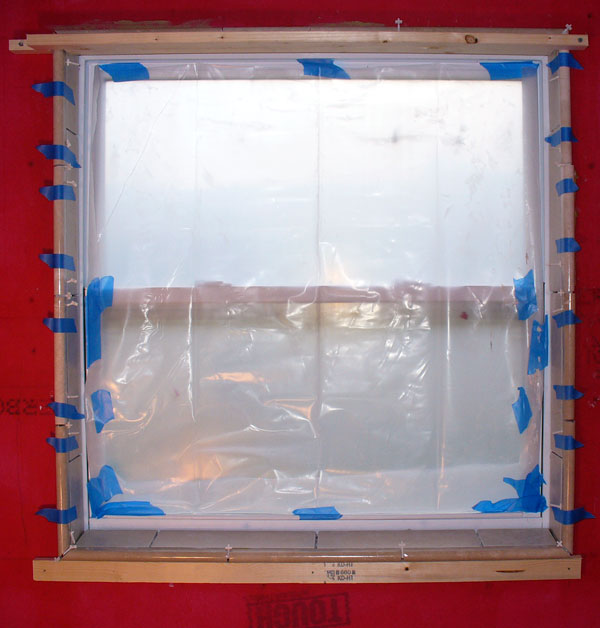
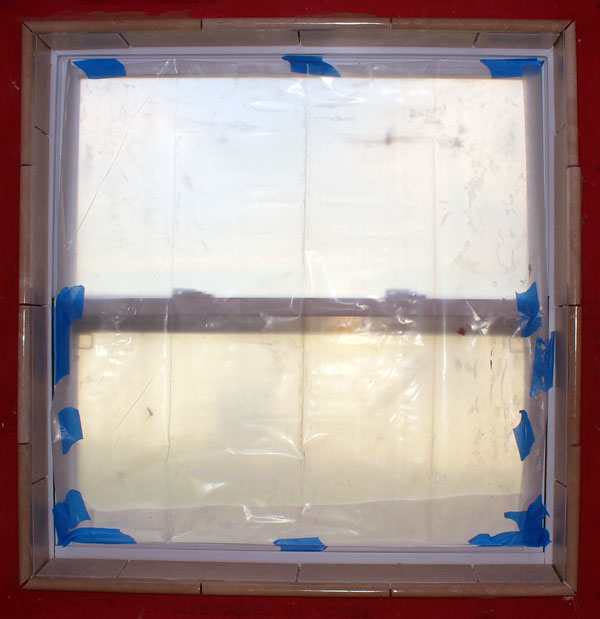
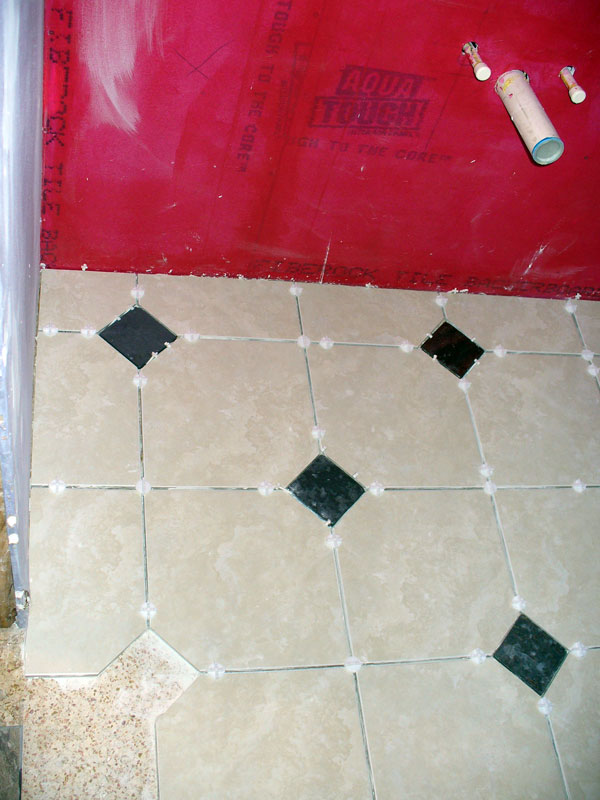
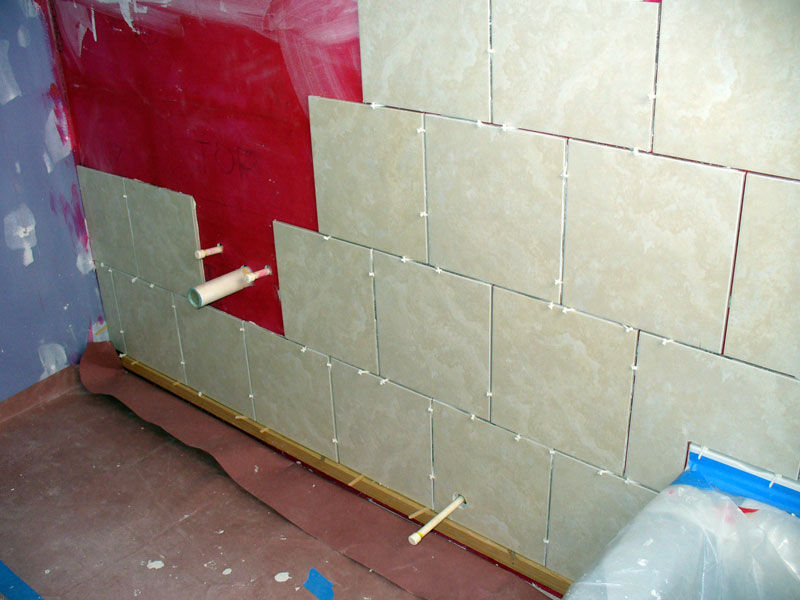
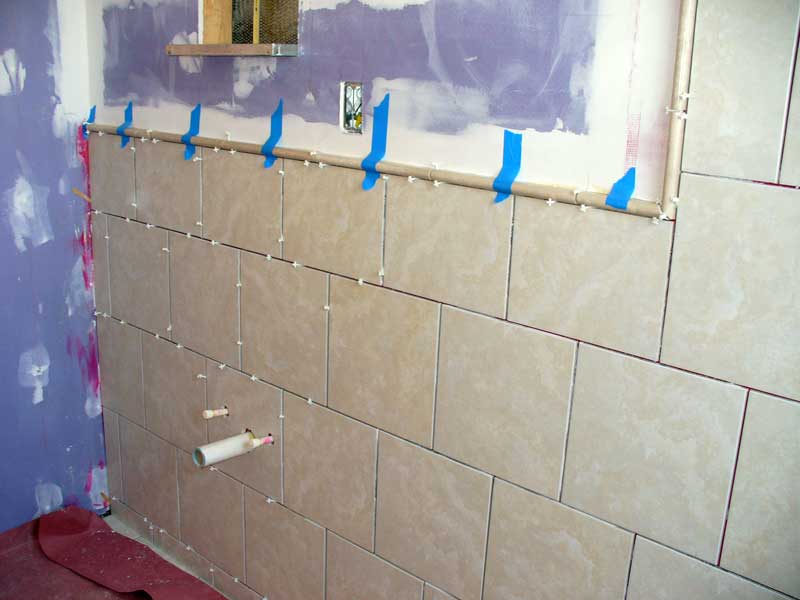
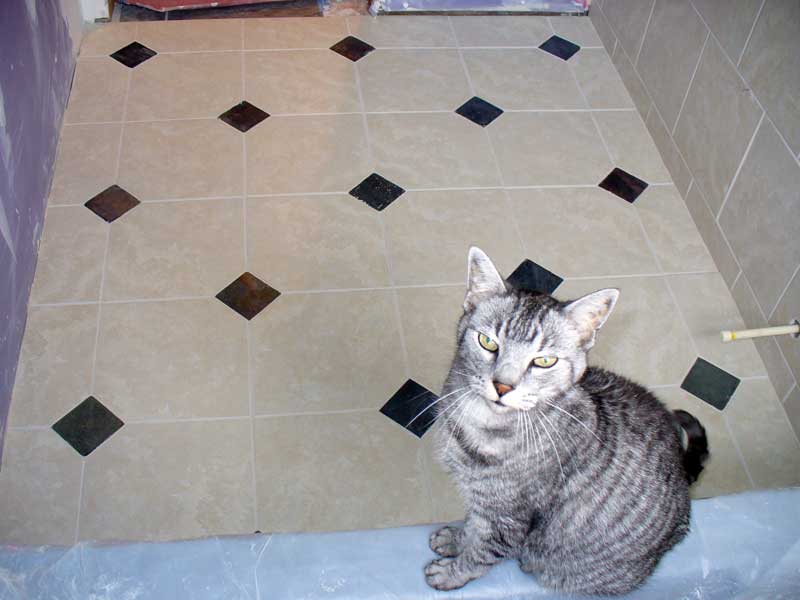
09/06/09: Tiling begins He went on to doing a final coat of joint compound while I worked out the floor tile layout. The only area of clear floor large enough to do this was in the kitchen. The bathroom floor will be a grid pattern of 11.75" porcelain tile that looks like travertine. At every other intersection, I'll be insetting a 4" piece of slate in a diamond pattern. Paul finished before I did, so he helped out. I marked all the porcelain where it will need to be cut for the slate. Then we numbered all the pieces before picking them back up. On Sunday, I scraped the bathroom floor, removing dropped joint compound and other debris. It still needs to be cleaned, but we didn't get to that. You wouldn't believe how long it took just to do the little we did—the interior sides around the window. Part of the problem was we switched jobs from the kitchen. This time I was calculating how big the pieces needed to be and laying them, and Paul handled the cutting. I made mistakes on the measurements, so we wasted a few cut pieces. Paul was not happy with the saw's fence—it was difficult to adjust and you had to screw it down each time instead of a simple clamp mechanism. On top of that, the thin set wasn't holding as well as we'd like. The bottom sill has a slant and the tiles wanted to slip forward. It took so long to lay all those window tiles that we ended up tossing a good amount of thinset. We've got our fingers crossed that the tiles along the top will stay put (notice the wood brace in the photo). The thin set was barely workable by that point. |
09/06/09
|
|
Photos: • After that was done, we put up the pencil around the window. |
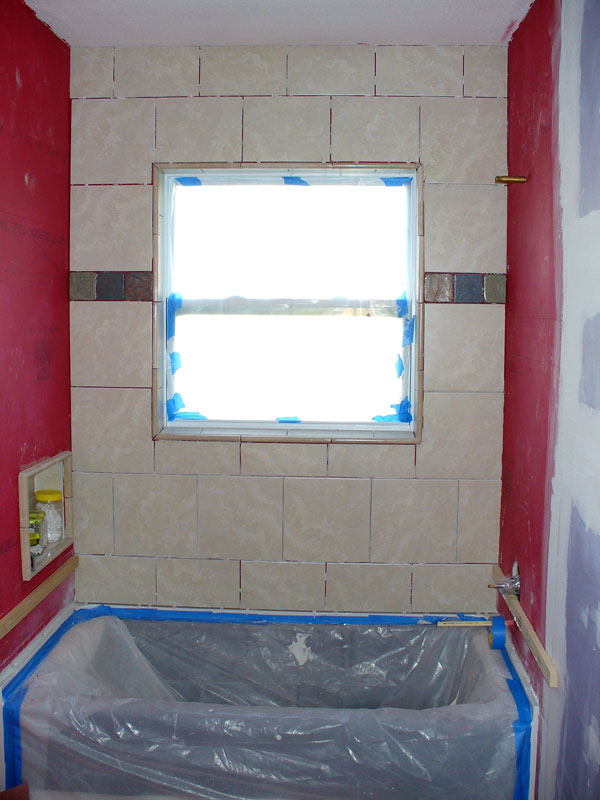
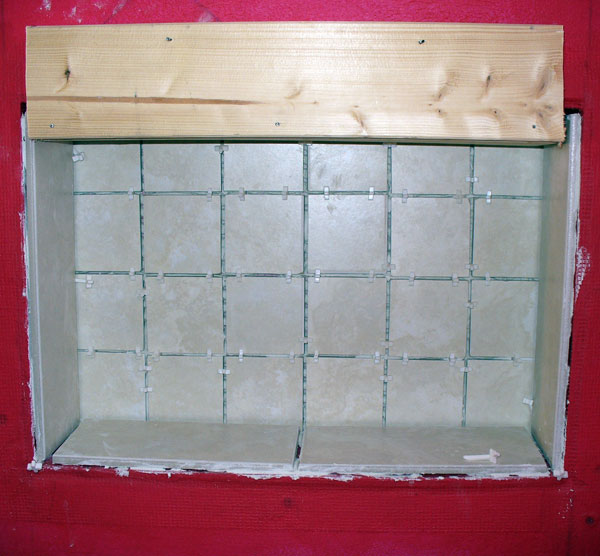
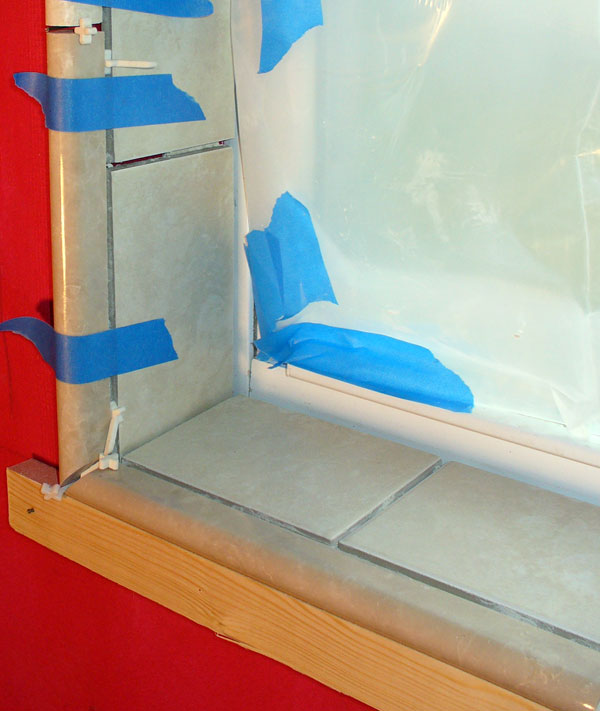
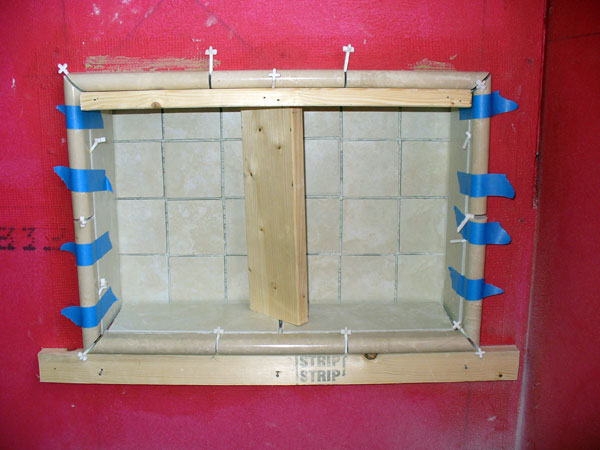
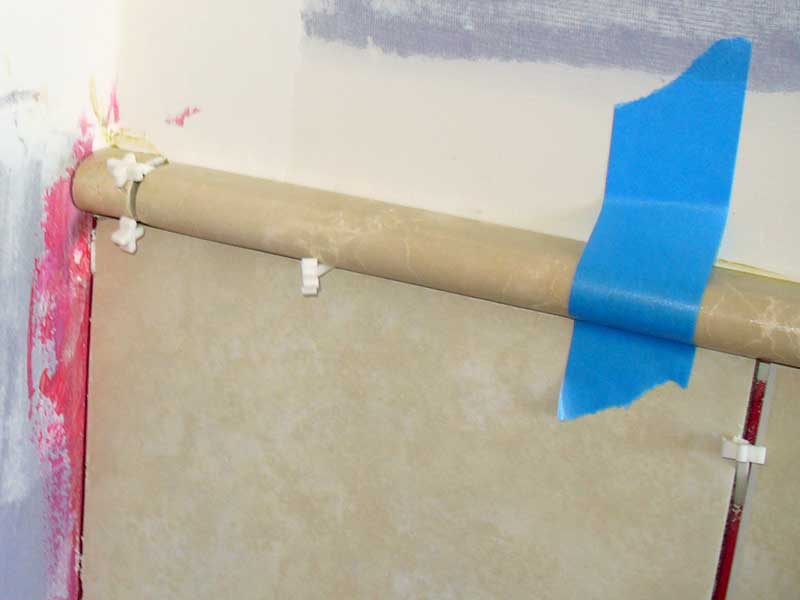
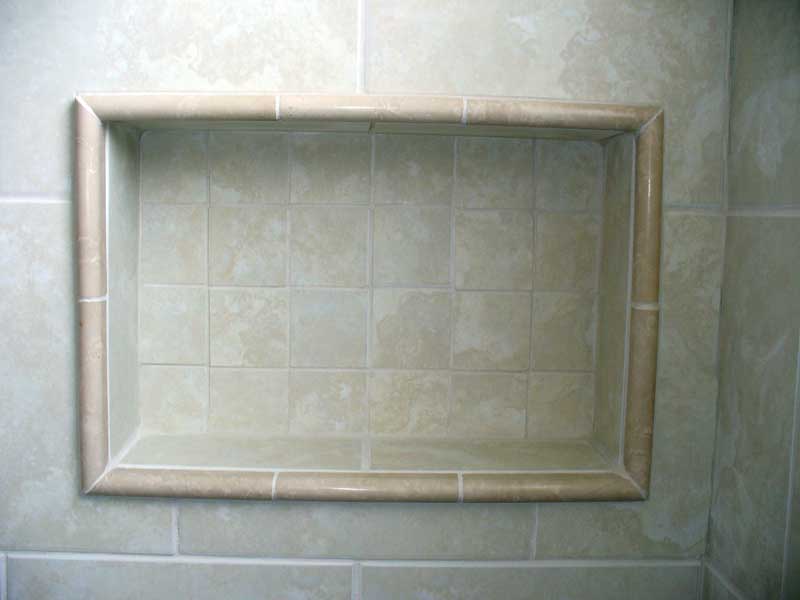
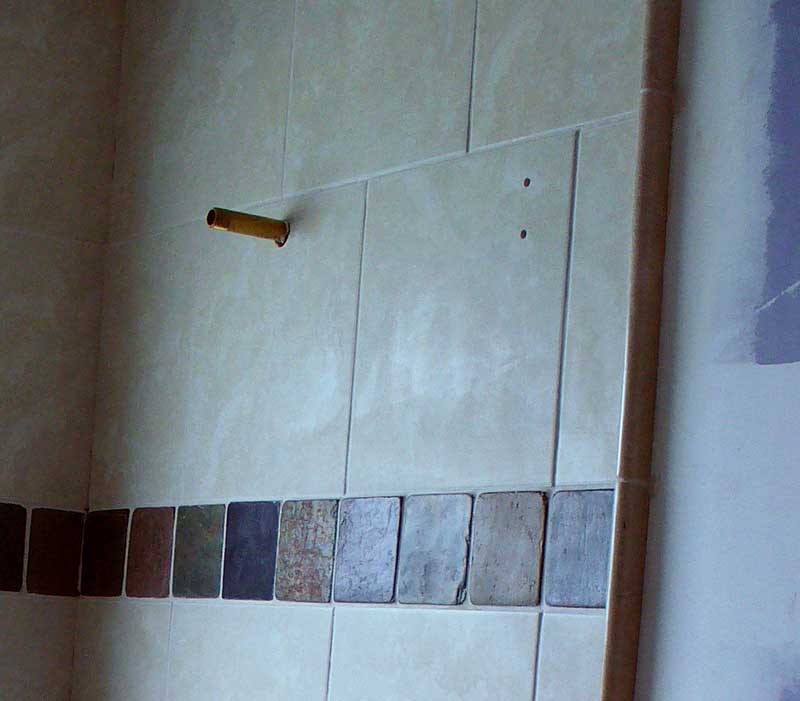
09/12/09: Slowly, but slowly… For the back of the niche, I cut small (roughly 3" squares) from the field tile. When I was shopping for the tile, I looked for a mosaic tile that would work with this field tile, but we couldn't find anything that went with it. This was the next best option. Not great, but workable. While the field tile is porcelain, the pencil trim is a type of marble. Their shape made the cutting a bit tricky, especially on those miters. But they provide a much nicer finish around the window and niche. You can see the boards we have up for support on the window. Figuring out the best way to support the upper pencil around the window took some time. Paul settled on a 1x4, with notches cut out for the pencil along the sides. He had to pre-drill holes, then drove in some 10-penny nails to hold it in place. Then he slid the last three pencil pieces in place. In the photo at right, you’ll see the ledger board up at the bottom of the niche. We didn't get to that pencil yet. As it was, it was just shy of 7:30pm by the time we got out of the shower tonight, and we still needed to eat dinner (take-out pizza, a remodelers delight!). Next weekend we’ll do the niche trim and the floor! |
09/12/09
|
• And finally, the niche! This will all look so much better once it’s grouted. |
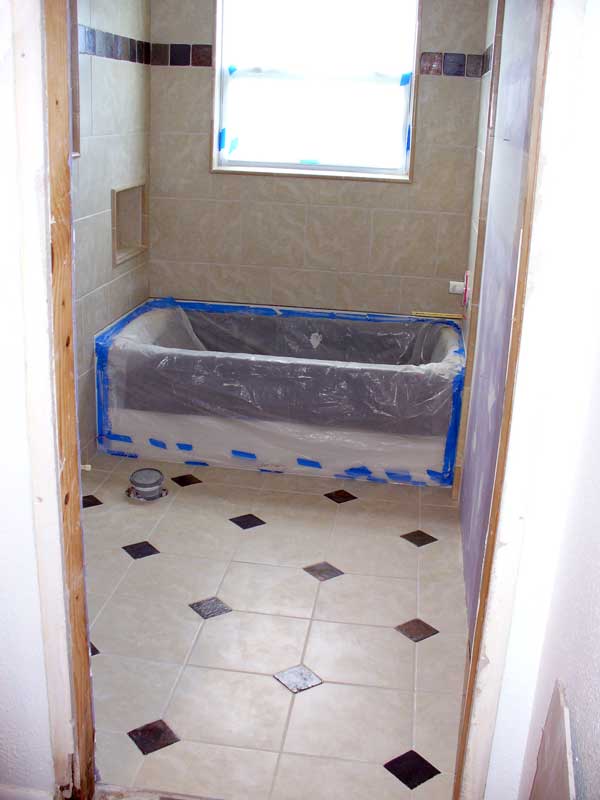
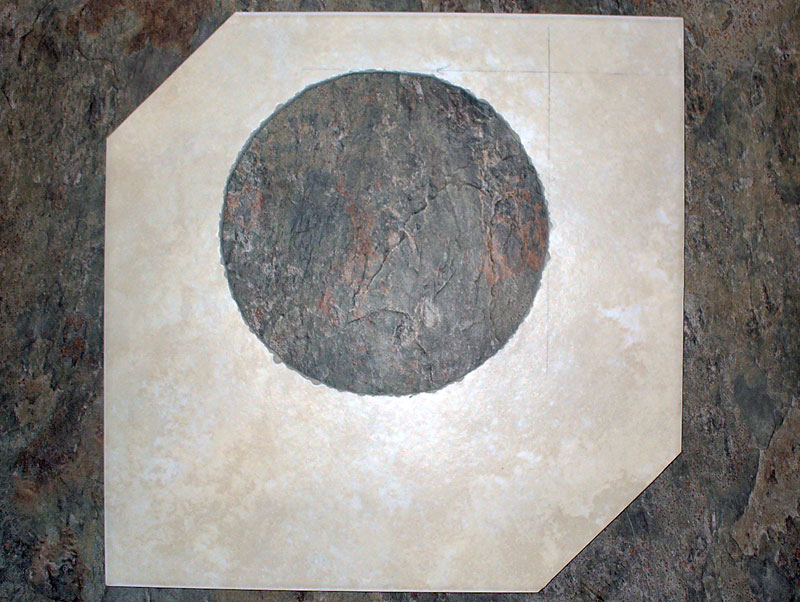
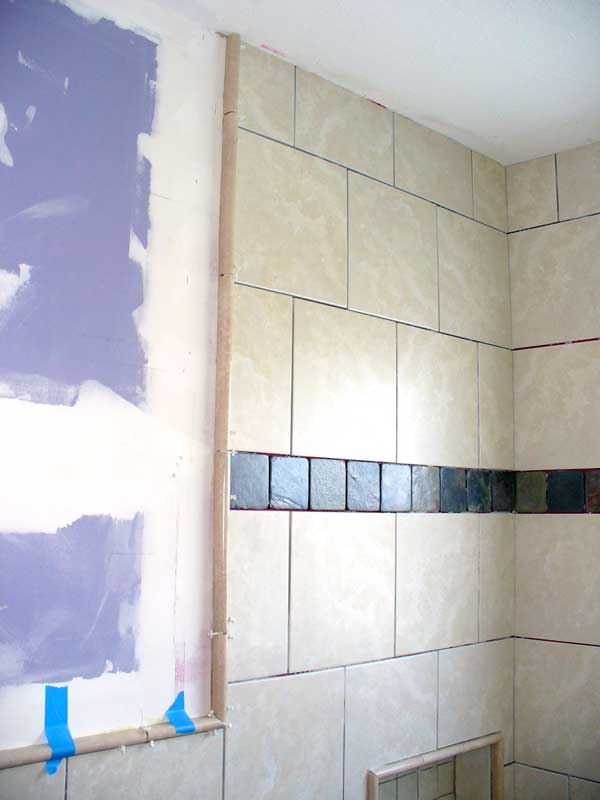
09/19/09: How niche… We had to do more tricky miter cuts, but at least the perimeter of the niche is a whole lot smaller than the window. And this time we used a better system for bracing the upper pieces of pencil trim. It made placing those last three pieces a lot easier. Now the only pencil we’ll need to place will be to finish off the edges of the wall tile, and that’s weeks away. And only one more miter joint! While the tile saw was still set up, Paul did a trial cut-and-fit of a section of floor tile. He wanted to check how the slate would fit once the corners were cut. Doing that, we realized we’re going to have fun in some cases—some pieces of slate are thicker than the porcelain. To keep the floor level, we’ll have to go a bit easier with the thin set under those. From there we scraped and cleaned the floor. We used a special product for terrazo that removes dirt as well as any wax or finish. For now, it's covered with rosin paper to keep it clean. Next week, we tile the floor! |
09/19/09
|
09/26/09: So close… |
09/26/09
|
|
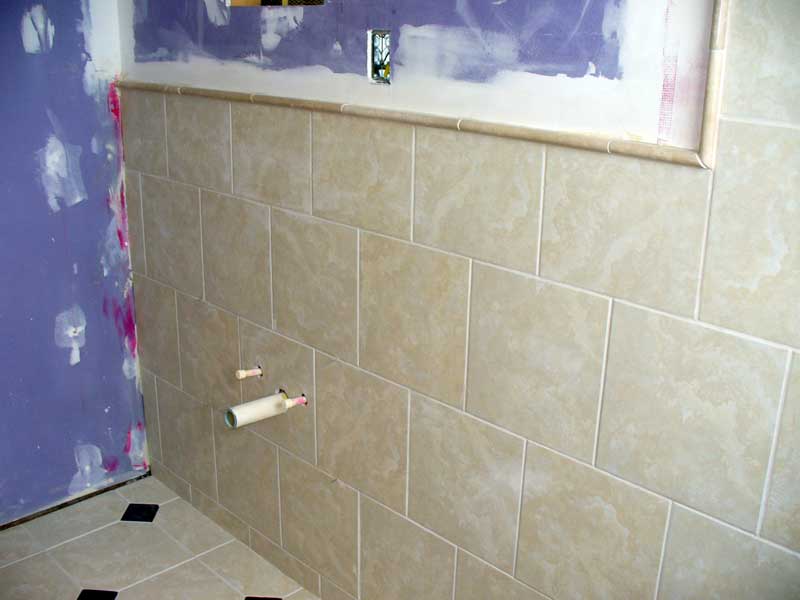
• Ooh, look, wall tile! Okay, so it's not a whole wall of tile, but… it is wall tile! |
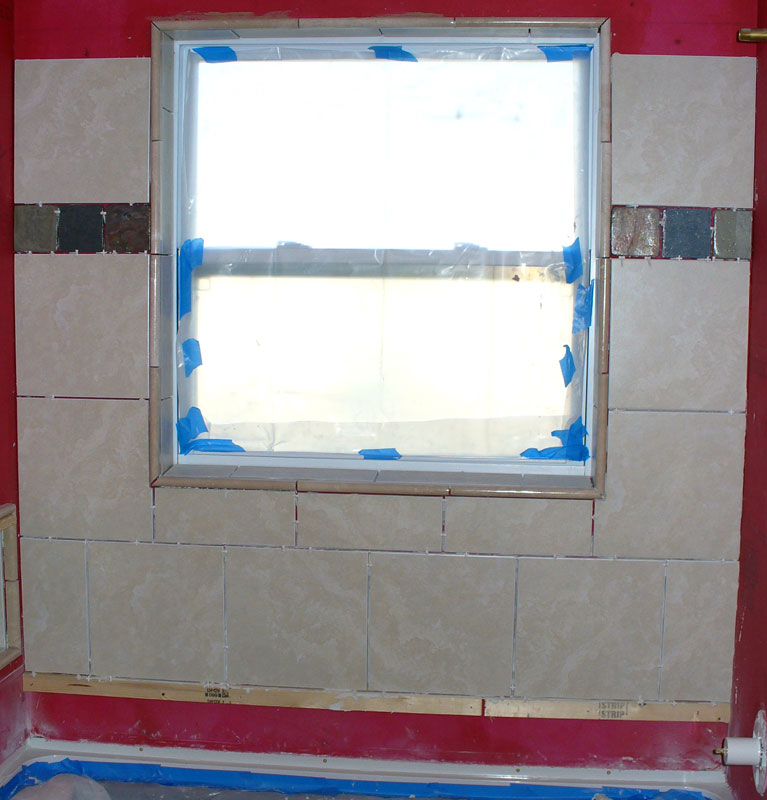
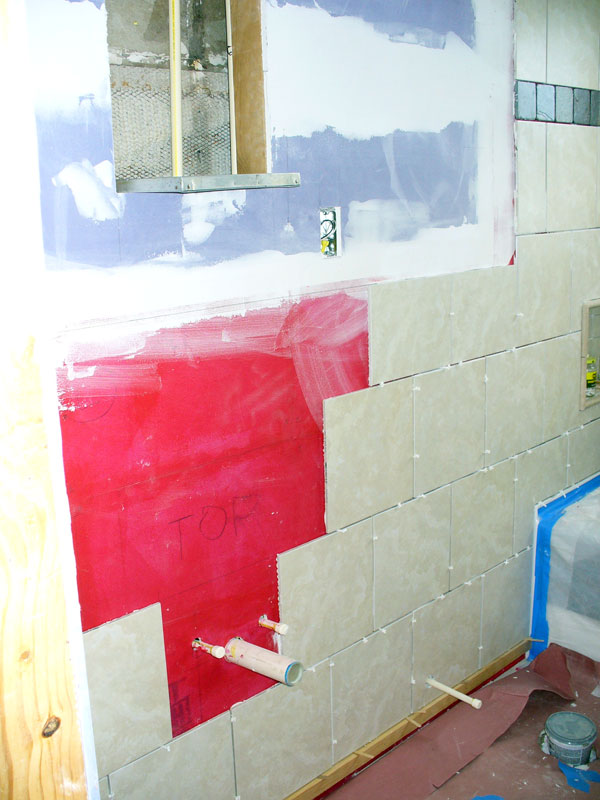
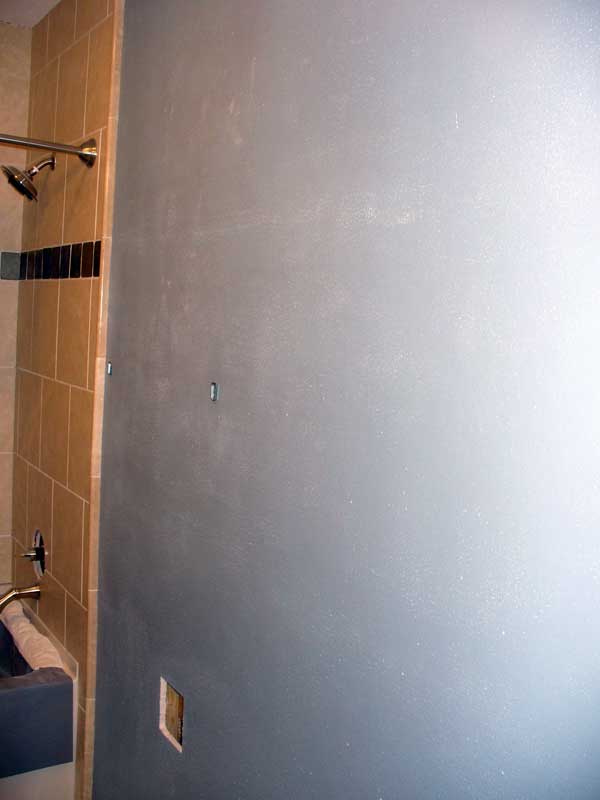
10/03/09: Whoops! I started out setting the tile, but we quickly switched places. Paul was better at getting the thin set up on the wall and I like cutting tile, so that worked out well. There weren't any terribly tricky cuts, but a couple did have to be cut at a slight angle. You may notice in the final shot of the day that it looks like we didn't properly center the tile. No, that's not the "Whoops!" moment. The tile is right—the window is slightly off center. The "Whoops" happened as we were setting those last floor tiles right at the entrance. I looked up at the wall and realized we'd made a big mistake. Can you see it? It may not jump out at you right away, but we were supposed to do a running bond (brick) pattern with the field tile. Yep, the rows of field tiles above and below the slate should have been offset. In other words, there should have been two smaller pieces on either side of the window instead of a single big one. Whoops! Hey, it's a feature wall! Yeah, that's the ticket. We meant to do that. We decided it wouldn't be that bad. It will just end up being a mirror image on either side of the slate. We'll pick the pattern back up where it should be and go from there. On the other two walls, where there's not a big interruption (the window), we'll stick to a straight running bond pattern. We had one other issue come up. Turns out painter's tape removes sealant from slate! When we cut slate for the kitchen backsplash, we learned putting tape around it first made it easier to mark and kept it from falling apart. But we sealed that slate after it went up. This time I'd pre-sealed it and when I removed the tape from the far right piece (it had to be cut), it removed sealant, too. If you look closely, you can see the right side of the tile is duller than the left. I'll have to re-seal that piece. Sigh… |
10/03/09
|
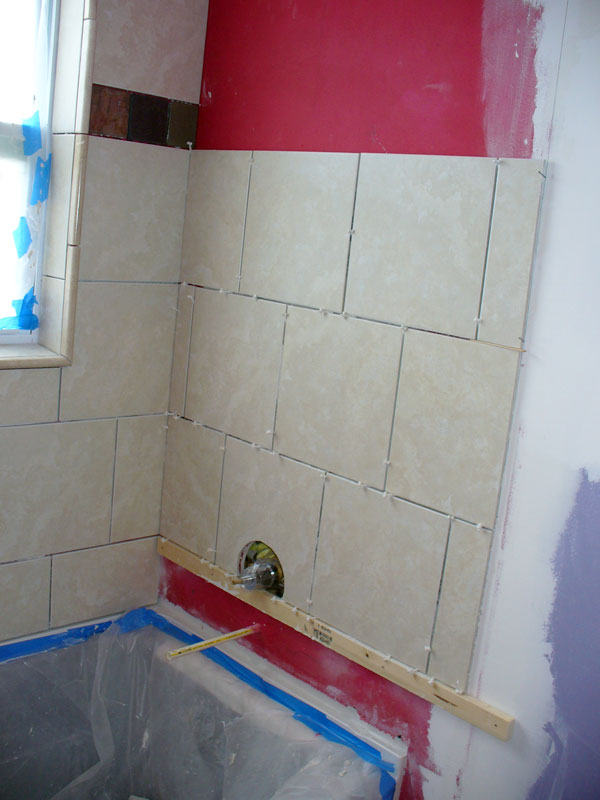
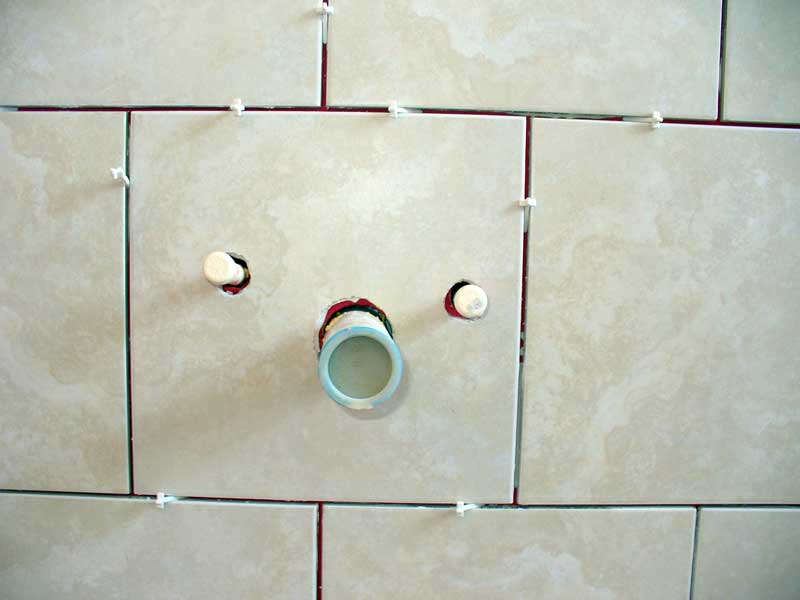
10/10/09: One wall done! When the batch of thin set was pretty much done, it was fairly late (almost 3:00) and we hadn't even had lunch yet. We decided against mixing up another batch. After a quick late lunch, we got a jump on next week by going ahead and making some of the needed cuts to get going. We had to reconsider the pattern on the south wall (with the bath and shower plumbing). If we'd followed through the with original plan, it would have it a grout line just short of either side of the large opening for the valve. From an aesthetic point of view, we decided it would be better to center a tile over the valve. So on alternating rows, instead of starting with either a 1/2 or full tile, it will be more like 3/4 or 1/4 of a tile. Paul used the RotoZip to cut out the large hole for the valve—slow but ultimately easier. We also went ahead and cut the first tiles that will be needed below the niche on the north wall. The plan for next week is to do the south wall (we're only going 3' wide there), then start on to the north. |
10/10/09
|
|
10/24/09: Slow progress On this shot, you can see where we'd put up a tile, then took it down. Why? The top of the niche is a little out of level, but we didn't catch that when I cut the upper left field tile. When we were dry fitting the upper right field tile, we noticed a large gap where they met along the top. What I should have done is made that horizontal cut on a slight angle to compensate. By that time the mortar was acting up—Paul had a hard time getting it up there for that left tile—so I recommended we pull that left tile back off and stop for the night. That turned out to be a good thing because the mortar wasn't adhering to that tile. When Paul pulled it down, it's back side was almost completely free of mortar. Next week we'll re-cut that piece. I have my fingers crossed that we'll finish the south wall (where the plumbing fixtures are) next week, and make some good progress on the north wall. Even still, we're probably looking at three work days to finish the tiling, plus one more day for all the grouting. It's not looking good to finish by Thanksgiving, I'm afraid. |
10/24/09
|
|
• It's such a tiny bathroom, it's hard to get it all in with a single shot. |
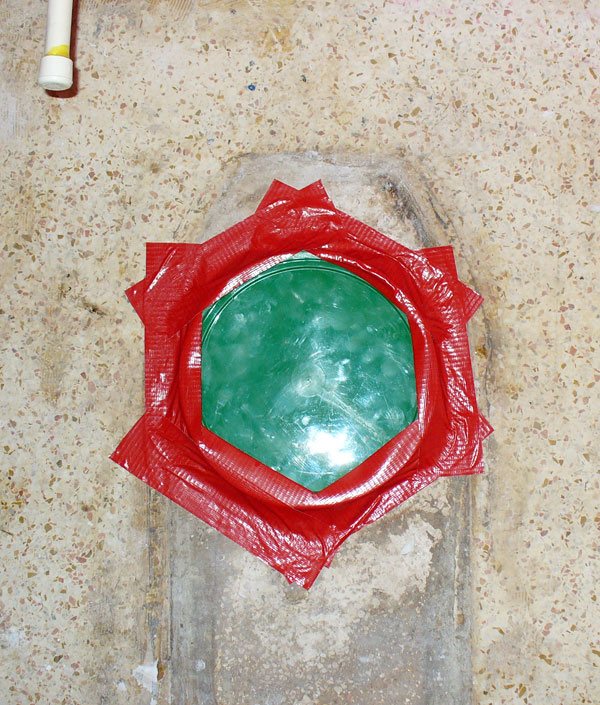
10/31/09: Trick or treat! You'll notice we used popsicle sticks in some places for spacers. Our field tile isn't rectified (not perfectly square and uniform), and of course, the natural slate has irregular dimensions. The popsicle sticks are slightly smaller to help compensate in places. The hole cut for the shower went pretty easy using the porcelain bit on the RotoZip, but Paul wants to get an appropriate drill bit to create a starter hole before we do the four cuts for plumbing on the north wall. We'll need one anyway to install the shower curtain rod. |
10/31/09
|
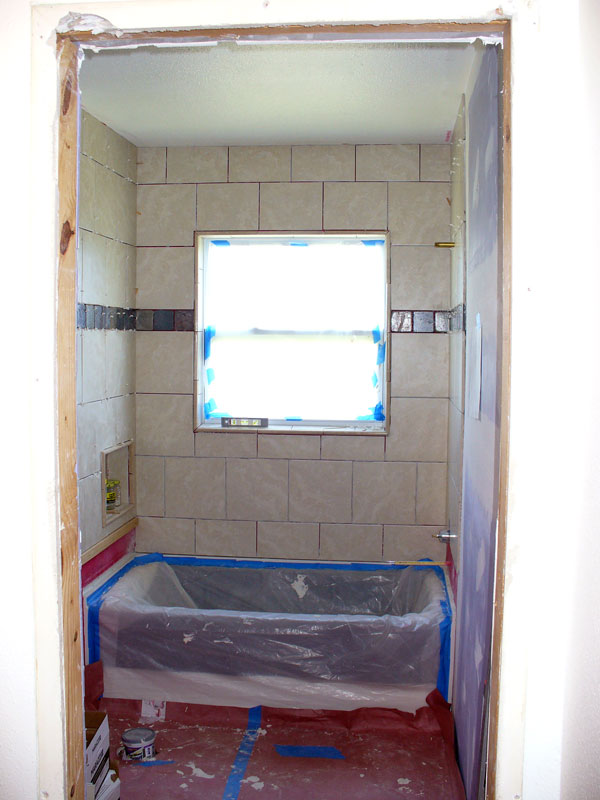
11/07/09: So close… We made some good progress today. We've got all the field tile done on the south wall, and almost all of it on the much longer north wall. We've got about 14 more field tile pieces to go on that wall, but one is going to be very tricky—all three plumbing pipes for the sink are there. We worked around it for today as it would take too long to make those holes. We'll cut it before we mix up the thin set next weekend. During the week I'll go in there and remove that final ledger board so we can do that bottom row and the few pieces needed to finish that section off. Then we have the pencil trim to put up on both walls. Then the following weekend, we can grout everything. Then we can finally get the vanity in place and order the countertop. Of course, it won't be done by Thanksgiving, but I'm hoping it will be completed before Christmas!! |
11/07/09
|
|
Photos: • Whoops! What we tried to avoid happened to an extreme — a tiny piece of pencil trim. • Here's the pencil finishing off the tile on the south wall. |
11/14/09: That's a wrap on the tile saw… We started out the day with some prep work to make things go faster. I removed the ledger and made a list of all the necessary cuts for that bottom row of tiles on the north wall. Paul had marked the three holes he needed to cut out of the skipped field tile last week, so that was the first piece we tackled. Once it was ready for placement, we mixed up the thin set. It all went pretty quick. We broke for lunch after all the field tiles were set. We had one problem when we put up the pencil—that is, after dealing with the miter cuts where the floor-to-ceiling tiles turn into wainscotting on the north wall. We'd both looked at it and determined we needed to start that corner with half-lengths of pencil trim. That way we wouldn't end up with a tiny pieces at the other ends. Well, it worked perfectly along the vertical, but as we approached the far left side of the horizontal row, we realized we ended up with just that—a piece just under an inch! We couldn't easily re-do the whole thing and debated doing two shorter pieces at the end, or that single tiny one. It will be hidden behind a shelving unit, so I opted for the 7/8" piece. Oh well… Next week, we grout! |
11/14/09
|
Photos:
|
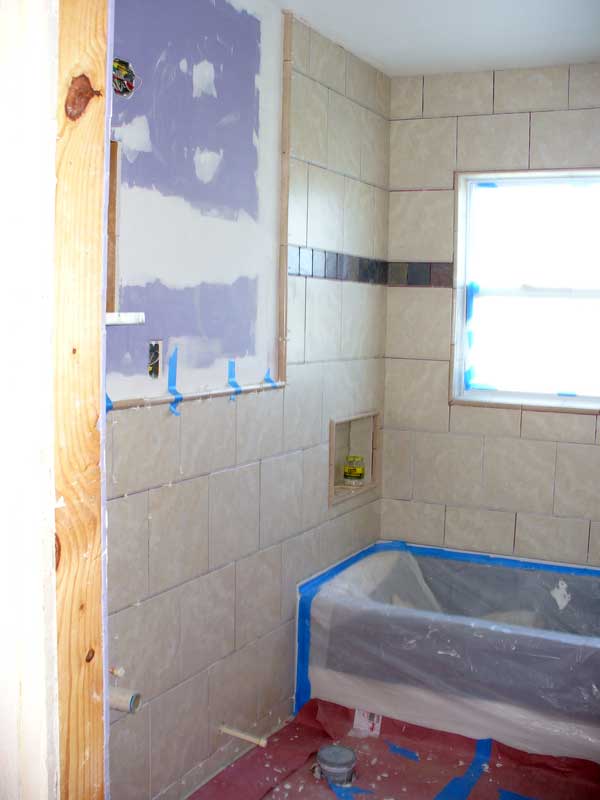
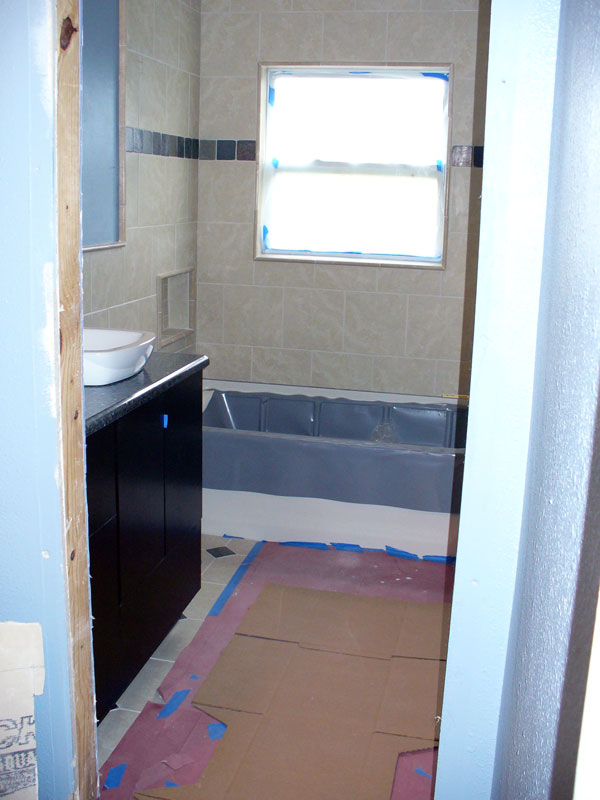
11/21/09: Done with tile! The day started with drilling a couple of holes first. Earlier in the week we'd gone in the bathroom and marked out where things like towel bars and the shower curtain rod were going to go, as well as where the studs were for attaching the vanity. For one side of the shower rod and the vanity, we'll be going into grout lines, but over on the south wall, the shower rod doesn't land on a grout line. Pencil marks would be wiped away in the grouting process (and hidden by texture on the rest of the walls), so Paul tapped in small nails every where he could, but we planned to drill the two holes we need for the 'south' side of the shower rod first thing. That went pretty well as you can see here. All in all, I'm pretty proud of how it turned out. We're certainly not experts at tiling, and we were working with non-rectified porcelain tiles (a nightmare!) plus irregularly-sized natural slate and marble. Even the 'homemade' mosaic tiles in the niche turned out pretty good. Over Thanksgiving weekend we're planning on texturing the walls and installing the vanity. Then I can have the template done for the countertop. Is that a glimmer of light at the end of this very long tunnel? I sure hope so! |
11/21/09
|
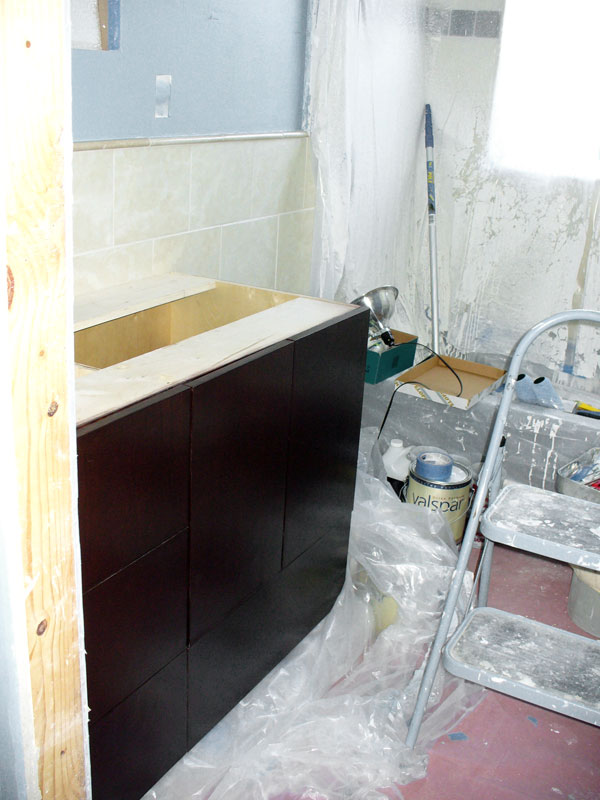
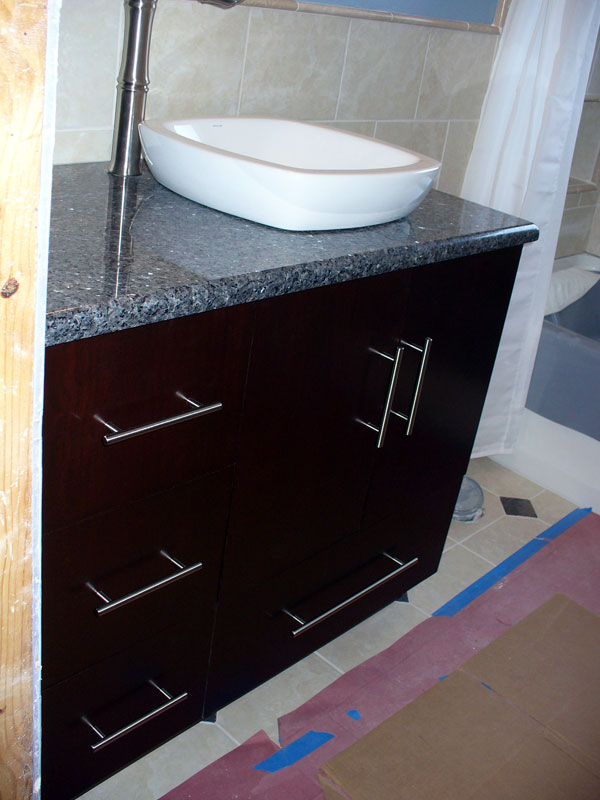
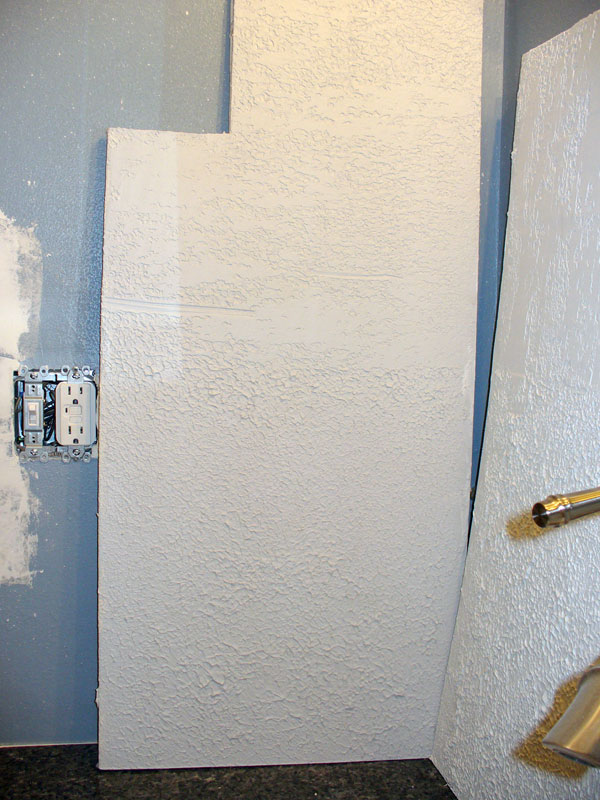
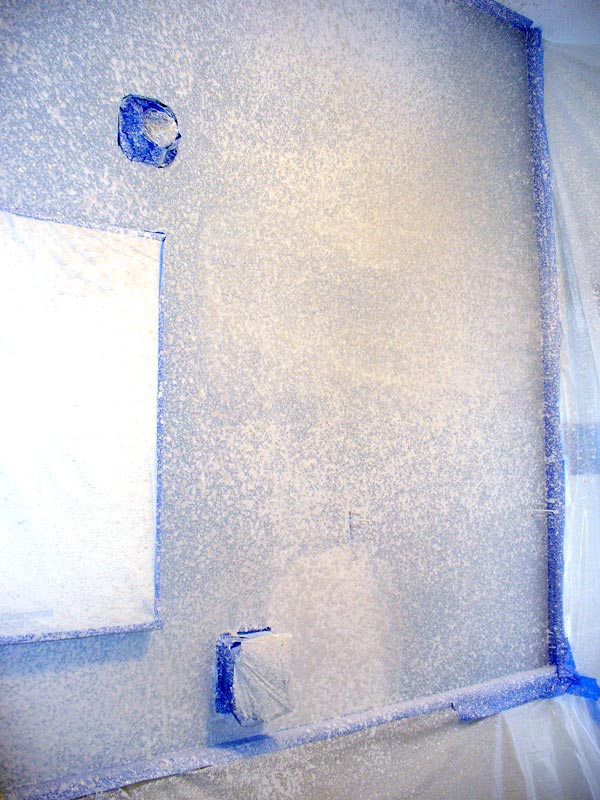
11/28/09: One step closer While most people spent the long Thanksgiving weekend relaxing, or decorating for Christmas, or shopping, we spent yesterday and today working on the bathroom. Yesterday we textured the walls and that was a bit of a fiasco. After getting everything but the bare drywall covered in plastic (with rosin paper on the floor) we mixed up a batch of wall texture. Unfortunately, we'd both forgotten the problems we had with the hopper gun when we used it in the kitchen. The trigger kept sticking, we couldn't get even texture out of it, and it liked to throw globs of texture out the top (and onto poor Paul). After several attempts it was just getting worse. We broke for lunch, ran down to Lowes and got more texture along with some paint rollers. Once we got home we scraped off what we'd done (at least the high points), and rolled on texture instead. By the end of all that the place was a disaster. Today, while I protected the wall with a large piece of plastic, Paul used spray can texture to fill in the small portion of ceiling around the perimeter of the room (from taping the new drywall). Then we turned our attention to the vanity. An out of plumb wall and slightly out of level floor made that barrels of fun. Because we also knew that corner was out of square, the cabinet maker included an extra piece along the west side to compensate, but Paul had to plane down that side to compensate for the 1/4" difference from top to bottom. Shims took care of the floor leveling issues. For some reason, the holes we cut out for the plumbing ended up being slightly off, so the beautiful round holes Paul drilled for them ended up having to be roughly enlarged with a jigsaw. Oh well, it's in there good and secure and that's the main thing. |
11/28/09
|
|
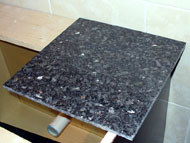
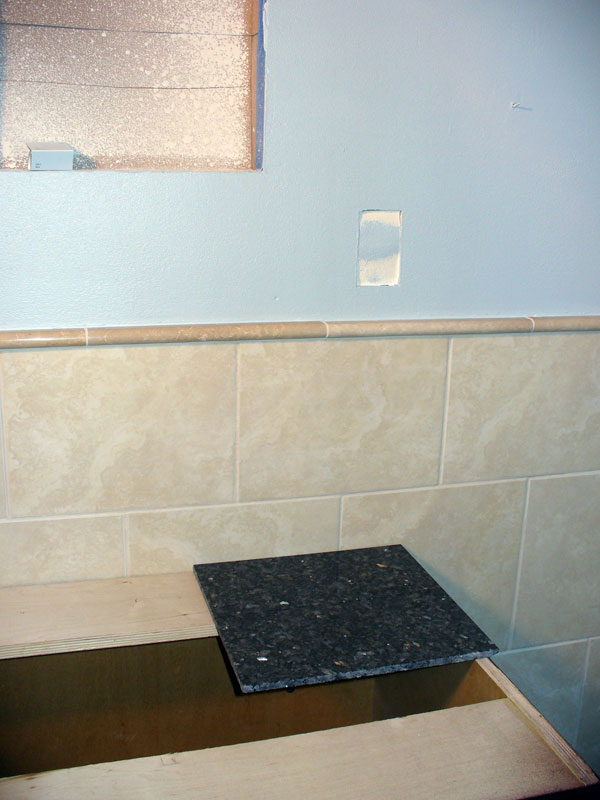
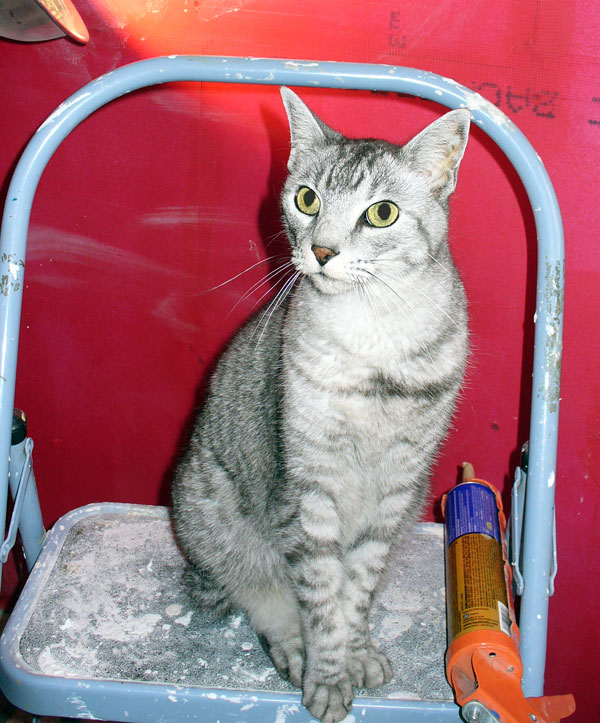
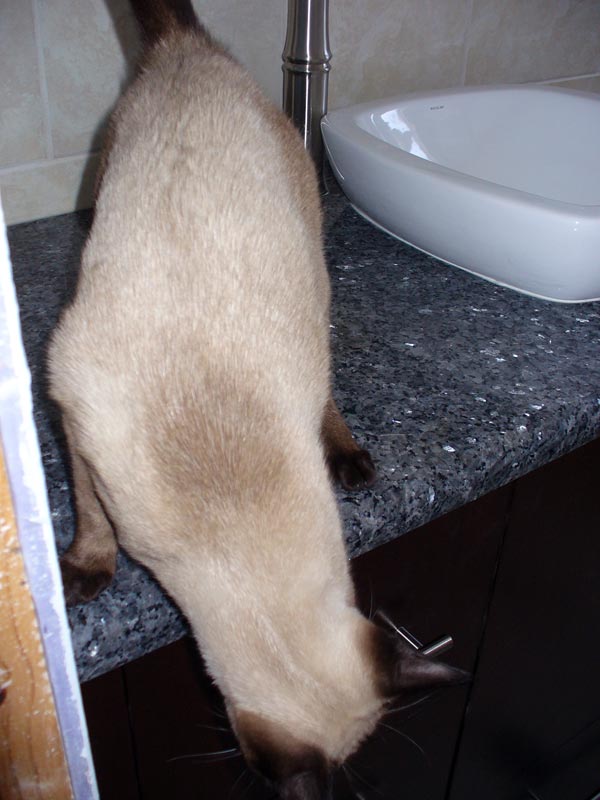
12/05/09: Downs & ups There were some positives this week, though. We got the template done for the countertop and selected Blue Pearl granite. In today's 'end' photo you can see a tile made of Blue Pearl. I picked it up from Floor & Decor, so I could decide on a paint color (something in a light dusty blue). There was one other piece of good news—a new kitty. If I had my way, I would have gotten a new one when we lost Splatties last year, but Paul wanted to keep the feline members of the family limited to two. The loss of Gizmo meant we only had nine-year-old Skeeter left. So filling the void is a new little girl—a three-month-old seal point Siamese officially named Neela (an Indian name that means blue, appropriate considering her eyes). Of course, she'll rarely be called that. Like most of our other kitties, she'll get a nickname that's she's actually called. Paul's leaning towards "Weenie" but I'm still thinking of other options. |
12/05/09
|
|
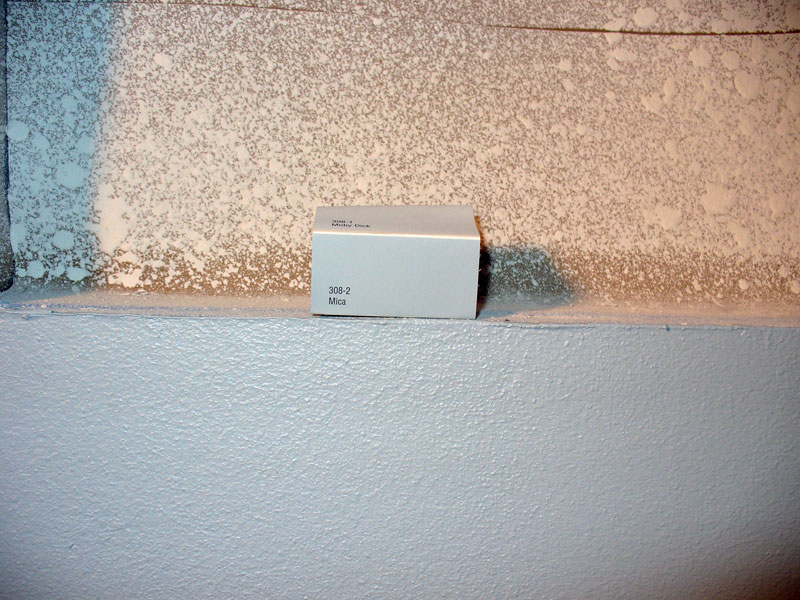
• While this blue is okay with the eventual countertop, it's not what we want. |
12/12/09: Paint, Take 1 Looking at the paint after it dried, it's too blue. We wanted a smokey or dusty blue — one with a noticeable grey component. "Mica" looked like that on the tiny chip, but up on the walls it just looks blue. It would be great in a little boy's room, but it doesn't work here. So this week I'll go back to Lowe's. We're thinking we can salvage it with a thin grey glaze over it, but I'll talk to the folks at the paint counter for advice. I'm leaning towards ragging on the grey glaze, but we'll see what they recommend. Oh well… Next weekend, we'll paint again. |
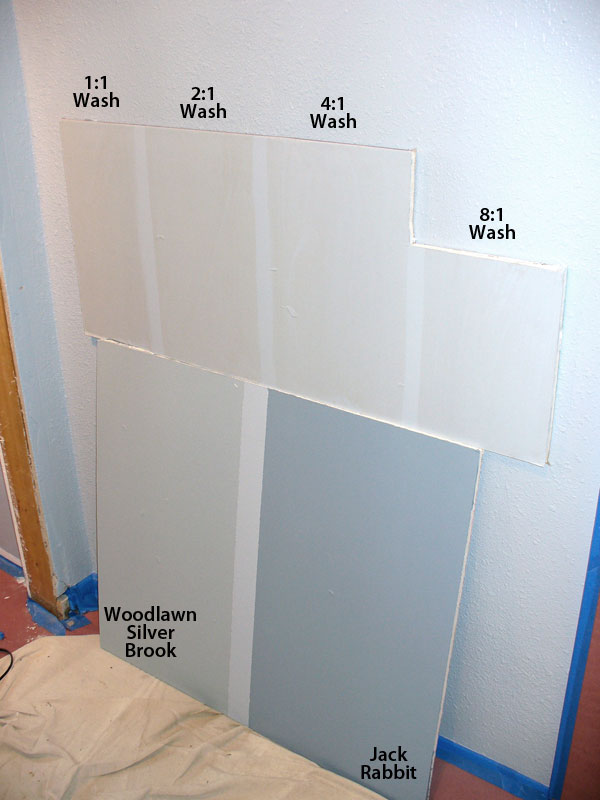
12/12/09
|
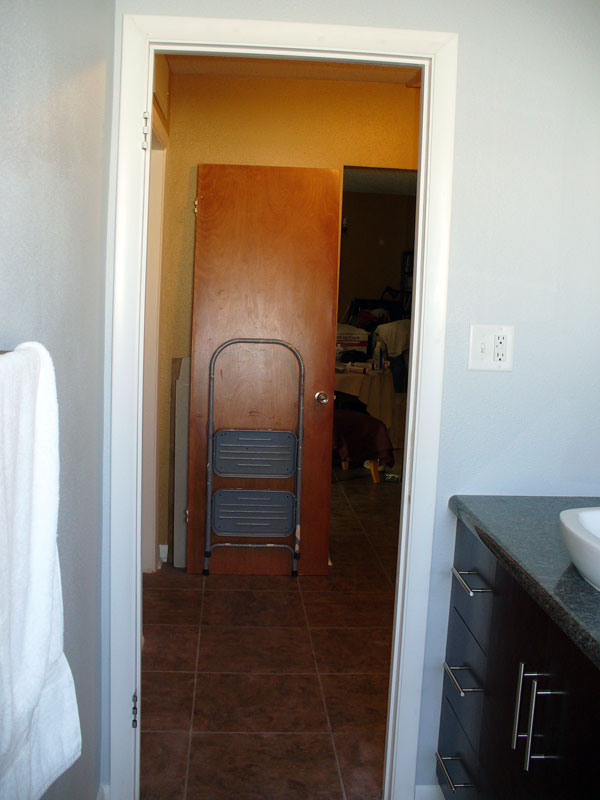
12/19/09: Paint, Take 2 Paul and I decided to just repaint instead of doing a glaze treatment, so I went back to Lowe's and picked up sample sizes of two colors — "Woodlawn Silver Brook" (a historical color that was fairly light) and "Jack Rabbit" (a much darker grey-blue that was the next one down on the color strip from the original "Mica"). To make the sample boards even more true, I applied texture to it first (I didn't do that on the wash samples), followed by a coat of the original blue, then painted the two samples. The "Silver Brook" has a greenish cast — not at all what we want. I was afraid "Jack Rabbit" would be too dark and while it is dark, it's workable, so that's the winner. Plus it looks better next to the dining room paint color ("Buckskin Pony") — they have a similar value, or tone — and that's good as they are side by side in the hallway. I finished taping everything off on Friday afternoon, so we only needed to paint and clean up today. It made for a wonderfully short work day! The new tools I picked up for Paul's cutting in were only mildly better than using a brush. For rolling, I picked up some better roller covers, designed for textured walls, but they used up a lot more paint. We came close to polishing off the gallon. After cleaning up the tools, I pulled all the fresh tape and didn't have any peeling of blue paint! Yeah! I'll go over the rooms tomorrow and see if there's any touch up needed. We hoping to have the countertop installed Tuesday or Wednesday. The fabricators have been slammed with people wanting their kitchens, bathrooms, etc. finished before the holidays and ours is such a little job it's been delayed. Just as well as it gave us time to deal with painting. Assuming all goes as planned, we can finally have the plumber in to finish up with that vital part of this project! Imagine having running water and a toilet in your bathroom. What a concept! For us, we need to frame up the door; install all the moldings; do the electrical finish; install the vanity handles, towel bars, shower rod, and toilet paper holder; create, stain, and install a molding piece to hide the gap along the back side of the shelf unit that will sit on the countertop; seal the grout; install the window film (for privacy)… Sheesh! So close, and yet so far. I don't think we'll work next weekend, so Merry Christmas! |
12/19/09
|
|
12/26/09: Merry Christmas! Paul got the electrical finish done, so we now have lights and receptacles functioning in there. That still leaves all the rest of the finish work (as mentioned in last week's post), so I'm guessing we've still got about two more weekends of work to do in here. Once it's fully functional, we've got to take care of some long overdue maintenance in the master bathroom's shower, including removing the shower doors (we're replacing them with a curtain — neither of us likes shower doors). We can't do that, though, until we can use this bathroom for showers for a couple of days. |
12/26/09
|
|
01/02/10: Happy New Year! We didn't want to make a whole day of it, so we just did some finish work. Paul got the bar pulls on the vanity, put up the medicine cabinet, and installed the two towel bars, shower rod, and toilet paper holder. I was pretty much just the assistant. When we ran out for lunch, we picked up shower curtain hooks, so after lunch, I put up the curtain. I haven't heard back from the plumber yet, so I guess he took off some time for the holidays. (He's a one-man operation.) Hopefully we can get him in this week. I'm really looking forward to having running water! We still need to frame up and re-hang the door, install the molding around the door (both sides), and install baseboard in the bathroom. Of course, all that trim needs to be painted. Once we have running water, we'll go around and caulk everywhere it's needed. I've read you should have lots of water in the tub before you caulk where it meets the wall. After the plumbing's done, we need to install the shelf unit on the vanity countertop (that way it won't be in his way when he's installing the faucet and sink — they're just sitting there for now). It will be going in the corner, to the left of the sink. That's going to require some woodworking to mask the gap where it doesn't actually touch the north wall. (The pencil trim sticks out back there and I want the shelf to be removable, so we had to carry the pencil all the way down the wall.) We also need to install the window film for privacy. I made Paul a bit crazy yesterday when I told him I might change the walls in the bathroom. I'm really not thrilled with how the texture turned out (if you've been following this blog, you'll recall the application of texture was a nightmare). It turned out splotchy in places, I can see a couple of seams, etc. My original plan was a troweled-on texture, so I'm keeping my paint sample drywall to test some texture techniques. If I come up with something better, I'll re-do it, then re-paint (just the bathroom). I don't expect Paul will be helping, but thankfully it's a small space. The hardest part is that my shoulders tend to quickly give out on me if I use my arms over my head, so it may take a couple of weekends just to do the texture work. Oh well, this was my bright idea! :) |
01/02/10
|
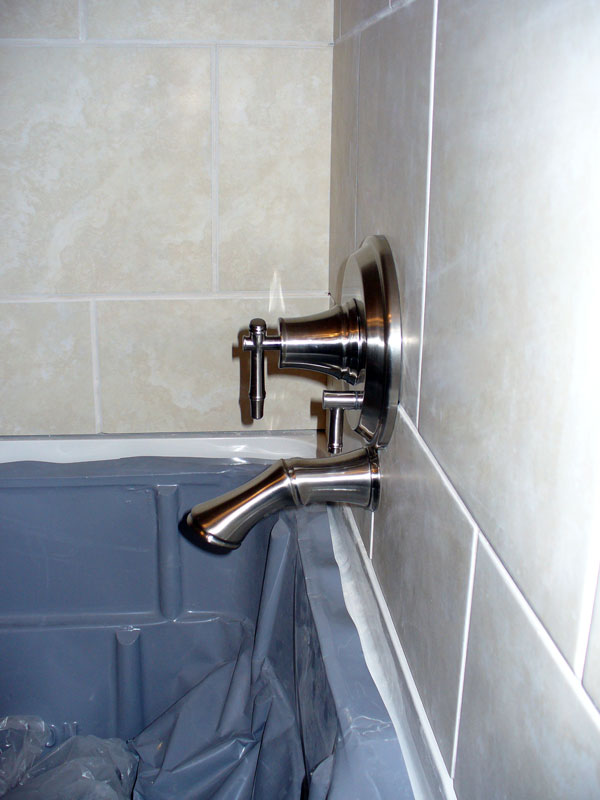
|
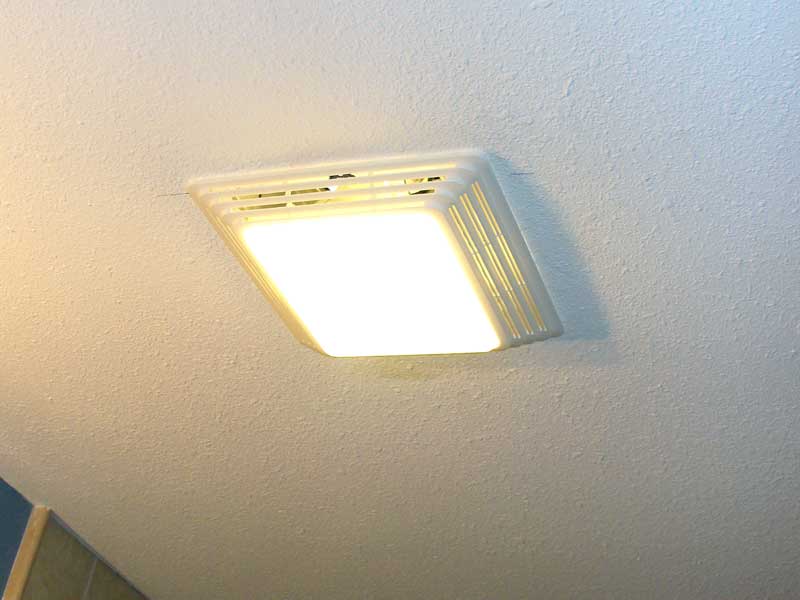
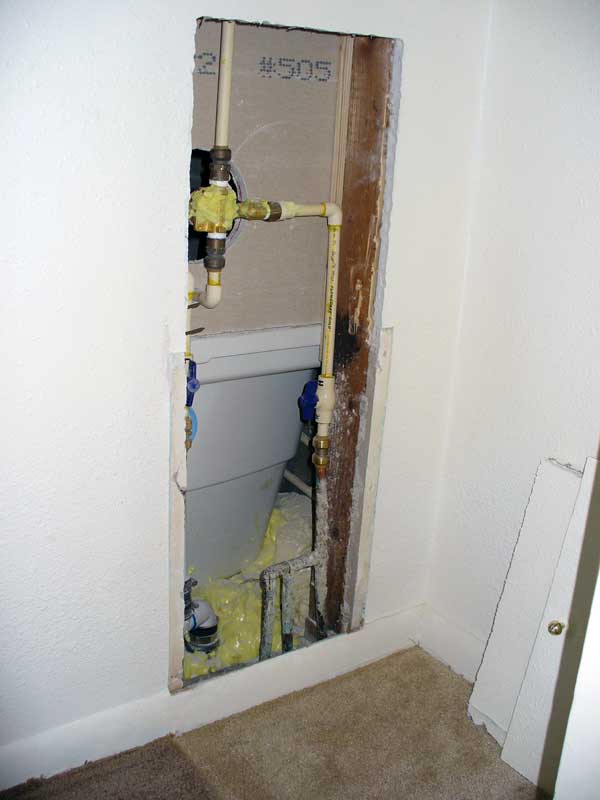
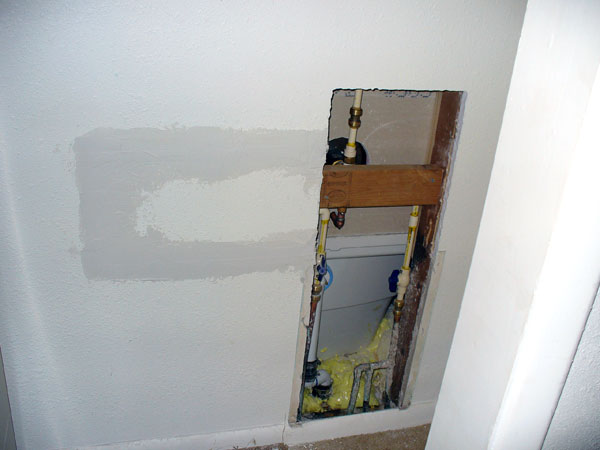
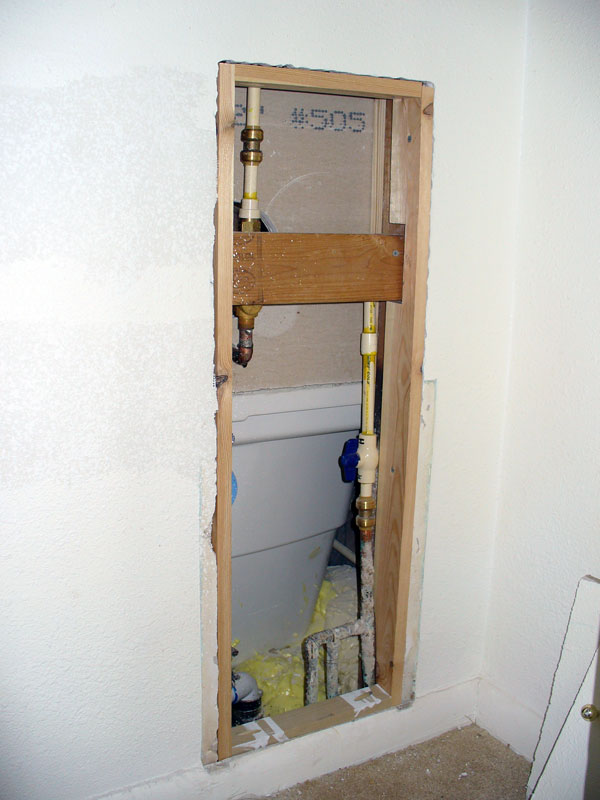
01/09/10: Good news, bad news Turns out the valve we'd been given by the vanity guy was the wrong style. It was for a trim kit that had the diverter on the tub spout, not at the controls. And this line (Danze South Sea collection) doesn't have a trim kit with that configuration. Argh!!! The vanity guy thought he was doing me a favor when he gave me that valve (so I wouldn't have to pay for one from the plumber), but now I've paid for a plumber to install that valve, closed up and tiled the wall, and now must pay the plumber for a new valve and the labor to replace the wrong valve with the new one. And to spare the tile job, we have to demo part of the wall on the other side (thankfully in a closet) so he can do the job. So that free valve has cost us more than twice as much as it would have originally!!! Plus, it's delays things even more. That's not the only delay. We decided to install an exhaust fan in the bathroom after all. Since some people might want more light than we need, we bought one that incorporated a light. But this bathroom never had any kind of a ceiling fixture, so this coming weekend, while I play with joint compound trying to come up with a new wall texture, Paul will be in and out of the attic, cutting a hole in the ceiling, the wall (to run wire), and the exterior wall (for the vent outlet). This project has turned into a bit of a dog's breakfast, I'm afraid. I'd say it would cure me from ever doing another project around the house, but we have some other things that do need doing — removing the shower doors in the master bath and re-caulking the shower, finally finishing curtains and valances in the living room and dining room, re-painting the hallway outside the bathroom (to match the dining room, since I'm changing the color of the bathroom), replacing the living room flooring, closing up the old kitchen doorway and window on the family room side (leftover from the kitchen remodel), addressing the ceiling in the kitchen (to mask the transition where we took out a wall), painting the master bedroom, and I'm sure some other things I'm forgetting about right now. |
01/09/10
|
|
01/16/10: Exhausted It meant two difficult trips into the attic. Thankfully it was cool out, keeping the temperature in the attic tolerable—this is Florida after all. But the bathroom sits right at the end of the roof's slope, so there was almost no room to maneuver. Making matters worse, Paul had to navigate over several A/C ducts to get there. During his first trip up there, he verified where he could locate the fan, moving insulation out of the way so it wouldn't fall into the room when he cut away the ceiling. Then he made his way to the exterior wall and made a single pilot hole where the duct would terminate. Then it was back to the bathroom to actually cut the opening in the ceiling as well as widening the opening where we had an outlet, so he could add a switch. After a trip outside to make the hole for the duct outlet and securing it in place, we broke for lunch. Then Paul was back into the attic to install the fan, its duct, drill a hole in the header for the conduit, feed the conduit down so I could connect it to the outlet box, connect the other end of it to the fan, and make everything secure. Once he was back down again, we ran the electrical, installed the switch, then went back outside and caulked the duct outlet. Believe me, it was a very full day of work. When I wasn't actively helping Paul, I was working on the walls—removing fixtures and face plates, then sanding them. Since I'll be re-texturing the walls, I needed to take down any high points and scuff up the paint. The walls are still blue, but with lots of white dots all over the place. I still need to do my texture sample boards and decide between three paint colors. Some day this bathroom will be finished! |
01/16/10
|
|
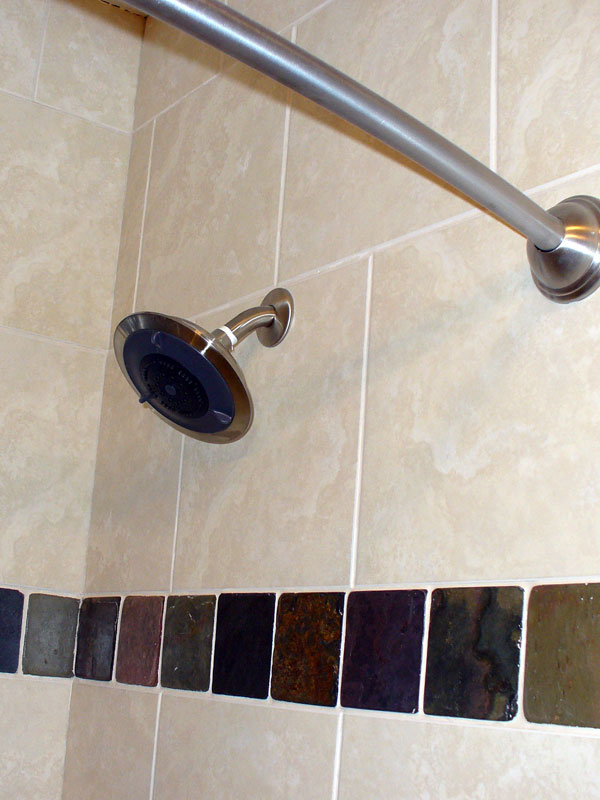
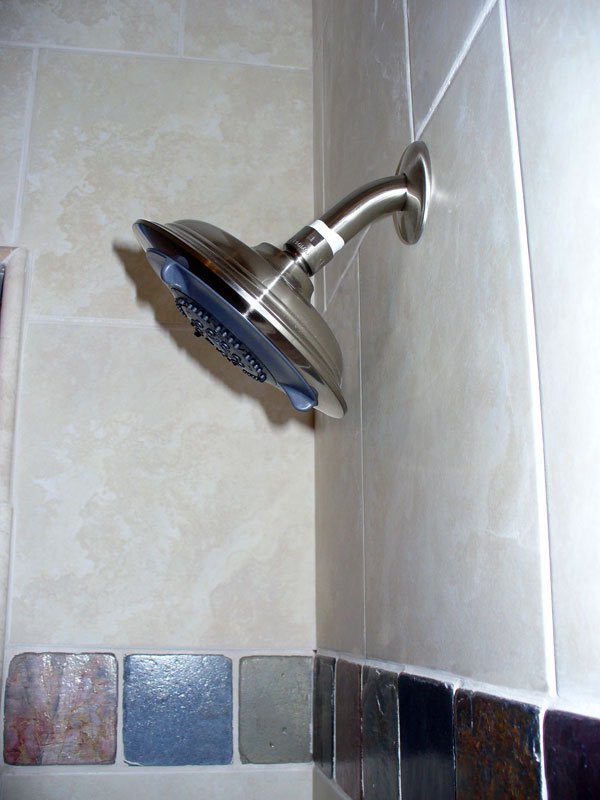
Photos: • Here's the shower head. Ooh, ahh… • And the winner is… the hand-slapped texture, but "Silverware" paint (in the inset box).
|
01/23/10: Playing with mud When the plumber arrived, it was determined the opening Paul had made wasn't sufficient. The plumbing is right up next to a stud and the plumber needed to get to the other side as well. Paul had to enlarge a portion over the next bay, but he's already begun that patch. Because he used the RotoZip, he could turn around and put the piece right back. Saturday began with continuing to seal the grout (I did the first coat earlier in the week). Paul helped so it went pretty fast. After the first coat of the day (the actual second coat of sealer) and a quick lunch, I turned my attention to texture samples. Paul mixed up the joint compound for me and I got busy. I tried out several methods of texturing: using a texture roller, 'slapping' the compound on with a soft bristle brush, using a stiff bristle brush, troweling it on (like stucco), applying it with a fake sea sponge, as well as with grout sponge (for removing haze), and lastly applying a thick coat with my hands, then slapping at it with my fingers to create peaks and valleys. Then I did a knock-down effect on all of those. Paul like the regularity I got with the roller, but we knew it would create a problem in the two inside corners. The 'slap brush' texture was too subtle to create much of a knock-down. Neither of us liked the stiff bristle brush or trowel techniques. The two sponges were okay, but the knock-down hand-slap technique was really best. It's just going to be very messy and will use a lot more compound. From there I tried out the three new paint colors and the winner looks to be "Silverware". It's a grey with just a hint of bluish-purple in it. "Silver Service" is too blue—we'd be back to looking like a little boy's room. "Pearl Ash" is so light it almost passes for white. While I was playing with mud, Paul did a variety of things. He patched the second hole he had to make in my closet, replaced the light fixture in our master bathroom, replaced the damaged tile outside the main bathroom, drilled the holes in preparation for installing the threshold, and started cleaning up all the tools and supplies we have out. Once I was finished, we applied the final coat of sealer on the grout. Next Saturday I'll be attending our daughter's baby shower (Amelia, grandbaby number two, should arrive March 3!), so we won't be getting any major work done. Paul may use that time to caulk the bathroom and remove the remaining fixtures in preparation for texturing. We'll do that the following weekend. Ooh, yeah… |
01/23/10
|
02/06/10: Here we go again… The good news is this hopper works much better than the one we had before. The bad news? We had a serious drip problem in places. We took a break to let that coat dry, then Paul did a second spray. That helped, but there are still some places that need touch up (sparse coverage, drips going horizontally in places, and some drips still in need of repair). I'm going to go in there and hopefully fix all that with spray can texture after work, during the week. This way we can still paint on Saturday. Cross your fingers that it looks okay after we paint. It's so hard to tell on texture until then. |
02/06/10
|
|
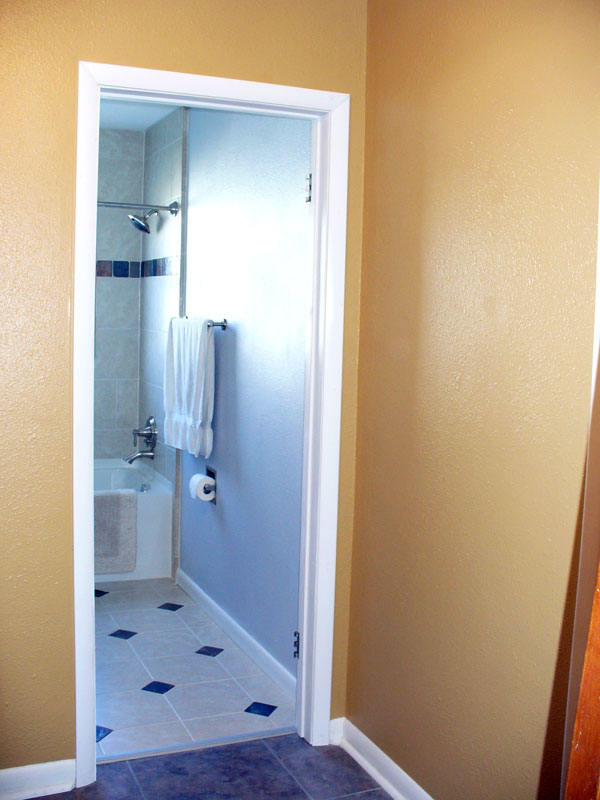
Photos: • Taken from the hallway, you can see it's wearing its new paint color, too. We're getting there!! |
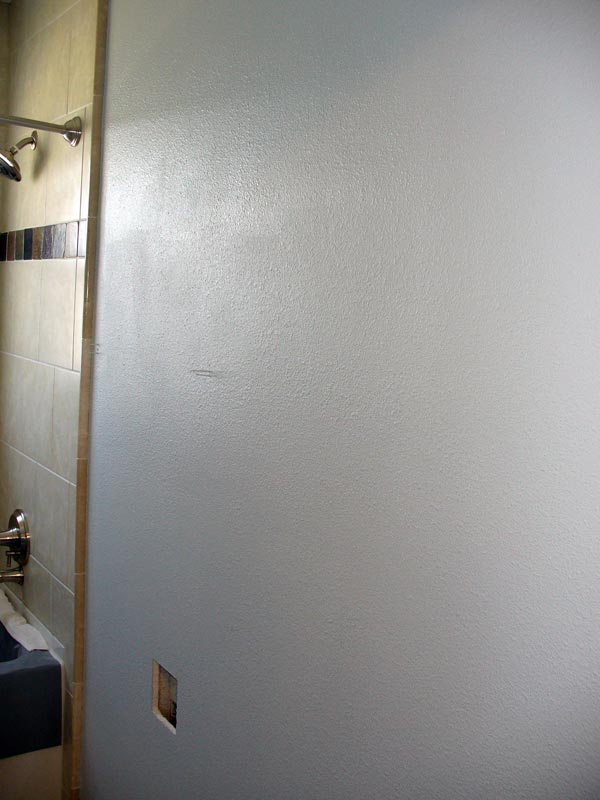
02/13/10: Third time's the charm! I spent Friday afternoon prepping the hallway outside the bathroom for painting. No reason to leave it blue, but instead of painting it the same color as the bathroom, we painted it the same color as the adjoining foyer/dining room/living room (Buckskin Pony). On Saturday, Paul ended up painting the bathroom himself. It's such a small, cramped space it was just easier that way. Meanwhile I started working in the hallway. There's a lot more wall space there, so when Paul finished in the bathroom, he came and helped me in the hall. It ended up needing two coats, so we did the second one after lunch. I'm starting to see the light at the end of a very long tunnel. Next week we'll put the finish back up, caulk the tub, touch up some paint on the ceiling (whoops!), and look over our list to see what else we can get done. |
02/13/10
|
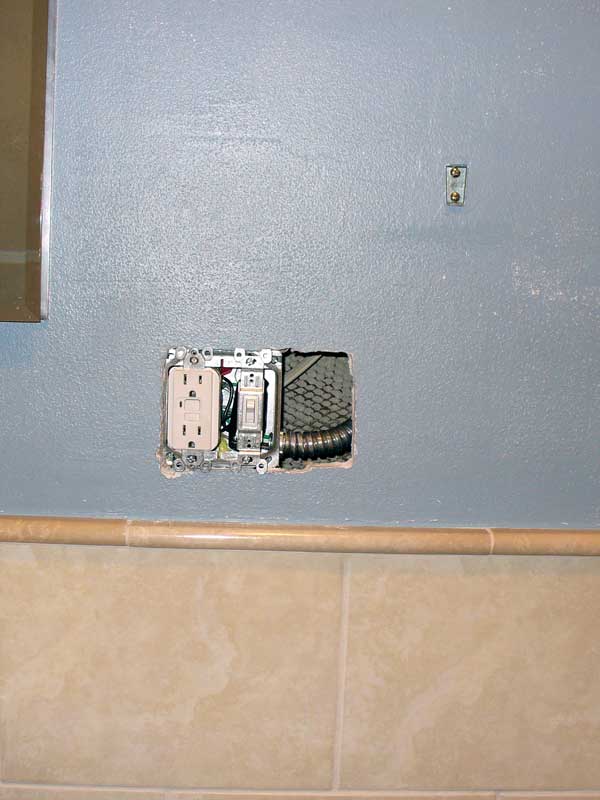
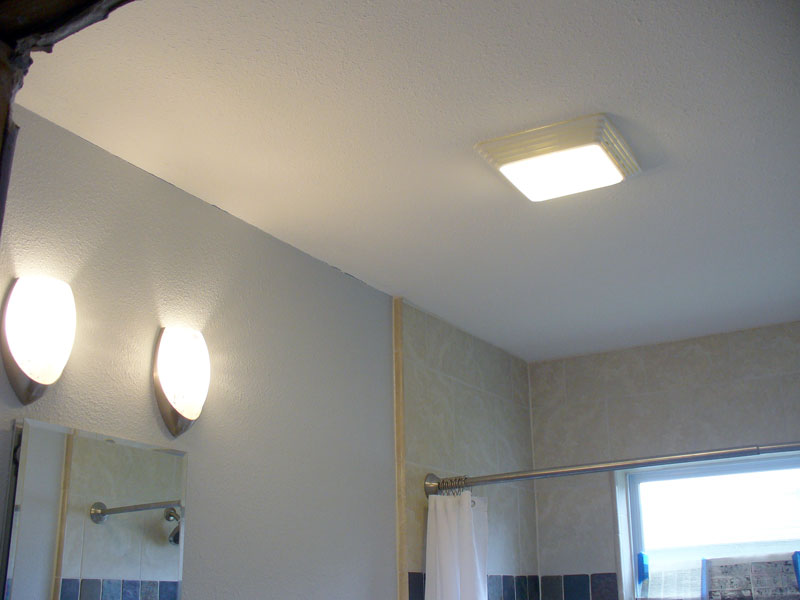
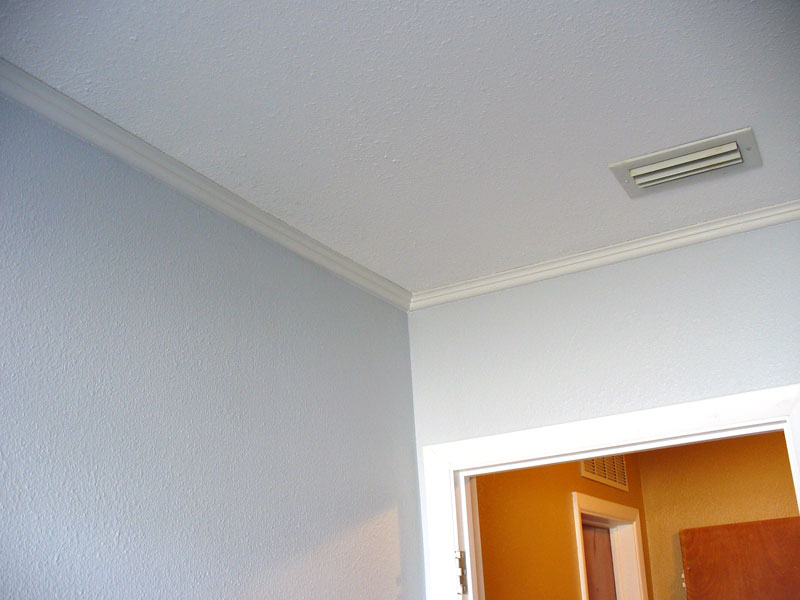
• The new stack switch enables the ceiling light and exhaust fan to run separately of each other. |
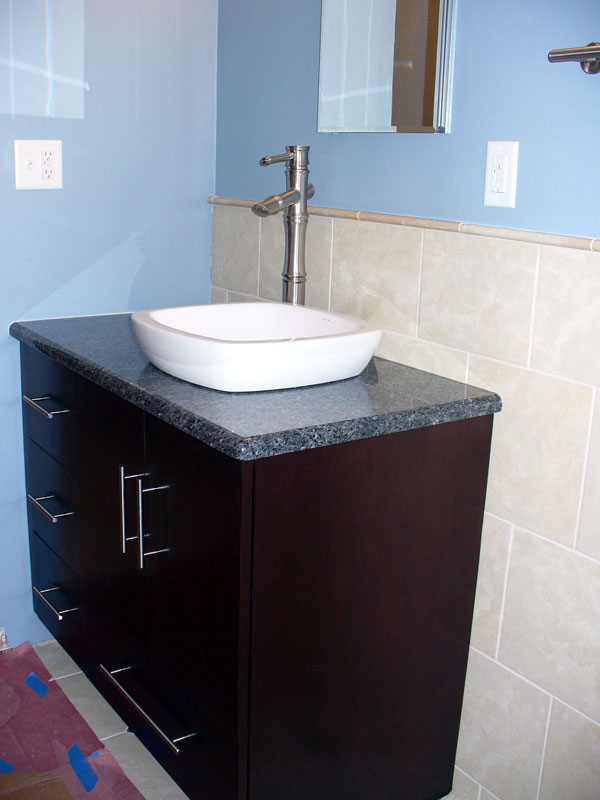
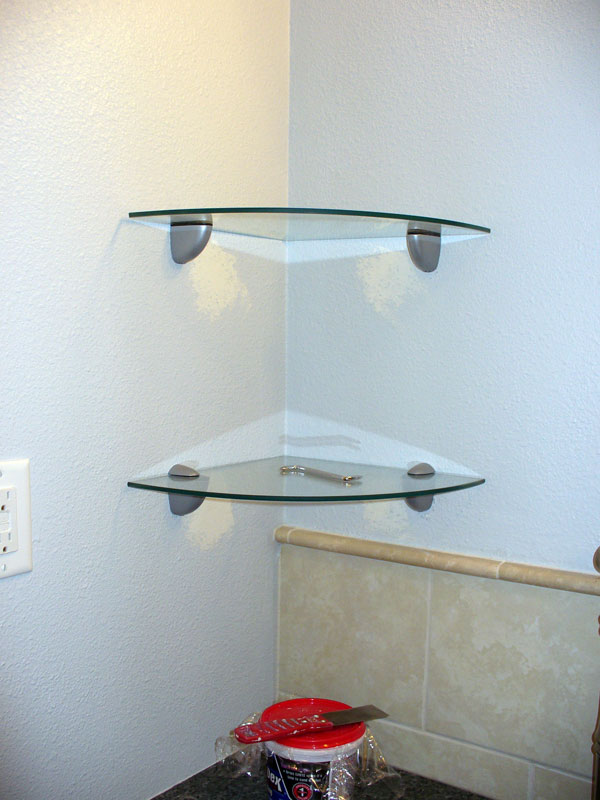
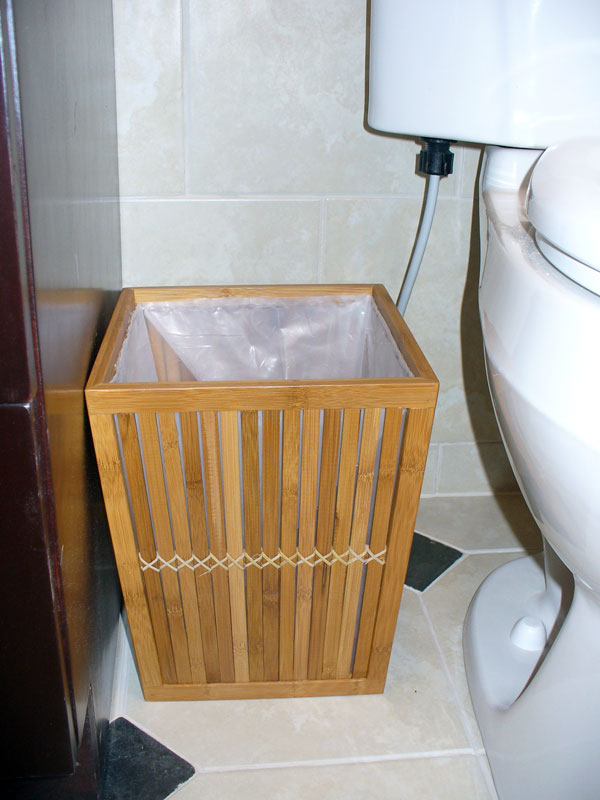
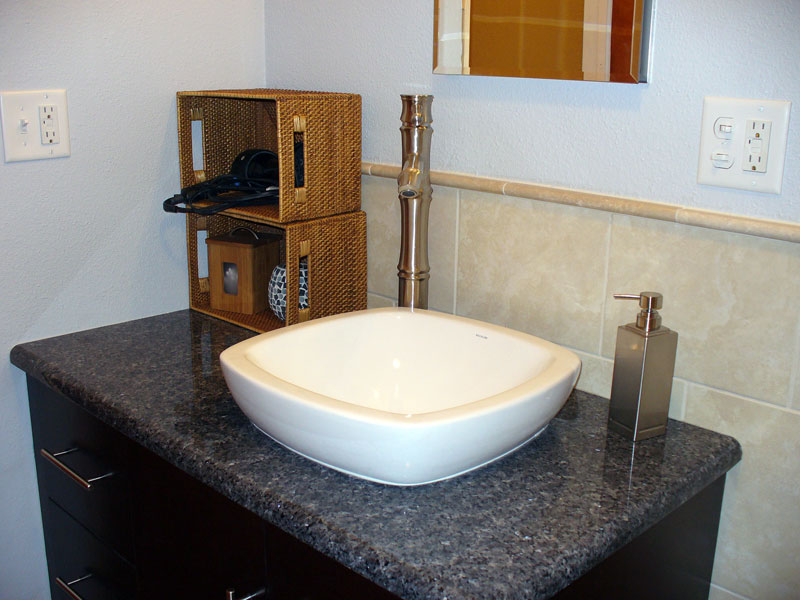
02/20/10: Plans change So what was I doing all this time? For starters, I created a plastic liner for the wastebasket we bought. I wanted something bamboo (it plays off the fixtures), but there are gaps all around. I took some of the heavy duty plastic we had from construction and created the liner. It was a bit of an engineering problem as the basket has flared sides. I did some touch up painting, but the biggie was working on the shelving unit that was to go on the countertop. I attached some black vinyl to the bottom to protect it and the counter, and re-glued a couple of places where the veneer was peeling up. Then I worked on trying to match the stain of the shelving unit on a piece of poplar. I did several alternating coats of ebony and red mahogany, but still couldn't match it. After about the fifth coat of stain, Paul set the shelf on the countertop and that's when we began rethinking the plan altogether. Seeing it there, it really overpowers and darkens the room. Argh! I had the vanity made smaller than what was there before (the original was too big), but that meant I sacrificed some storage. The shelves were to help compensate for that. So now I'm back to the drawing board, researching some glass shelving options. That way it would still be light. Unfortunately I'm very limited on space. I may have to go with buying brackets and having some glass shelves cut locally. Oh well… |
02/20/10
|
Photos: |
02/27/10: Privacy While he was working on that, I busied myself with several other things. I hot glued the gimp around the top of the liner I'd made for the trash can, then turned my attention to the vanity. I started by lining all the drawers and the doored compartment. Then I worked on filling it up. I'm very pleased with how much it holds. I pat myself on the back a bit for designing it for maximum storage. I haven't been able to locate glass corner shelves locally, so for now, I have the two baskets that were going to be in the original shelving unit on their sides, acting as counter top storage. I have a couple more local stores to check, but I'll probably order the brackets online, and have the glass shelves cut locally. The door isn't the only bit of privacy this bathroom now boasts. When Paul some time, he helped me put up the Artscape privacy film on the windows. This isn't an adhesive film, so it was easy to install, adjusting as needed. I also replaced the old 'sticky' film from our masterbath window with the same film. Hopefully only a couple more weekends left to finish this bathroom. Next weekend we work on all the moldings — door trim, baseboard, and bed (crown) mold. |
02/27/10
|
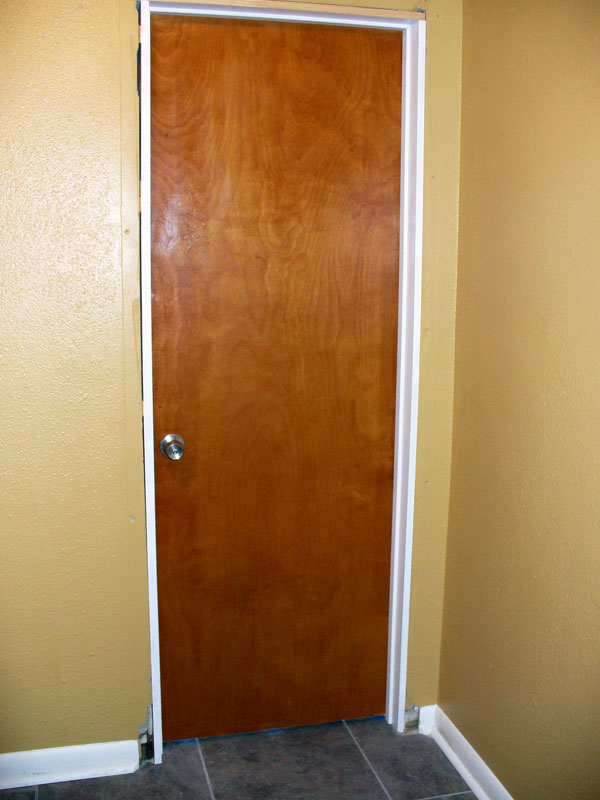
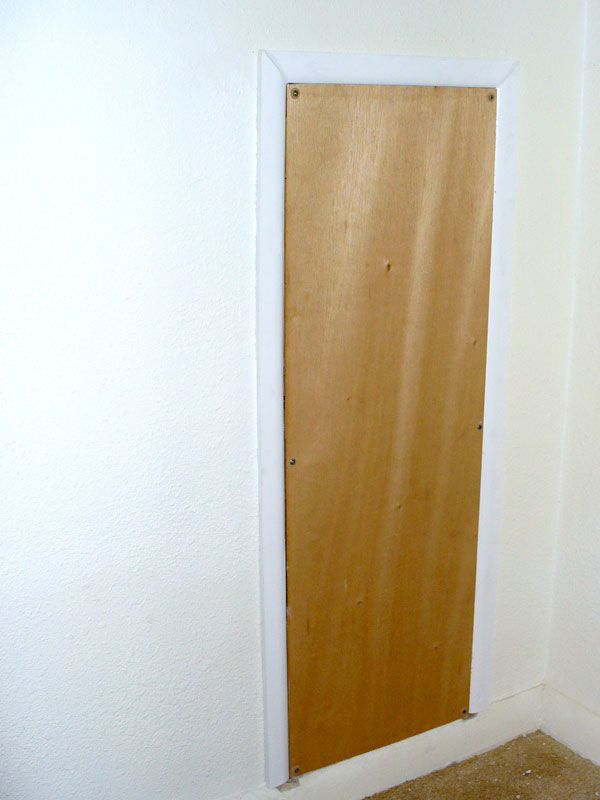
03/06/10: Where's the door?! When I wasn't helping Paul, I was doing touch-up painting, then going behind him with spackle filling nail holes and gaps in seams. While I was finishing that up, Paul turned his attention to the access door for the tub. He needed to frame up the opening so the door will have something to stop against. He got to finally use his pocket jig on the horizontal braces. Would you believe all the above took all day? Yes, it ended up being a pretty long one, interrupted by a run to the hardware store at lunch to get another piece of door trim (don't ask!). We were both beat by the time it was done. I still have more spackle coats to do in some places, plus touch-up painting on all the trim, and Paul has to finish up the access door — actually make the door, attach hinges and knob, then trim it out. Then rehang the door. Hopefully it won't be a long day. I've ordered some shelf brackets and once I get them, I'll have two pieces of glass cut. Once that's done, we'll put the in the corner to the left of the sink. Then it will be done! |
03/06/10
|
|
03/13/10: Almost… Paul had originally intended to do a nice hinged access door, but he had to alter his plans. The door is a piece of luan — very thin plywood — and he didn't have any screws short enough to attach the hinges without extending out the back. It didn't matter before with the old door, but since he built this nice interior framework, it was an issue. He gave up and just made it a scewed-on panel like most people usually do. But it's nicely trimmed out with molding. He also painted over the wall patch where the opening was temporarily widened. We were still on track to be done until we got to the new glass shelves. These are 12" inch shelves, so he put the brackets at the mid-point along each side. He couldn't get them to sit level — the brackets had enough play in them that the shelves dipped forward. And the heavy-duty anchors he'd used couldn't be removed. He had to 'bash' them into the wall and start all over. This time he positioned the brackets a bit higher (to give him more room over the pencil ledge) and spaced farther out, closer to the edge. Bingo! But now the patches need to be finished, re-textured, and painted. Oh well. And the door needs to be re-hung, but I wanted the paint (from touching up the trim) to have a full 24 hours at least before we did that. |
03/13/10
|
|
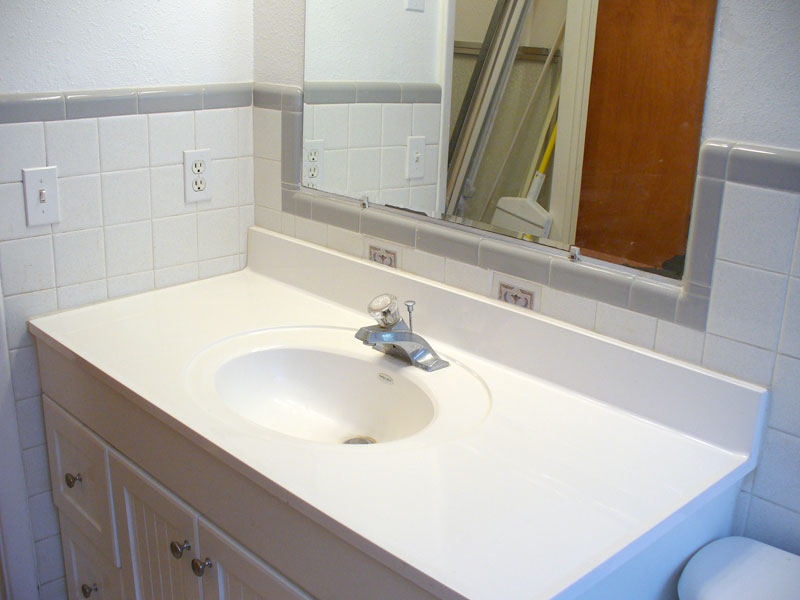
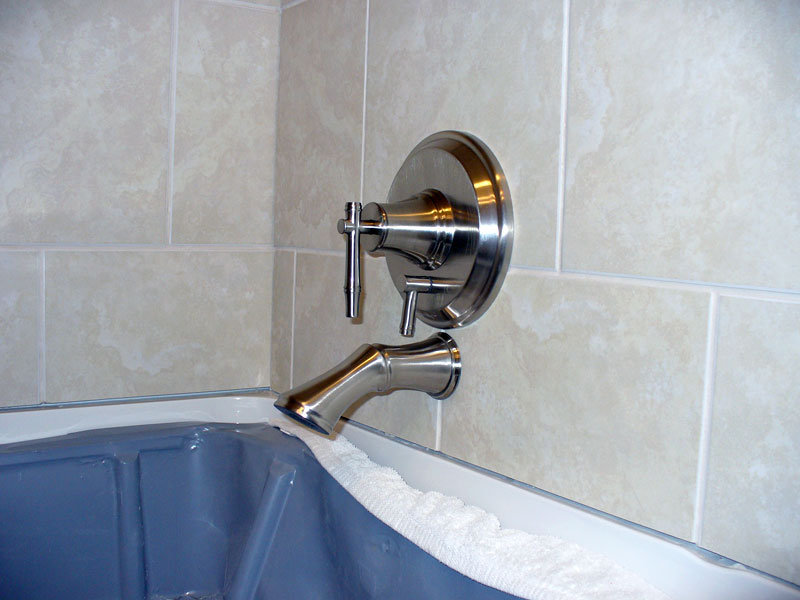
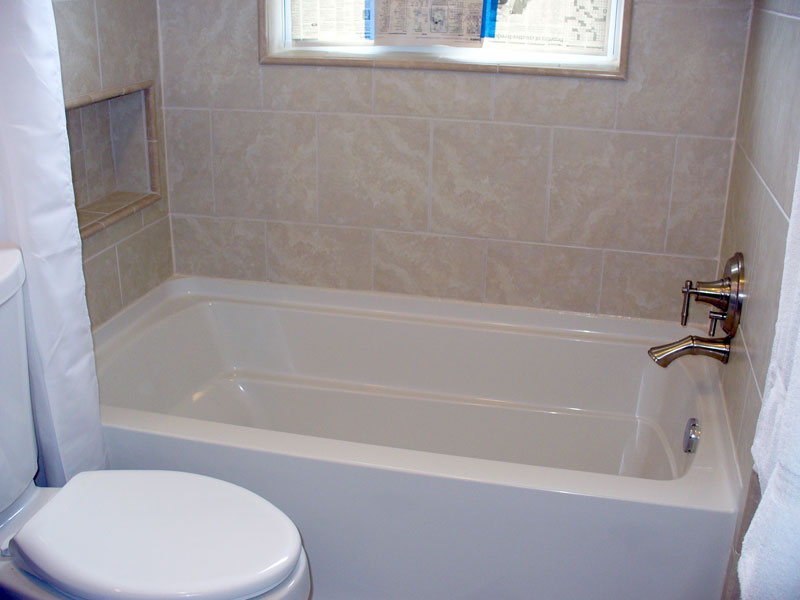
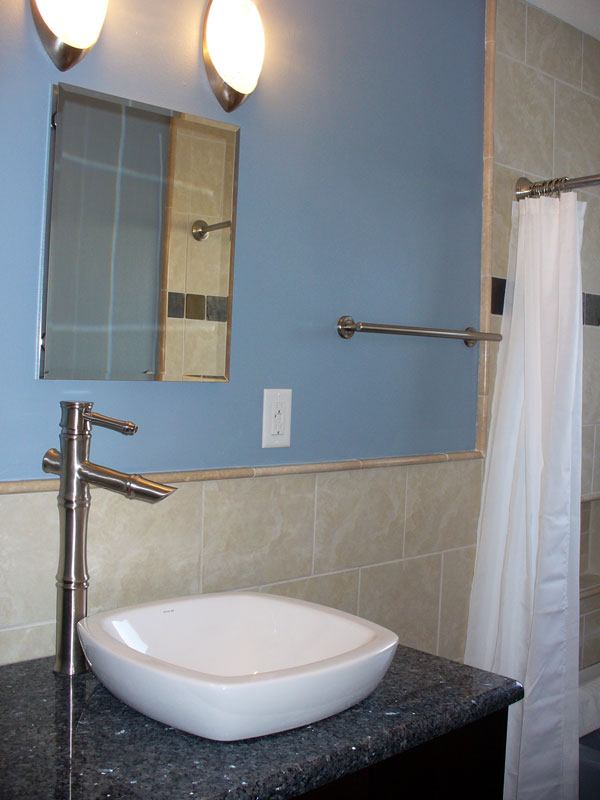
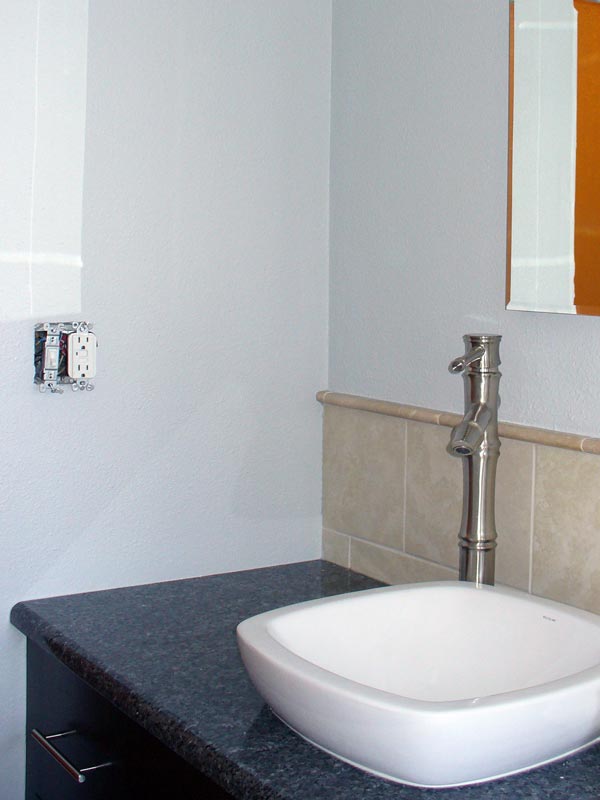
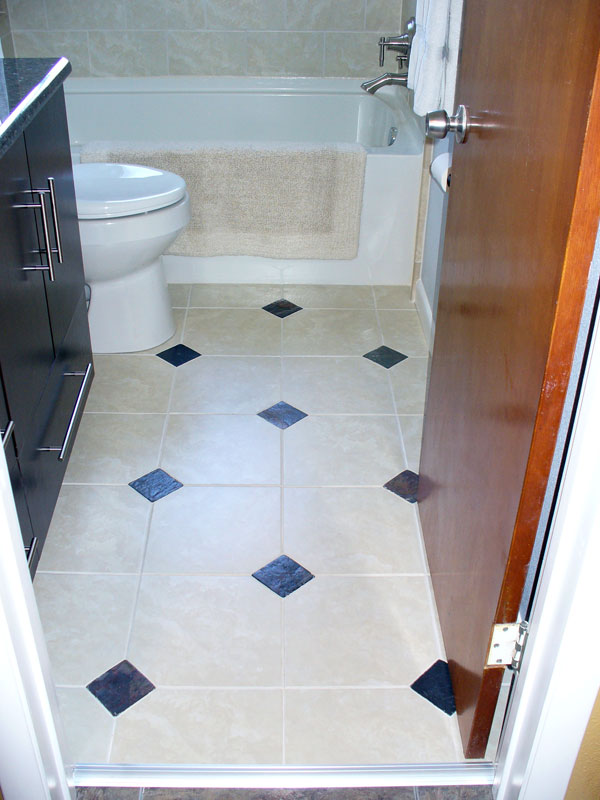
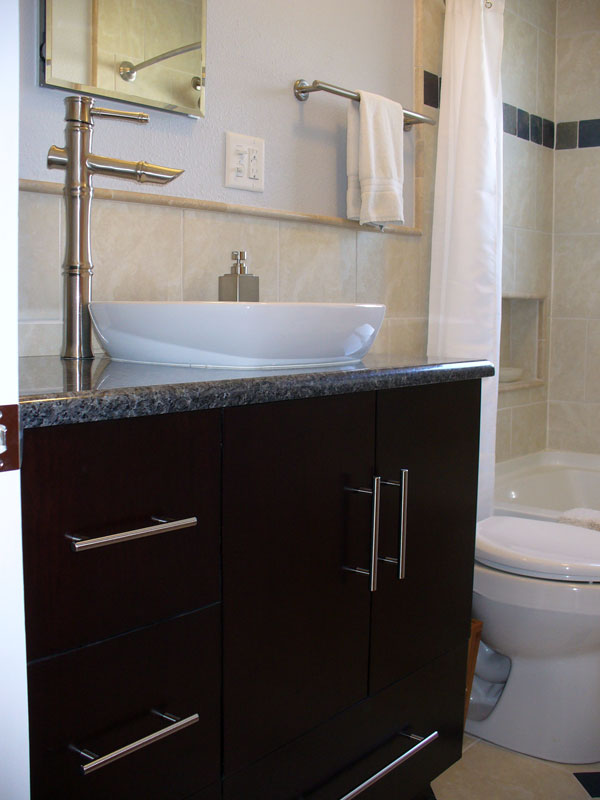
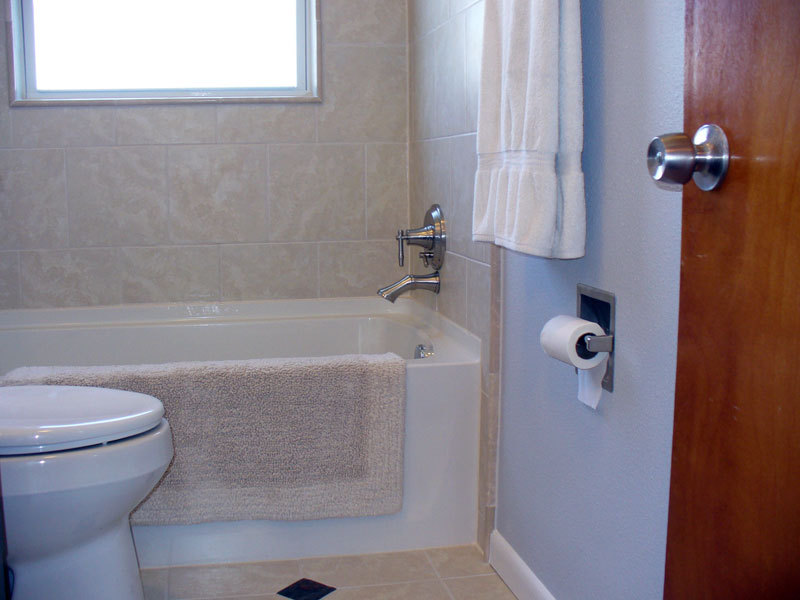
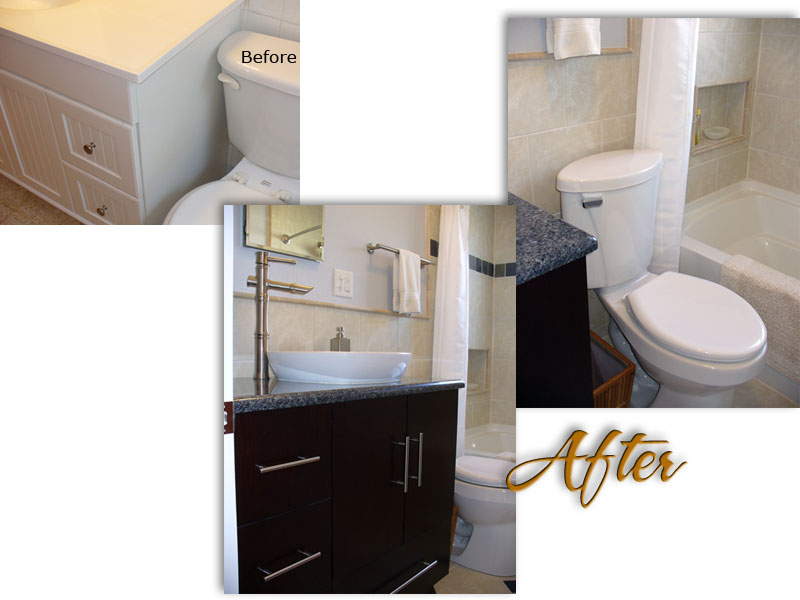
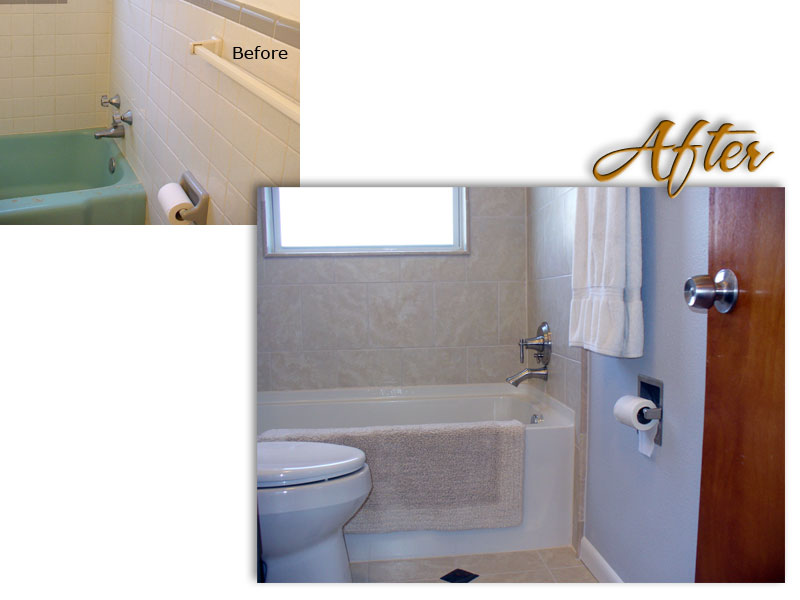
Photos: • My favorite part of the new bathroom is the floor. I think it turned out quite nice. • Here's a good shot of the tub's matching faucet. • In this before, you see the old vanity nearly touched the old toilet. • And the new tub and tile surround is a definite improvement! |
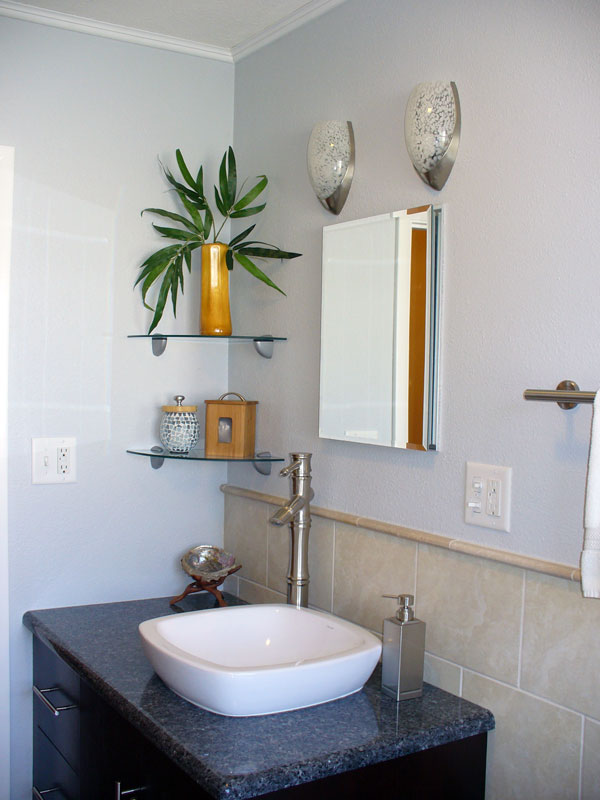
03/20/10: Finished! Paul helped out there some, but was focused on working on the master bathroom. Now that we can use the remodeled main bath, he removed the shower doors from our shower, cleaned away all the leftover caulk, filled the holes left by the door frame, and replaced the caulk in the corners of the shower. After removing the doors, he discovered some of the tiles were chipped. I used the penetrating sealer on the exposed areas. Paul then put in a shower curtain rod. It's amazing how much bigger the room feels with those shower doors gone. When I finished outside, I came in and did final touch-up painting in the main bathroom and hallway. I also finished up the wooden lid for a glass container (actually a decorative votive holder) that now holds cotton make-up pads. You can see it on the lower corner shelf. I had a sample of bamboo flooring and had Paul cut it for me earlier. I sanded it down, re-finished it, attached a knob on the top, and cut some cork for the underside to hold it in place. It works nicely in there — the bamboo top goes well with the bamboo container next to it that holds Q-tips. On the top shelf is a vase made from a section of bamboo. And the trash can is bamboo. Their color picks up on the wall color of the adjoining hall, dining room, and living room. And they play off the bamboo shape of the faucets. I plan on doing some artwork that continues the bamboo theme, but that has to wait. I've got tons of other projects in need of doing. All total, I'm pleased with how it turned out. I had to drop several things from the original plan and make some compromises, but the finished project looks very nice. If I had to pick a favorite part, I'd have to say the floor. I really love how it turned out. But if we ever decided to remodel the master bath (and it desparately needs it!), we'll hire it out! We'll spend next weekend trying to restore some order in the house. All the various tools and supplies are just piled up in our Florida room. With no garage, that's our workshop. Plus we need to give the whole house a serious cleaning. Remodeling creates a mess! |
03/20/10
|
| < Home |


