| |
Kitchen Remodel from
 |
|
|
Demo Index
Next Page—Construction
Day 26: All
blocked up
Day 22: 6 sisters
Day 21: Getting there
Day 20: Another detour
Update
Day 18: Back to the drawing board...
Day 17: Demo!
Day 16: The joy of power tools
Day 15: What closet?
Day 14: Surprise!
Day 13: Look what Paul did!
Day 12: Look what I did!
Day 11: Take that!
Day 10: Down & dirty
Day 9: The next level...
Day 8: Capped off
Day 7: That's rotten!
Day 6: Still on the floor
Day 5: Floored, take 3
Day 4: Floored, take 2
Day 3: Floored
Day 2: Plumb this!
Day 1: And so it begins...
Back Story
Home |
Homeowners Nancy and Paul share their kitchen remodel nightmare...
Back Story
We didn't buy this house because it was a great place to live. To make a long story short, our first priority was a house large enough and laid out correctly to include our home business, separate from the living quarters. That meant many compromises on the "home" side. I wanted to remodel the kitchen from the get-go. If you look at the before photos, you'll certainly see why. It was only 10x10, with only about 10' of countertop (broken up in three sections), limited cabinets, a 6" deep sink, and a 24" wide range. The walls and cabinets were painted white with a latex flat finish paint. Who uses flat in a kitchen?! The floor was covered with white ceramic tile, and there were two awkward and nearly useless closets -- one in the kitchen, and one just outside of it.
Sadly, other major repairs kept getting in the way. Any budget for remodeling the kitchen was disappearing and it went way down the to-do list. That is until the last straw. My husband, Paul, went to slide the range out so he could adjust the level, but it wouldn't budge. After one very big yank, it finally came out and the problem was clear. The former owner had, for some bizarre reason, run the waste line from the sink above the floor (under the cabinet toe kicks), to where it drops down under the range. To fit the range over that pipe, they'd cut a hole on the side of it! That was it. We needed to resolve this bizarre plumbing and that was going to require destroying most of the base cabinets (these weren't modular cabinets like you see today; they were built in place and it would be nearly impossible to "gently" remove them. And if that's the case, we might as well do the whole thing. Due to budget constraints, we'll be doing most of the work ourselves and making many compromises in product choices along the way.  TOP TOP
|
Click thumbnails for a larger view.
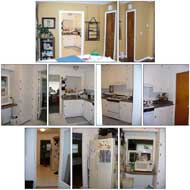
Kitchen Before Montage
Floorplan Before

|
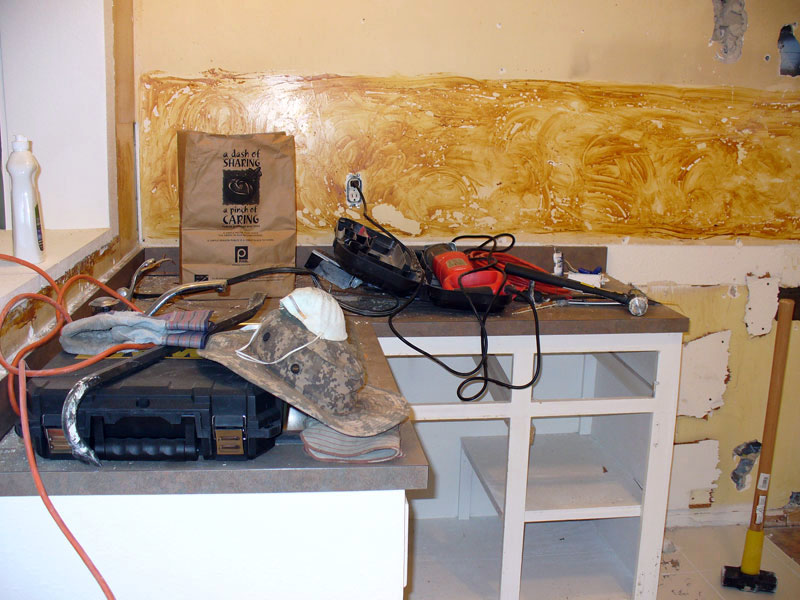
Photos:
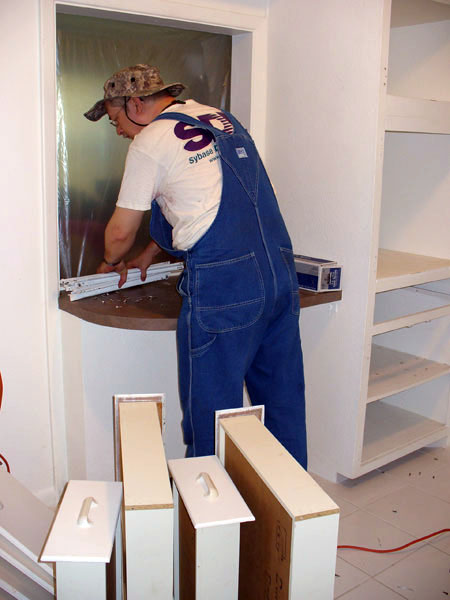
• Paul removing drawer hardware.
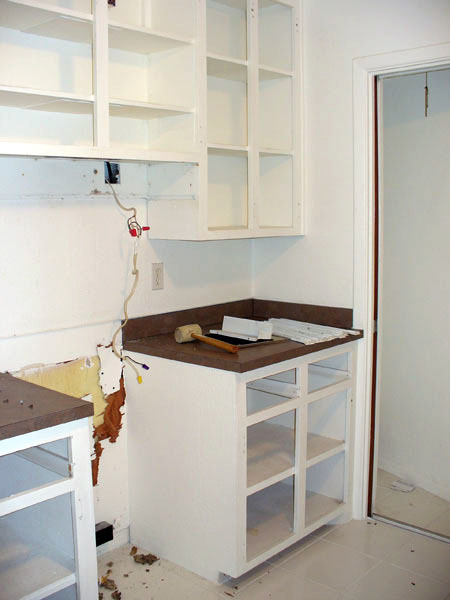
• Tiny countertops. Notice the virtually worthless closet -- it's triangular and almost impossible to get to the stuff in the back.
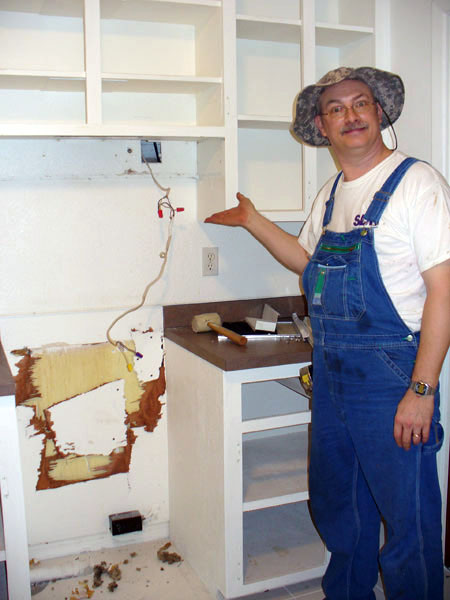
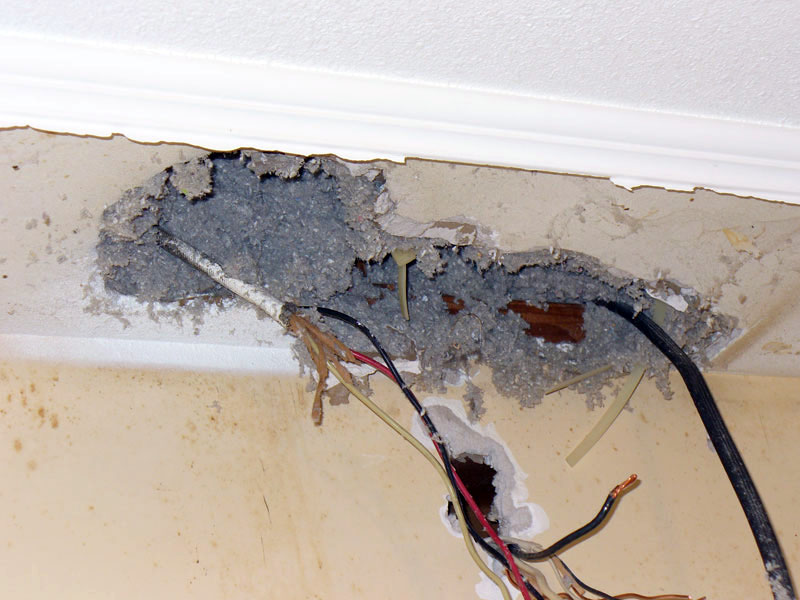
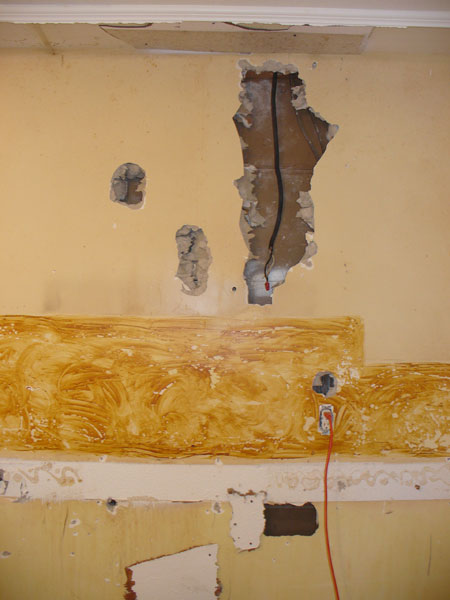
• Paul shows the ever-popular hidden electrical splice.
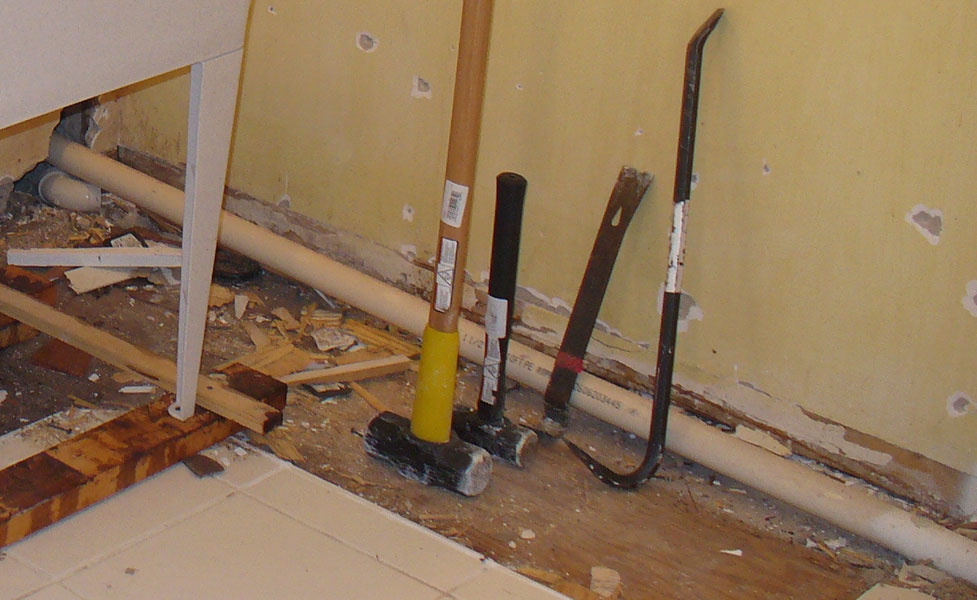
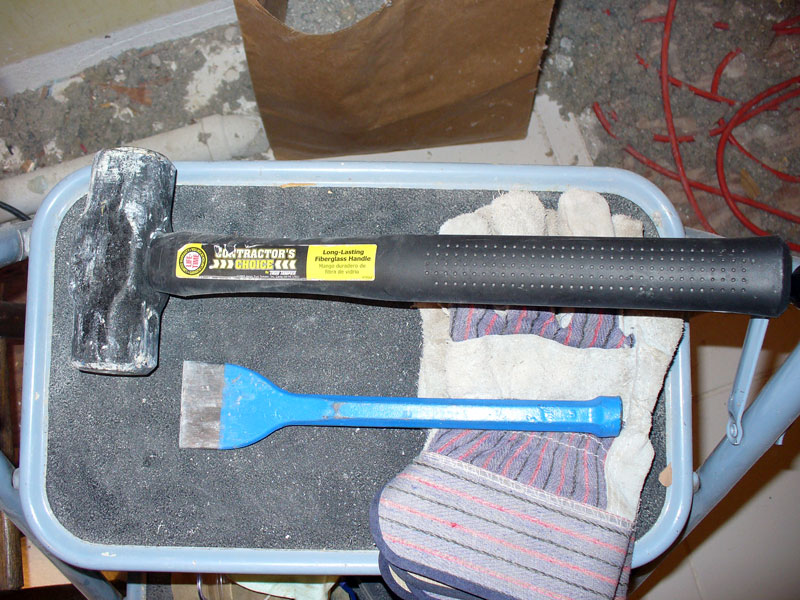
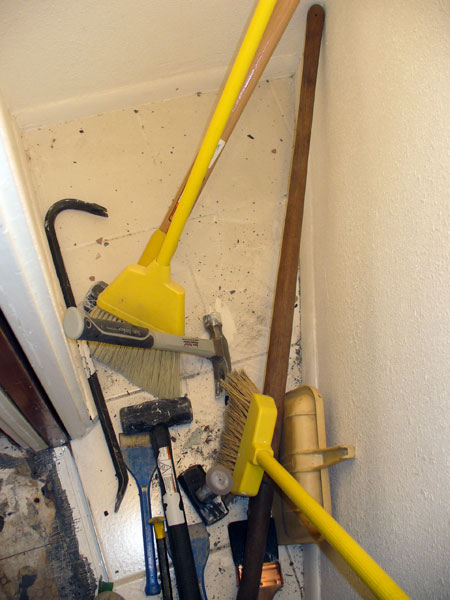
• A few of the tools we're using. Note the sledge hammers!
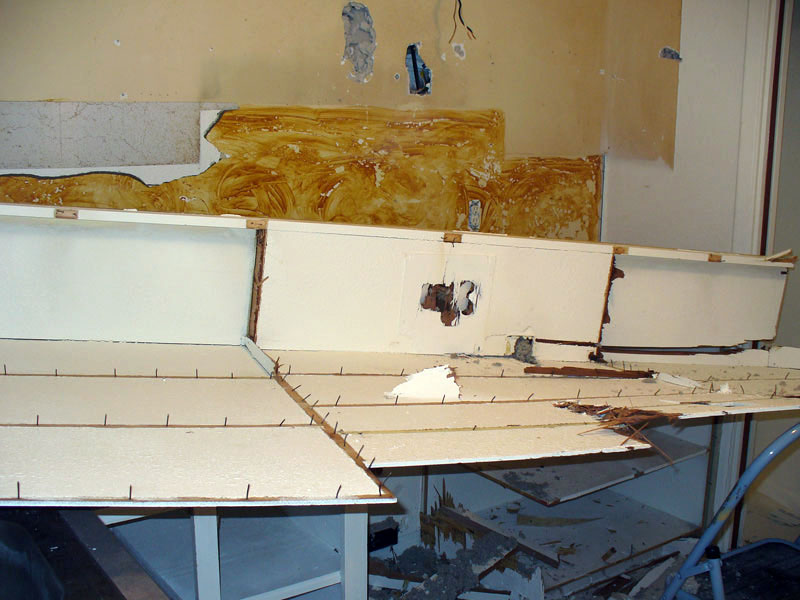
• The back panel from the main upper cabinets. Notice all the nails. Ouch!
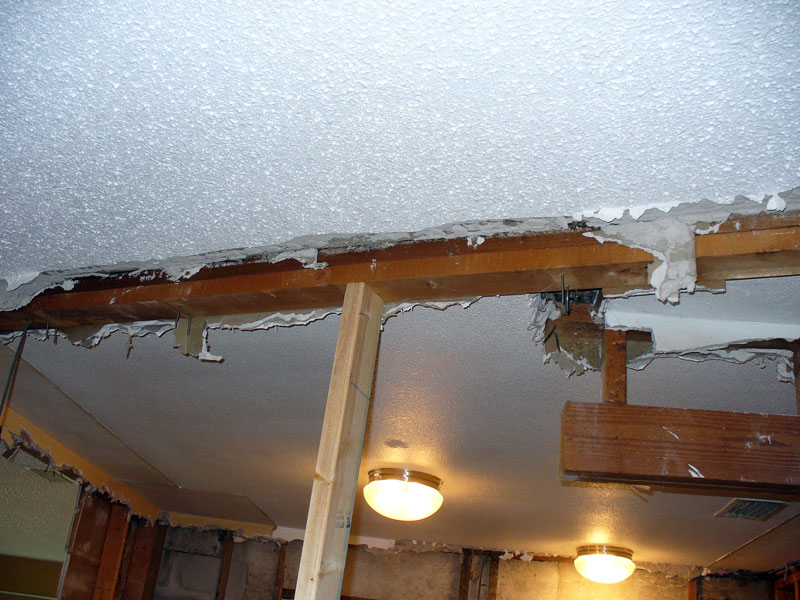
• Surprise! A great big hole in the ceiling hidden by the cabinets.
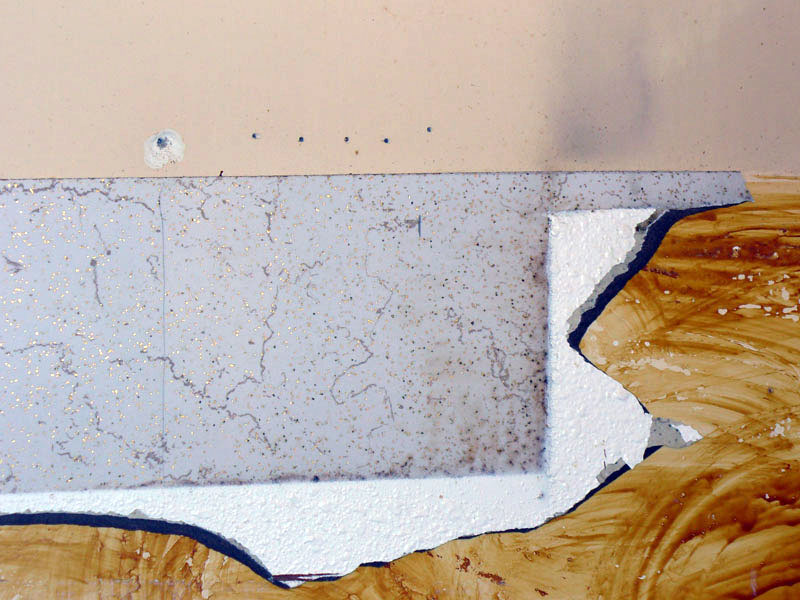
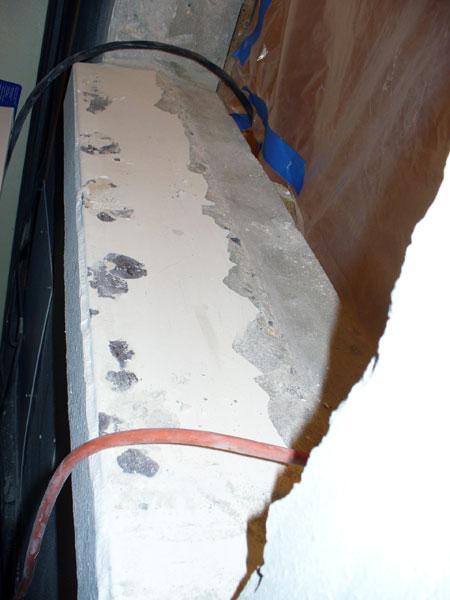
• Ooh, what lovely original backsplash! It was hidden behind that stylish orange-peel sprayed texture. |
Day 1: And so it begins...
June 16, 2007: Our first day of the remodel started with prep work -- removing cabinet doors and drawers, outlet and switch covers, and moving the appliances to the adjoining family room for our temporary kitchen. Then we taped things up to contain the dust. The existing floor plan has window-sized openings on the north and west walls, plus a door-sized opening on the south wall. The windows were completely taped up, and we left open one side of the door opening, so we could go in and out. The north wall has an actual door that we left intact for now, but it will eventually be closed up along with the window on that wall. By the end of the day, we'd removed most of the cabinetry, saving the portion with the sink for the next day. Thankfully the city lets us put wood and metal out on the street. By the end of Day 1, the pile was already getting pretty large. TOP
|
End of Day 1
 |
Photos:
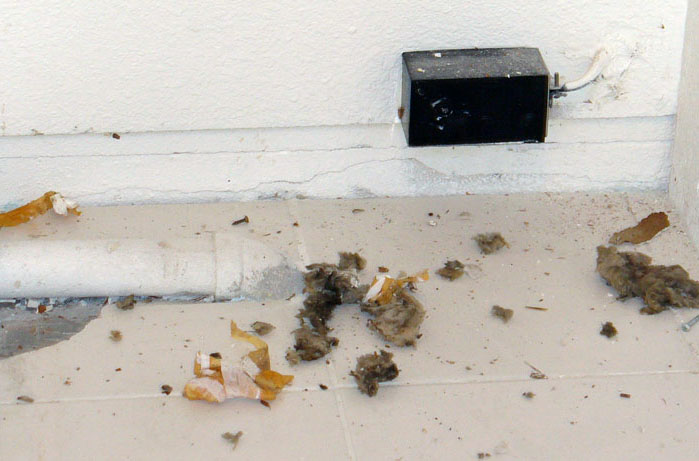
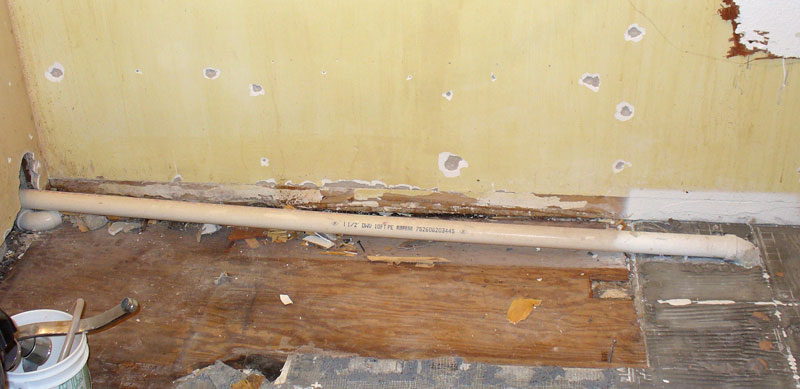
• The infamous waste pipe can be seen along the wall. Note the interesting shim someone used to support the pipe as it comes out of the wall.
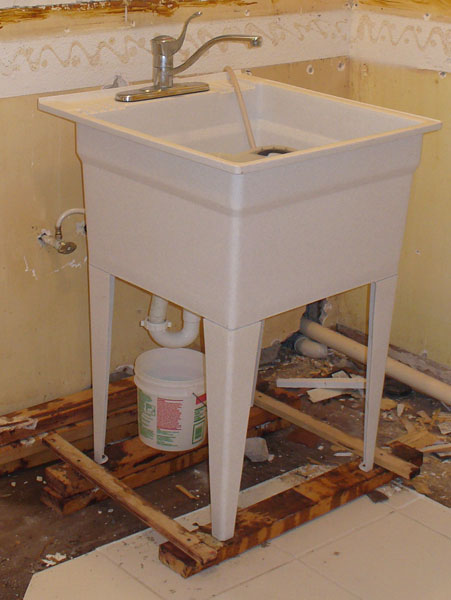
• Don't you love the sink rigging?! The trap leaks, hence the bucket.
• The other achievement for the day -- rerouting the 50 amp circuit for the range into the wall. Paul had a terrible time drilling through the header! Look up at the ceiling and admire that excellent temporary patch! One way to put the old formica backsplash to work. |
Day 2: Plumb this!
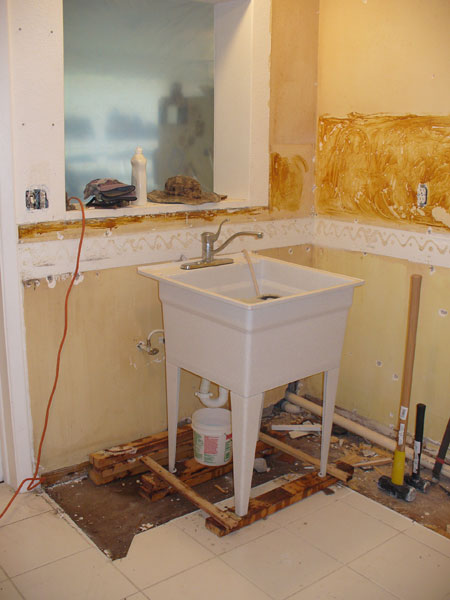
June 17, 2007: Father's Day -- what a way to celebrate! We got a late start on work. It's a holiday tradition to make cinnamon rolls for breakfast. Thankfully the toaster oven was set up! Just as we were about to get started dealing with the last bank of cabinets, with the sink, we realized we should really go and get the utility sink first. Once we came back from Lowe's, we got back to work. It was a real bear. The problematic waste pipe had 2x4s nailed down all along either side. It's hard to tell from the photo, but on the wall side of the pipe, that's about all the room there was. We weren't looking forward to getting those out, especially knowing the waste pipe itself is PVC. Getting the back of the cabinet off from the south wall (where the sink was), was another nightmare. We had to be very careful to avoid damaging the plumbing. We ended up using the reciprocating saw to cut it around the plumbing... v-e-r-y c-a-r-e-f-u-l-l-y!
Then the fun really started. The utility sink is, naturally, quite deep. The plumbing, though, was set for a very shallow sink. Paul ended up having to jury-rig the waste plumbing to get it all to fit. And that was after we had to prop the sink up on some 2x4s. By the time we got the sink done, it was already getting late. More loads to the street and we called it a day. TOP
|
End of Day 2
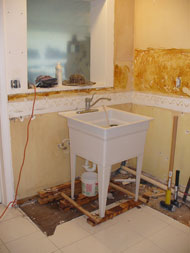 |
Photos:
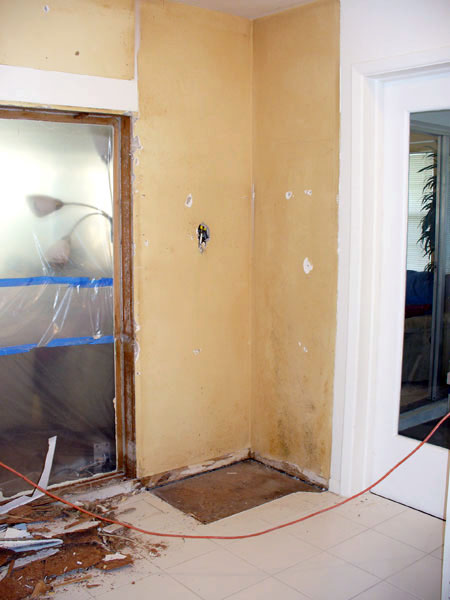
• Now we can run the stove! Of course, at some point we have to close up that old window opening...
• Three rows of tiles gone; another five to go. The now large opening you see is where there was a window-sized opening to the living room. You can see it in the Day 1 photo of Paul removing drawer hardware. Under it was a set-in bookcase that faced the living room and it had to go, too.
• For now, the sink is sitting half on tile and half not. In yesterday's photo you saw only one 2x4 under the front legs for that reason. Unfortunately, it wasn't enough, so now there's a second 2x4 under the front. But you can also see that ingenious plumbing underneath. |
Day 3: Floored
June 18, 2007: It's Monday, so we can't get started until after work. That makes the time pretty limited. I started on the floor while Paul worked on extending the 50 amp circuit into the family room. If you ever get the bright idea to remove a ceramic tile floor, think about it long and hard! While some of the tiles came up pretty easily, others simply refused to give up. For some unknown reason, while the rest of the house has terrazzo floors, the kitchen has ceramic tile on top of concrete backer board, which sits on top of plywood. We haven't gotten to a point where we can see under that yet. I only managed to get three long rows out before I ran out of time (had to make dinner). Paul got the wiring done and we dumped the removed tiles outside on a tarp. Once we're done with all the tiles and the wall board, we have to take that to the dump. Isn't this fun?! TOP
|
End of Day 3
|
Photos:
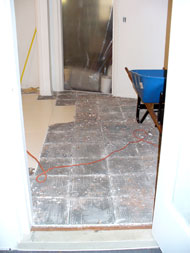
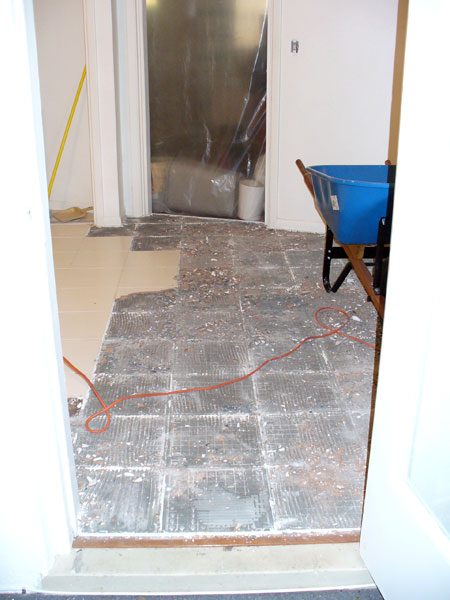
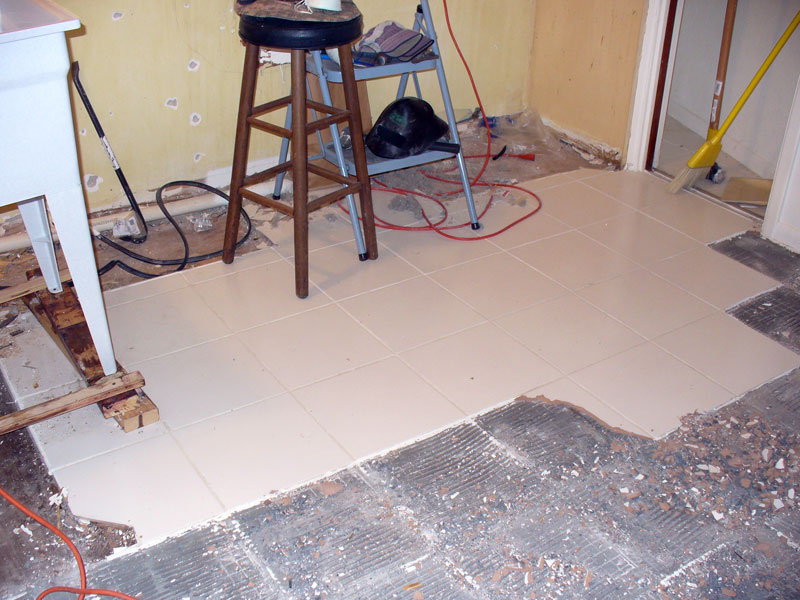
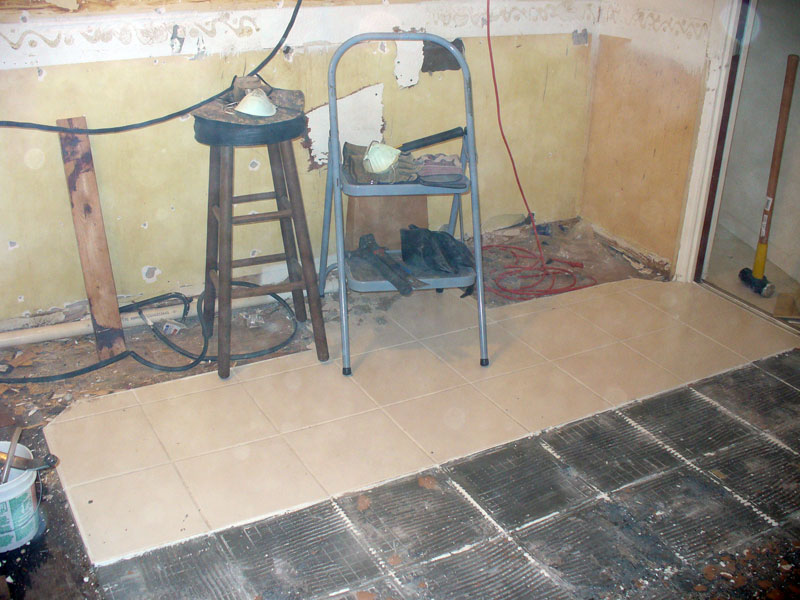
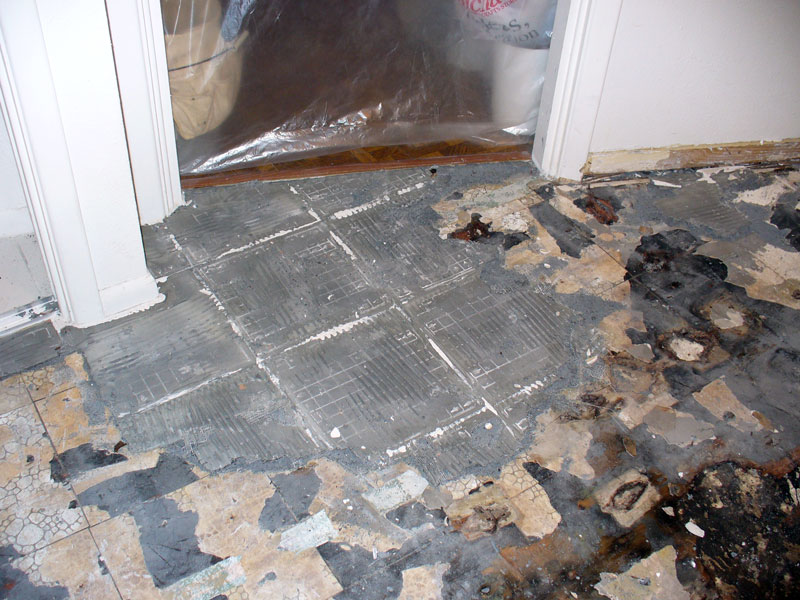
• There's almost a clear path from one opening to the other. At least more than half the tiles are now gone.
• Let's just hope there aren't too many more like this that require pulverizing.
• Here's how much ceramic tile is left to be removed. Ah, then it's on to the concrete backer board... Argh!!!!!!! |
Day 4: Floored, take 2
June 19, 2007: Not a good night. Despite Paul and I both working on the floor, we actually got less cleared. I was lucky last night; most of the tiles only need three to five whacks on the pry bar to break them loose. They were coming up in fairly large pieces. Tonight the opposite was true. Only a few were that cooperative. Most required serious work, and still were only breaking a little at a time. A couple were just completely obstinate. Paul resorted to pounding those trouble-makers to tiny bits with the 10-pound sledge. Even then, pieces refused to give up the ghost. We only got through about two more rows. Still more to go! Sigh... TOP
|
End of Day 4
 |
Photos:
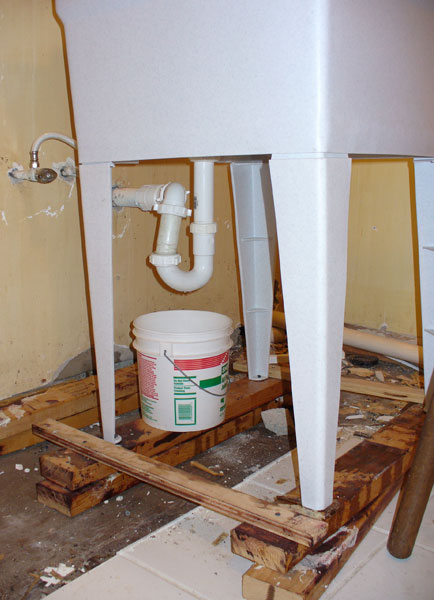
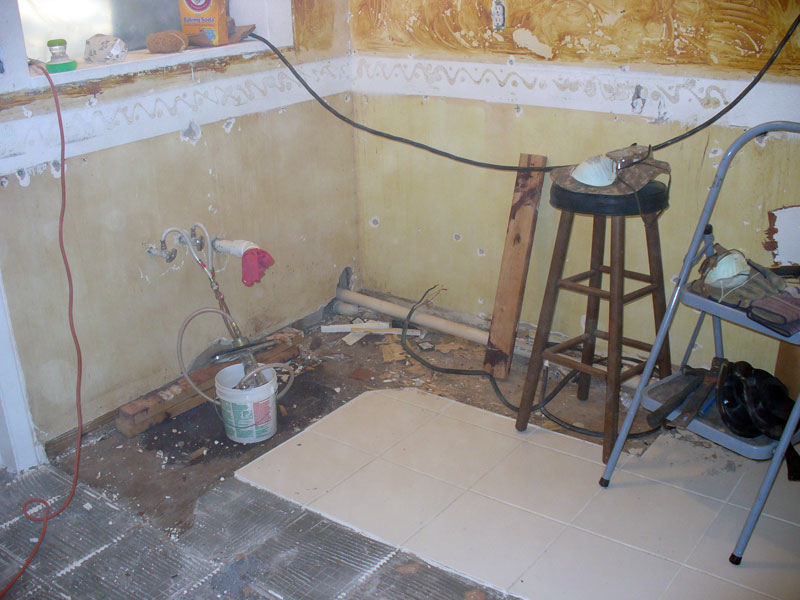
• No more temporary sink. The old shut offs don't fully shut off, so Paul had to reattach the faucet to keep it from leaking. The bucket's there just in case.
• Paul joined me on the floor after moving the sink and fell in love with his newest tool -- a nice wide chisel.
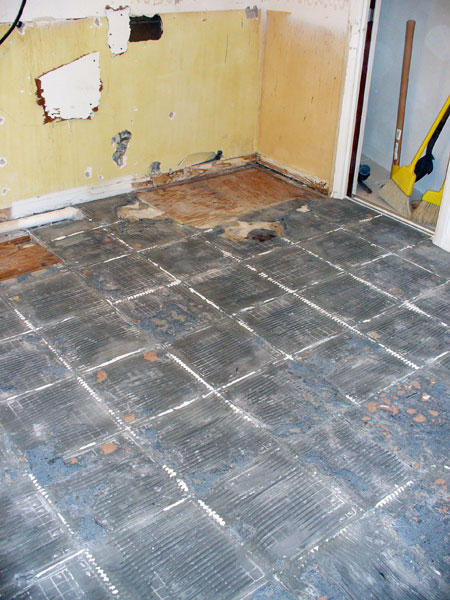
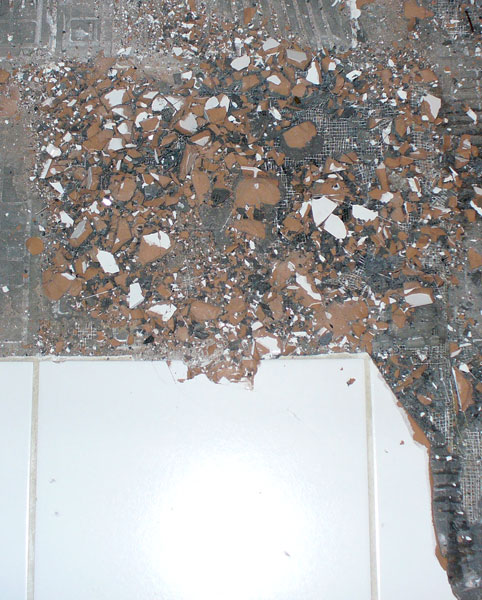
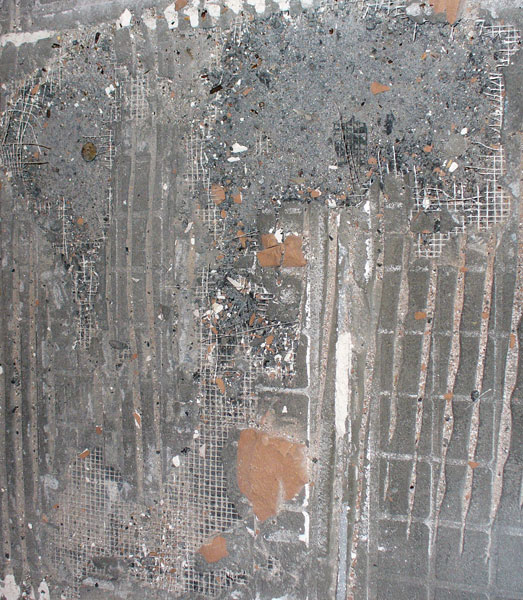
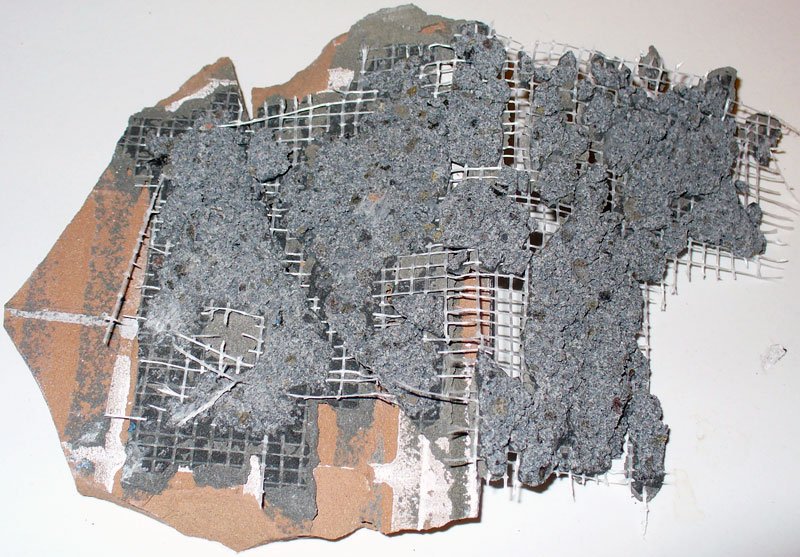
• Here's a close up of what things look like after a big fight with a tile. See all that exposed mesh? Ugh!!
• Meet the bane of my existence! Many of the tiles are grabbing hold of the mesh in the concrete backer board for dear life and refusing to give up.
• A little more than two rows of tiles left... then the fun really begins... |
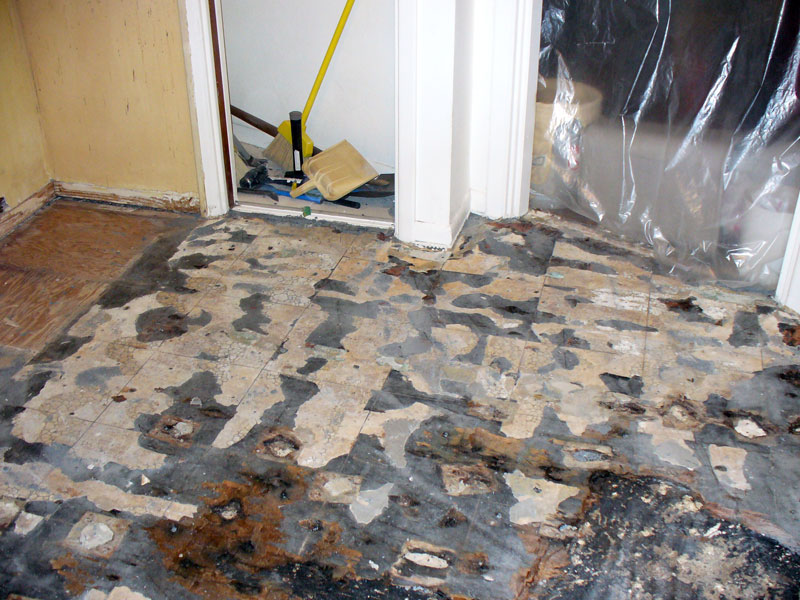
Day 5: Floored, take 3
June 21, 2007: We didn't work on the kitchen last night. We had an appointment right after work. Tonight we had to move the temporary sink to the bathroom as it was now going to be in the way. We have it straddling the bathtub, so it drains straight down into the tub. We bought a hand-held shower head and use the hose to get water in the sink. While Paul worked on that, I was back to the tile... again... and we're still not done! We still have a little more than two rows of tiles to go. You'll notice a haze in some of tonight's photos. I swept... what a mistake! TOP
|
End of Day 5
 |
Photos:
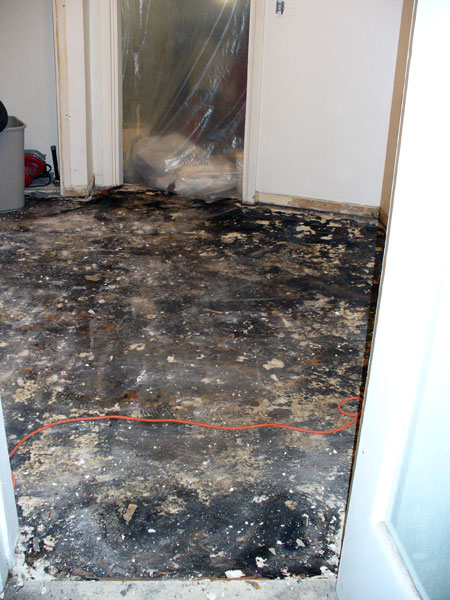
• Surprise! Look at that lovely vinyl hiding under the backer board.
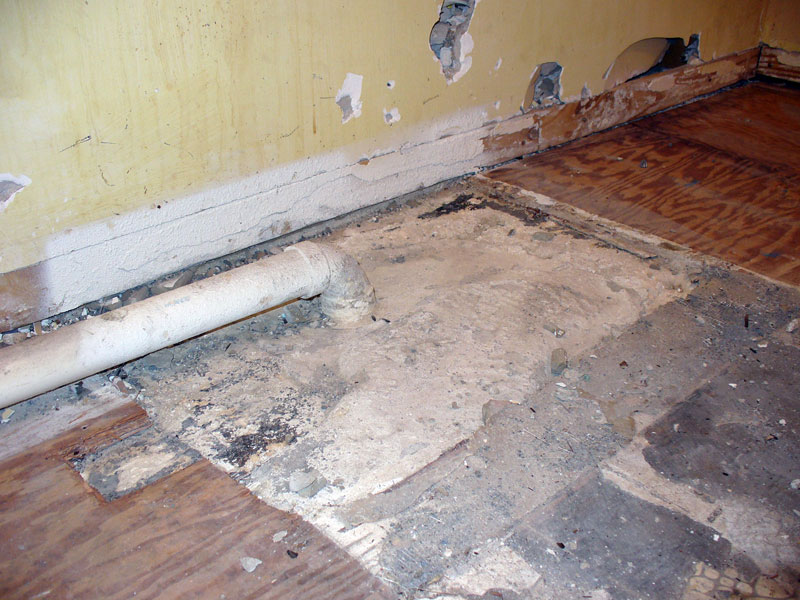
• Here's a better look at the infamous waste pipe in all its glory.
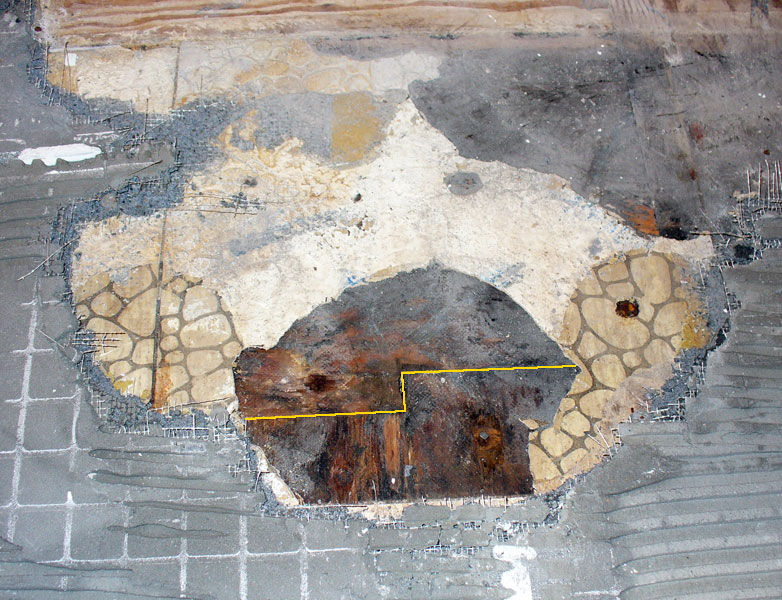
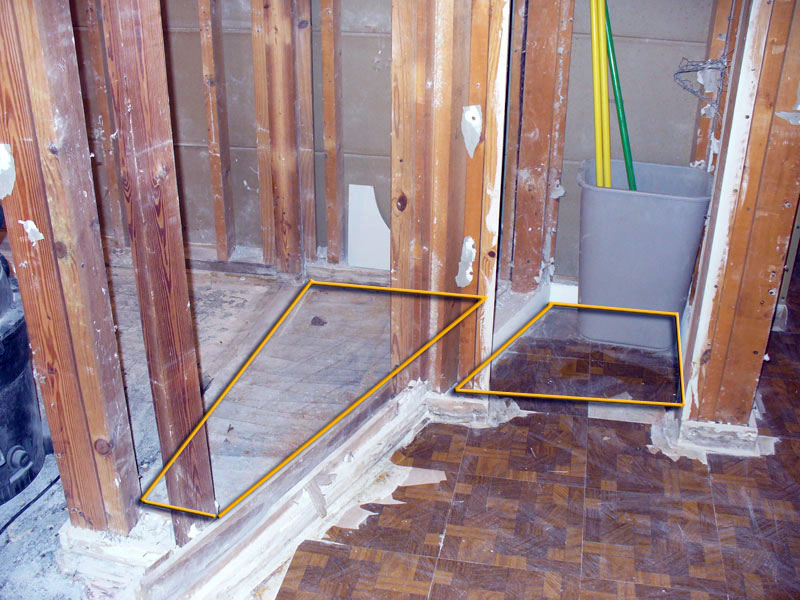
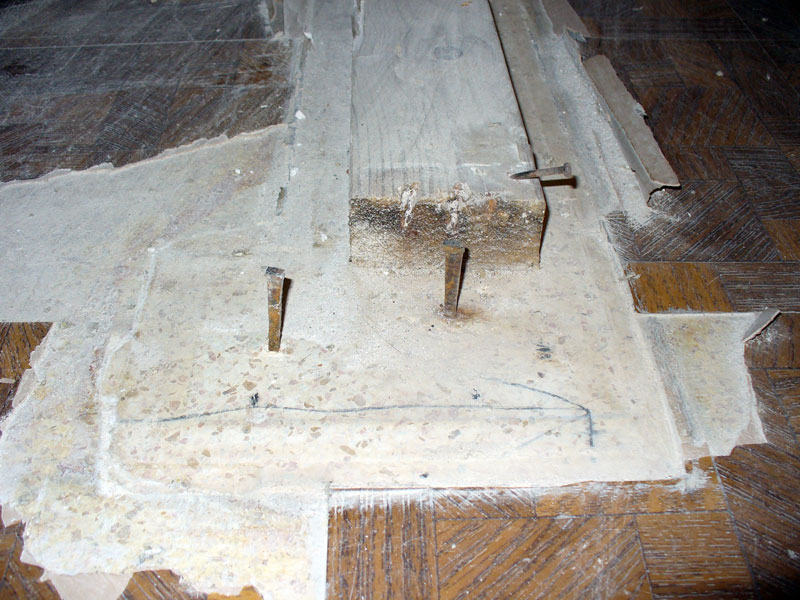
• Ooh, scary kids! Here's a classic example of the oddities we've been finding. In this photo, you'll see a piece of the plywood subfloor was cut in a very odd way. I've highlighted the edge with yellow to make it stand out. Also notice how much darker the wood is there, compared to the piece at the top of the photo. Water damage?
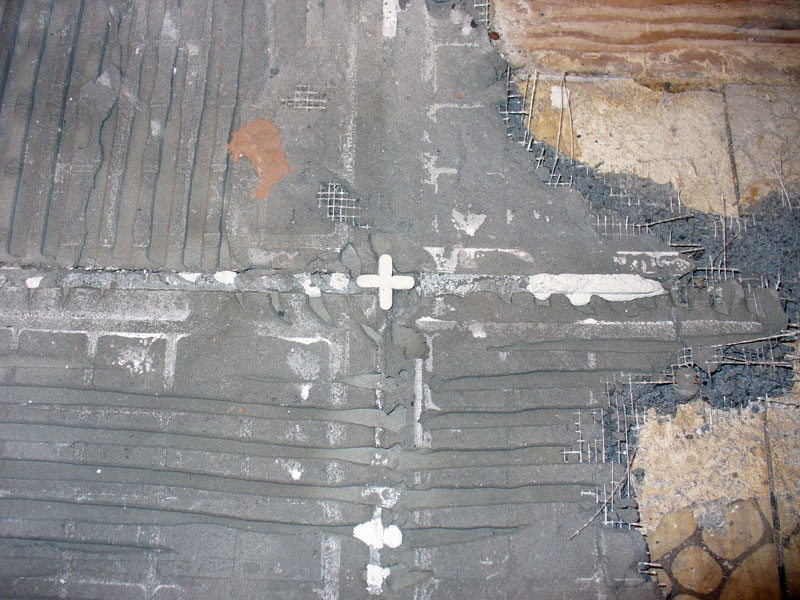
• Of course they left spacers stuck in the thin set/mortar. Doesn't everyone?
• Paul made a lot more progress than I did, but it's still only a drop in the bucket. |
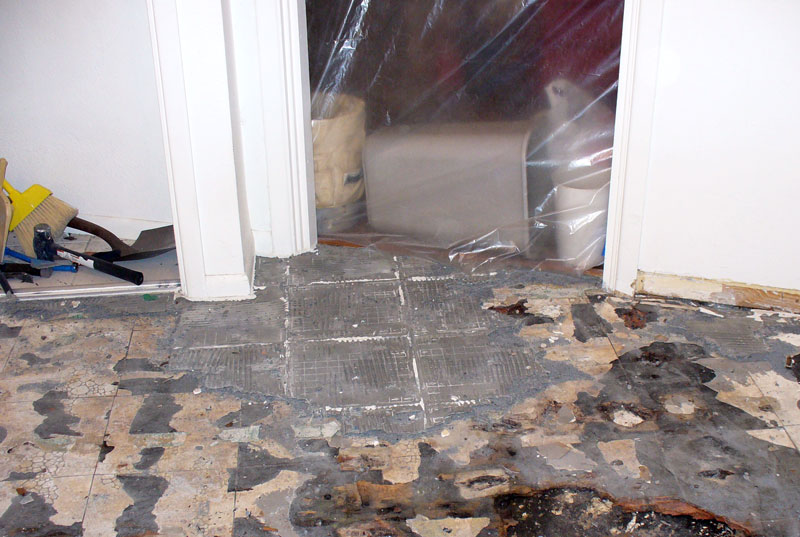
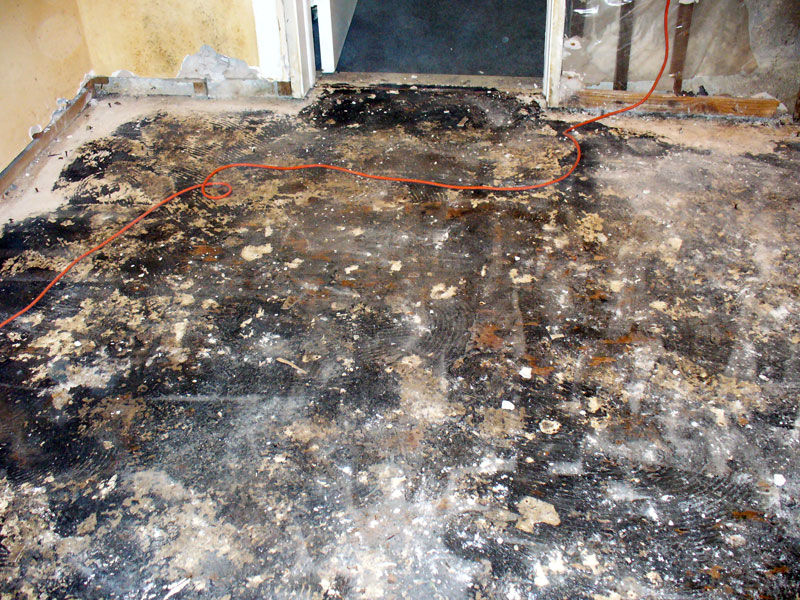
Day 6: Still on the floor
June 23, 2007: We took last night off -- Friday nights have always been our "night off", so to speak. We pick up fast food for dinner and chill while watching a movie. Back to work today. We finally finished removing the tile from the main floor. There are a few pieces in that silly thing called a closet, but we won't be able to get those up until we demo at least one of the walls. We had another surprise today. Under the concrete backer board is another layer, vinyl tile. Lovely! I lied in my last day's post -- the tile wasn't the bane of my existence; the backer board is. Argh!! It was coming up in tiny pieces, so we took a break and went to Lowe's in hopes they would have some brilliant solution. No such luck. But we did pick up a couple of wider chisels and a 3-pound sledge for me (so Paul can use the 4-pounder). Back home it was back to work... slowly. As you can see from the photos, we didn't make much progress. I used the ShopVac to clean up the floor. The backer board mostly turns to powder as we hit it. TOP
|
End of Day 6

|
Photos:
• Here are those three voids I mention above. I've lightened the rest of the photo to help them stand out.
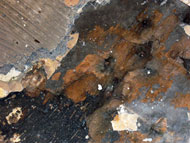
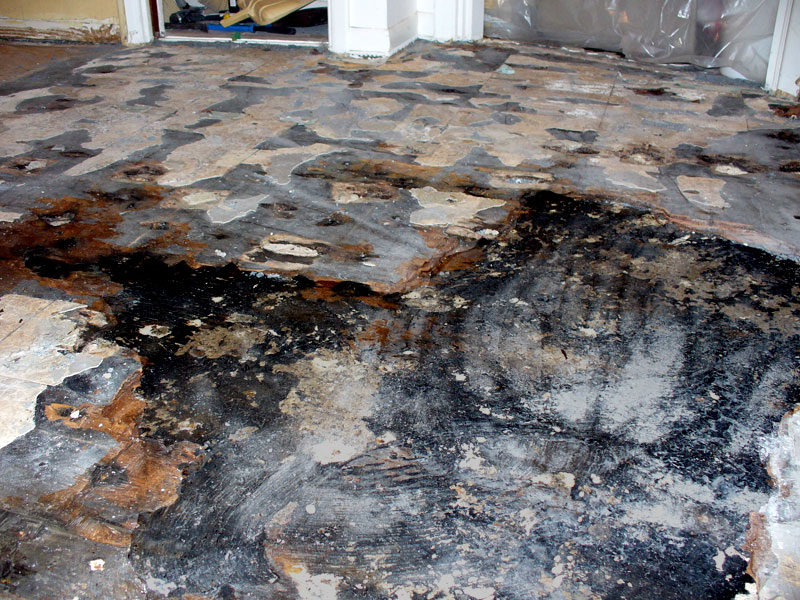
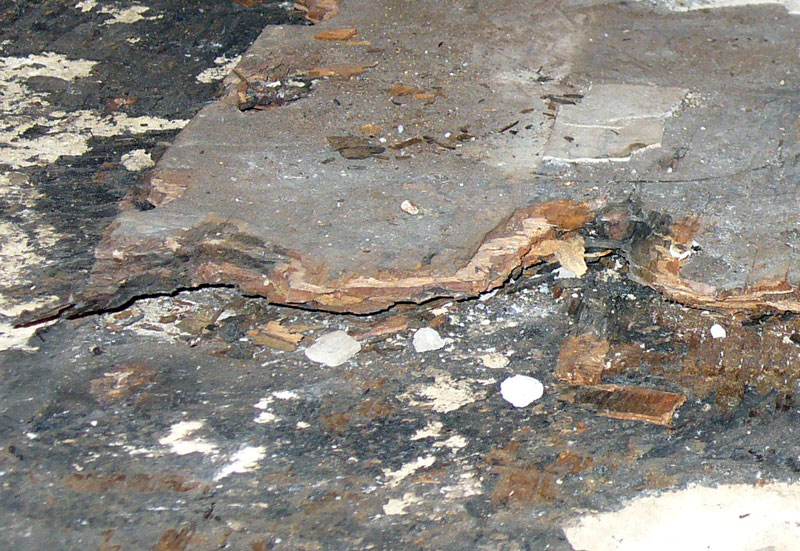
• Some of the worse rot.
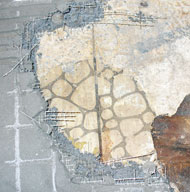
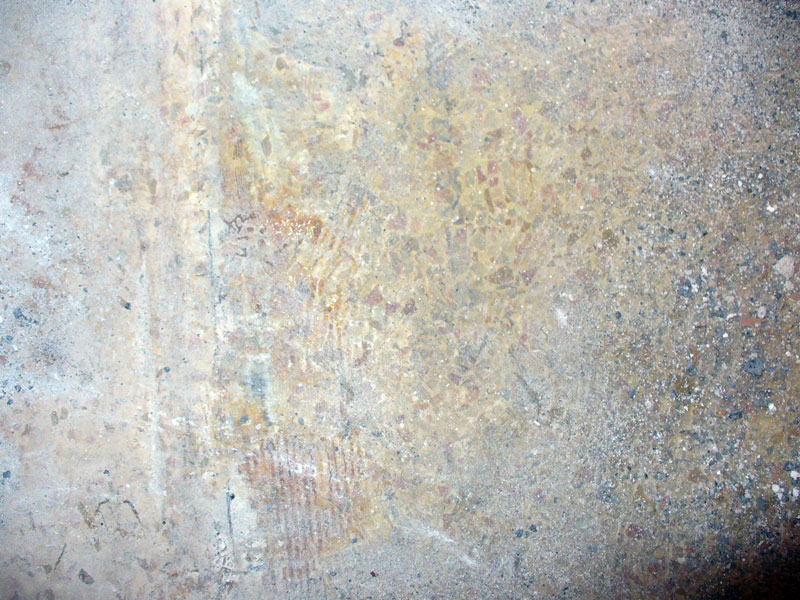
• And a larger view that shows the concrete (see the trowel marks) at the bottom; the decaying wood is clear in the mid-section; and at the top is more of the old vinyl we found under the backer board.
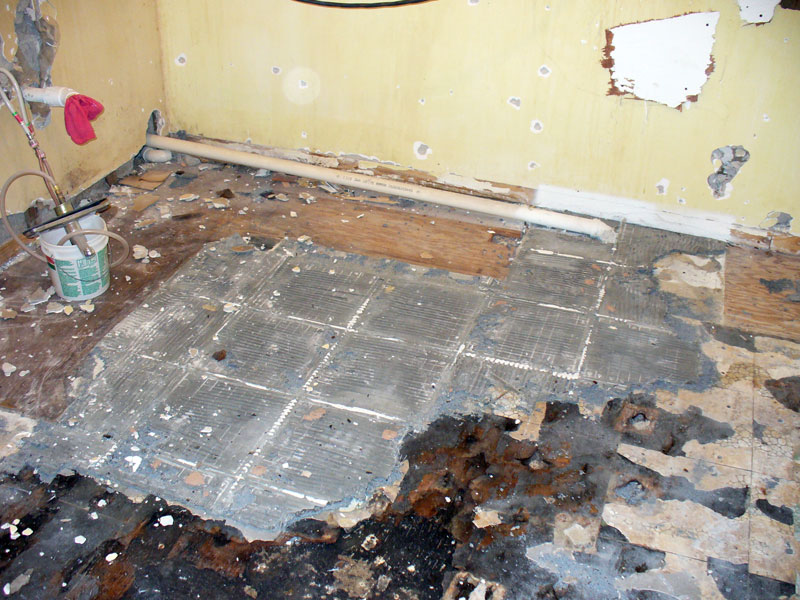
• Only two patches of backer board left. Here's the bigger section.
• Then this smaller area by the entrance.
• The plumber's coming out tomorrow to cap off these supply lines, so we cleared away the wall board/plaster for easier access. |
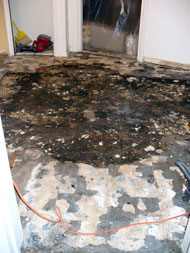
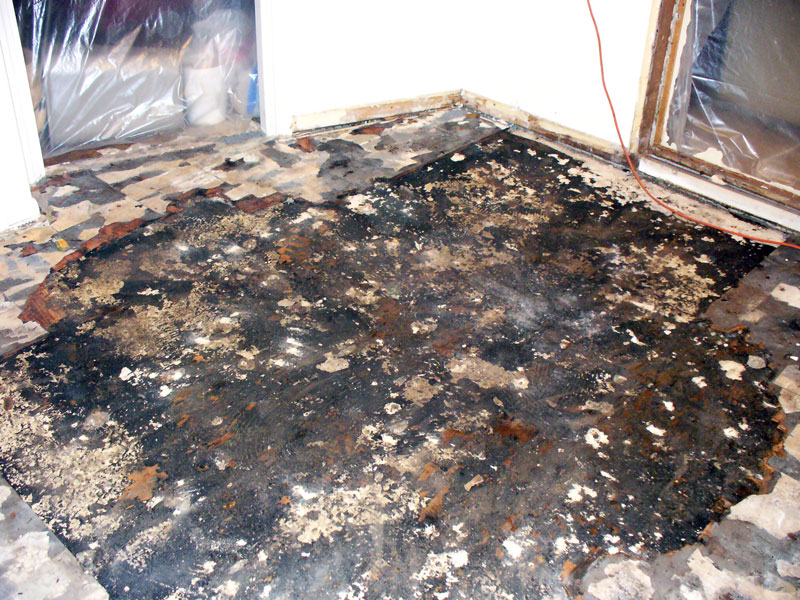
Day 7: That's rotten!
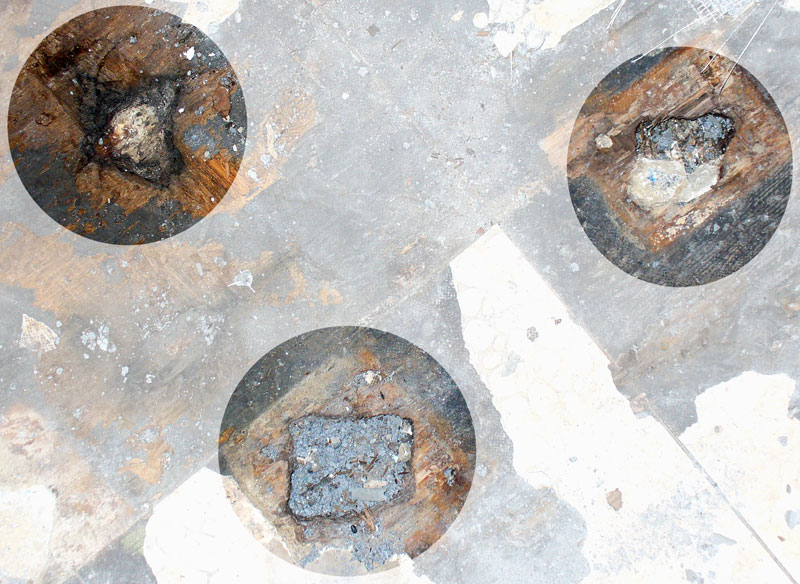
June 24, 2007: Why did I decide to remodel the kitchen?!! You know what they say about remodeling: you may find all kinds of surprises. We found a big one today -- massive wood rot in the subfloor. We'd been seeing how dark the plywood subfloor was in most places and we wondered if it was water damage. The farther into the middle of the room we went, the worse it was, until at one point, as Paul was pulling up backer board, chunks of wood went with it. There in roughly the middle of the floor the wood virtually turns to dust as you scrape it. At least it will be easy to remove. It appears to be concrete, and rough concrete at that, below the wood in that section. Over by that poor excuse of a closet, though, when I tap on the wood subfloor I hear a distinct hollow sound... not good. We're also finding all these little chunks of what looks like a very fine concrete or perhaps grout, filling odd voids all over the place in the plywood. In the photo section below I have a closeup of three of them clustered together. On the positive side, we made much better progress on the backer board than we expected. Little more than half way done. TOP
|
End of Day 7

|
Photos:
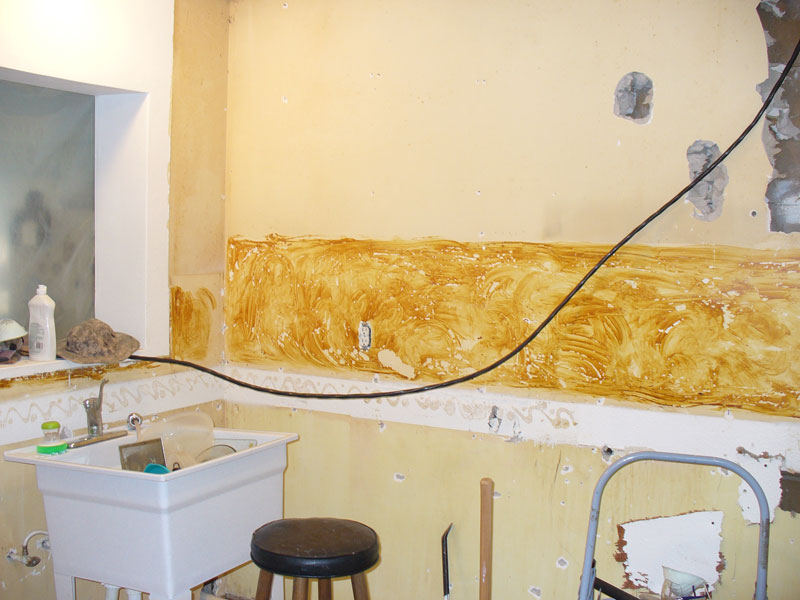
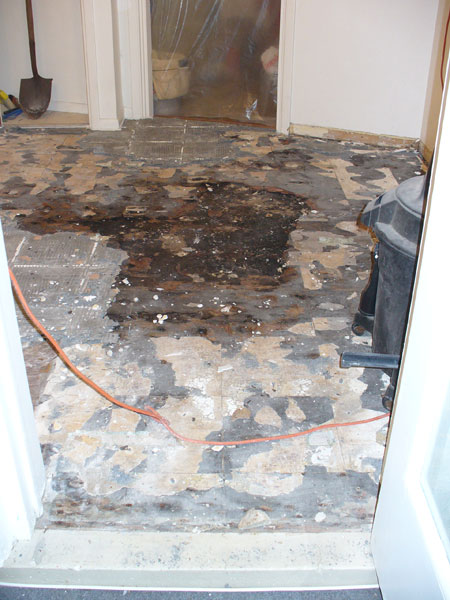
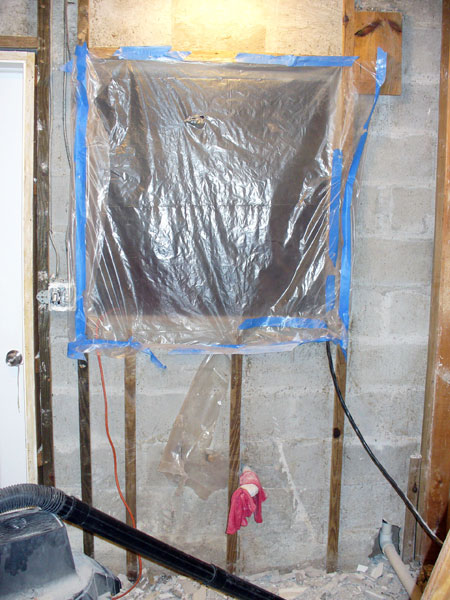
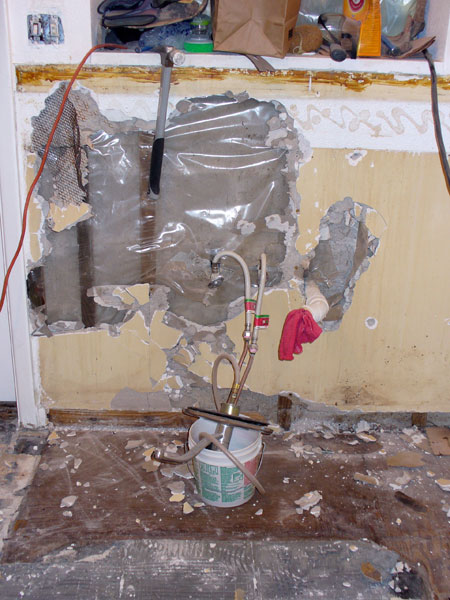
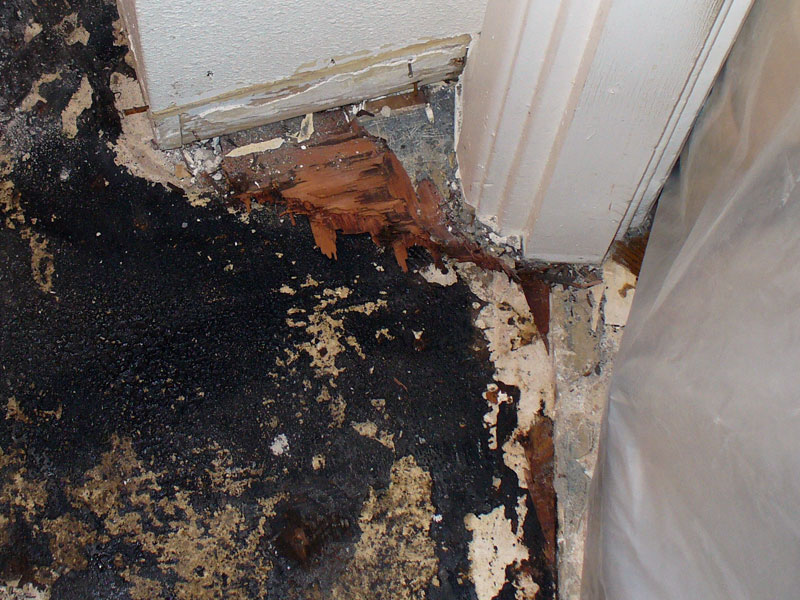
• Yeah! The big patch of backer board is gone. See that large white and yellowish area all around the waste pipe? It's some kind of concrete. The yellowish color is some type of adhesive they used to attach the backer board.
• Here's what's left -- a troublesome patch, but at least it's not too big. Check out that barricade on the other side of the plastic. One of the cats tried to get in under the plastic, so we had to block it off.
• Ah, no more dangling plumbing fixtures. |
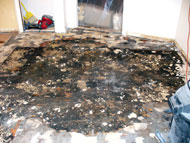
Day 8: Capped off
June 25, 2007: We're almost done with the backer board... at least until we get to the closet. We got the larger of the two patches of backer board up tonight. Sure enough, more rotten wood underneath. All around where the waste pipe goes into the slab appears to be some type of very smooth concrete, similar to what we've been finding in all the weird voids in the wood. It almost looks like grout. Curious. The plumber was in this morning. He first had to repair the main water shut-off for the house; then once he could safely shut off the water main, he came in and capped the two current supply pipes. When all is said and done, we'll be moving the sink to the area where the waste goes down into the slab. I'm looking forward to when we can open up the walls, so we can see just what will be needed for the new plumbing. Back to the floor, we'll hopefully get that last section of backer board up tomorrow evening. That section has been very problematic -- adhered with gorilla glue or something! Then we'll start removing all that plywood. We don't know why it's so waterlogged. Needless to say that problem will have to be resolved before the new kitchen goes in. TOP
|
End of Day 8
|
Photos:
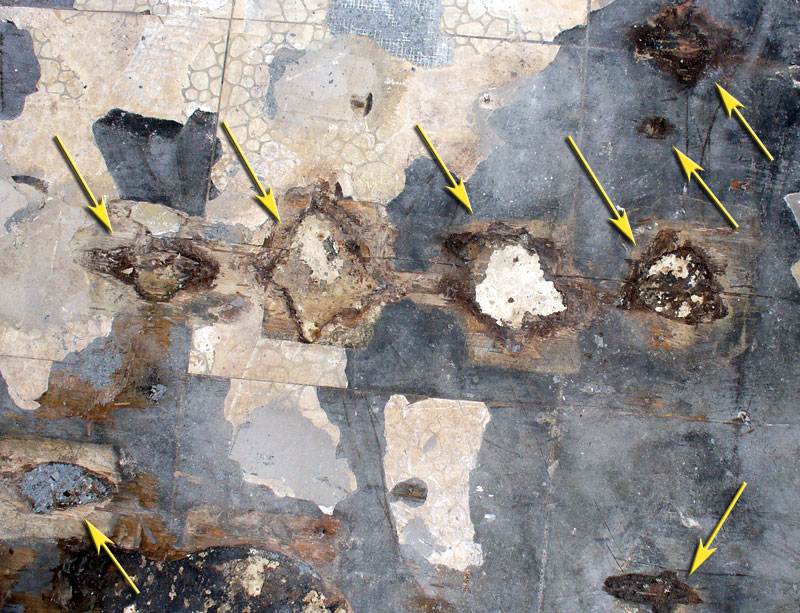
• Here's an interesting patch of those odd voids in the plywood. I've drawn arrows to the eight of them. You'll see four are in a nice row straddling either a seam in the plywood or a crack. Very odd.
• The infamous closet... I use that term loosely. If you look closely you can see that at its widest point it's only 2' wide/deep (the tiles are 1' squares). Virtually worthless and it won't be missed.
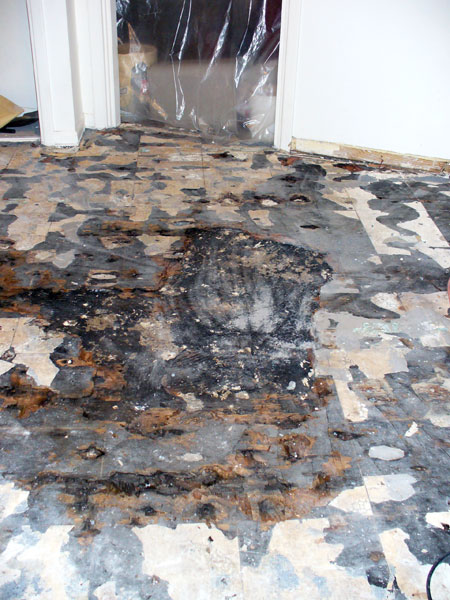
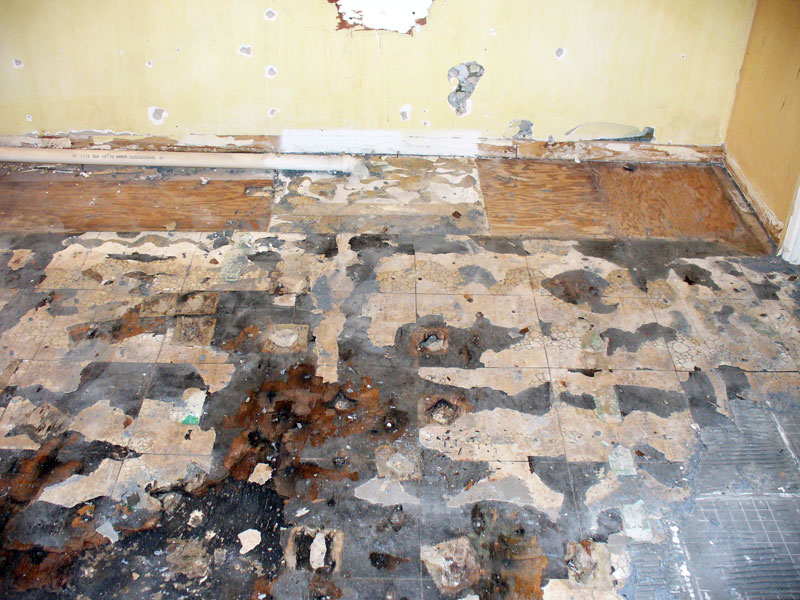
• The last section of backer board is no more!
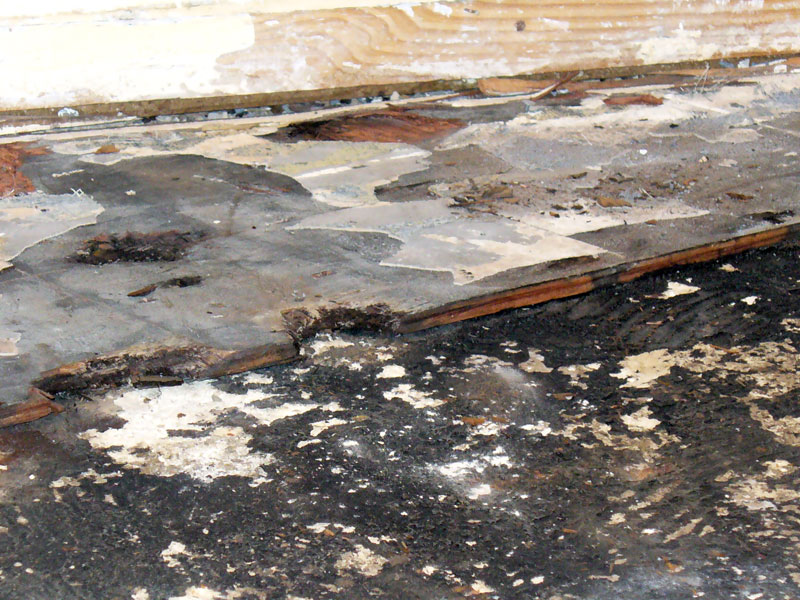
• You can see the fairly large area where the wood subfloor just fell apart as we removed the backer board. I've darkened the area to help it stand out. |
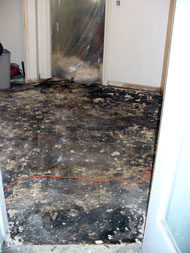
Day 9: The next level...
June 26, 2007: The last of the main floor backer board is now history. We decided to end off there, so it was a somewhat short night. That just leaves the little bit of tile and backer board in the closet, but we can't get to that until a wall comes down. We're taking off tomorrow night -- well, no demo at least. We're going to Lowe's after work. Paul's decided maybe it would be a good idea to get a compressor and some pneumatic tools. Lowe's has a good set that includes a sufficient compressor along with six tools (including an air hammer). We're not sure how difficult it will be to remove the next layer, the plywood. Where it's completely rotten, it's already falling apart, but along the perimeter of the room it's not so bad. Those areas may be harder to get up. We'll also need to break apart the layer of what looks like grout (matching the layer of plywood elsewhere) in a 24" square area around the waste pipe, as well as the concrete directly around the pipe. TOP
|
End of Day 9

|
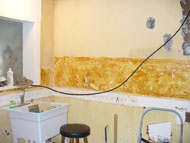
Photos:
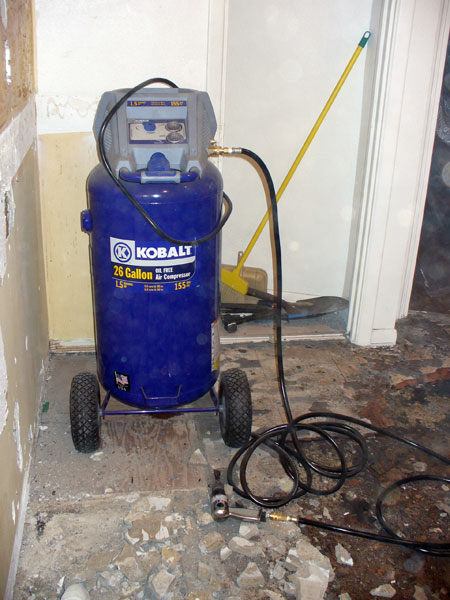
• Paul's new toy! Okay, it's mine, too. This compressor came with six tools, including the air hammer you see in the photo. One of the other tools is a nailer -- something I've wanted!
• Here's the waste pipe area after removing the upper layer of concrete. Note the lovely spray texture on a portion of the wall behind this area... and on the pipe!
• We made some pretty good progress tonight. This photo gives you a good idea of how much we got done.
• Here's a photo of plywood that's somewhat drier and not as cooperative.
• And in this one, you get a good look at what we're up against in those drier areas. You can see how thick the plywood is. |
Day 10: Down & dirty
June 28, 2007: And I do mean dirty! Paul and I were both filthy after tonight's efforts. We were working on removing the plywood and a lot of it just turned to dust. Paul got to put his new toy to work. The air hammer made quick work of the wood that was in rough shape. As we worked our way out to the perimeter of the room, it wasn't that helpful. The chisel was just too short to do much good. You'll see Paul's red circular saw in the closet in the end photos. We had to use it to cut the drier pieces into more manageable sections. We made pretty good progress. Hopefully we'll get the rest of the wood up on Saturday. We're guessing the black we're seeing under the wood must be some type of adhesive. We saw trowel marks on the underside of some of the wood. In the drier areas, the nails that were used are still there and won't pull up. We'll have to grind those down. Paul also got through the first layer of concrete around the waste pipe. The former owner used a different cement product to bring that layer up to the level of the plywood. Our biggest headache now is coming up with a way to provide a moisture barrier over the concrete (without breaking the bank), so we can lay down a new subfloor (probably HardiBacker) to prepare for the final flooring. TOP
|
End of Day 10
|
Photos:
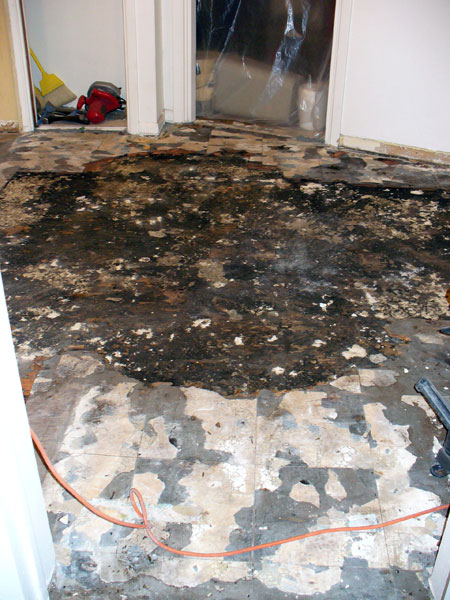
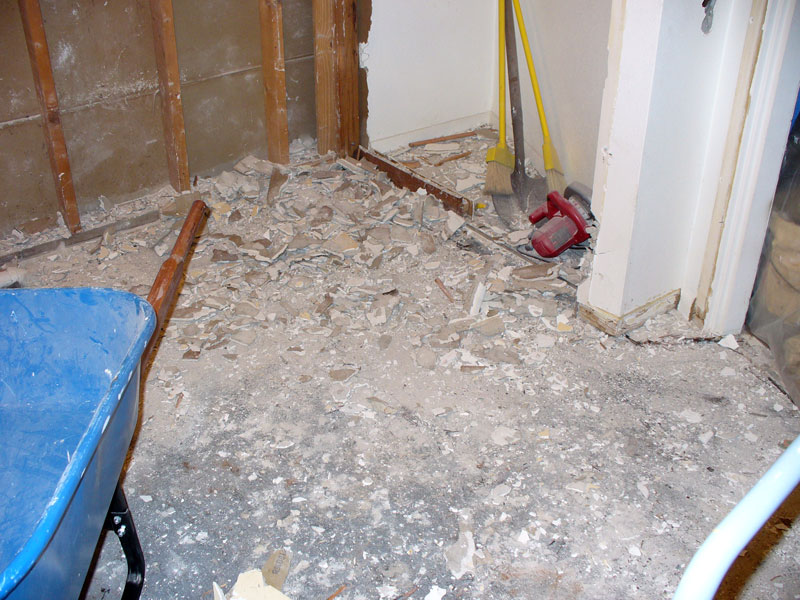
• The lone piece of wood left...
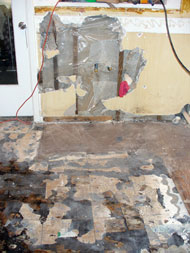
• Look what I did! Watch out when I've got a sledgehammer in my hands. Sorry I couldn't get the whole wall in the shot. The kitchen's just too small. If you look carefully, you can see the horizontal edges of the wall board on what's the back of the master bedroom's closet. These certainly aren't your typical 4x8 pieces of drywall.
• Okay, so I was running out of steam at this point. Note the concrete block wall.
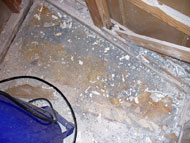
• Look, Ma, no plywood. After we finish pulling down the wall board and demo'ing the walls we work on cleaning the concrete as best we can. |
Day 11: Take that!
June 30, 2007: We had to start the day doing yard work. Unfortunately, just because you're remodeling a kitchen doesn't mean other things don't need attention. My shrub trimming and weed pulling didn't take near as long as Paul's lawn mowing, so to make myself useful, I started on the walls in the kitchen. The floor was going to take both of us. I got most of the odd plaster wall board down on one of the long walls, and some on the former sink wall. I'm just too short to get the upper 18" or so. This stuff is very hard; it takes several whacks with the sledge hammer to get through. I took the two shots of the walls after I finished, so you'll see a haze in both. What can I say, I made a pretty big mess. Then after lunch we tackled the floor. It was a difficult fight, that's for sure. Between the nails and the adhesive, the plywood just didn't want to cooperate, but as you can see, we got it all up except one small piece is an odd corner. Paul's muscles really got a work out. And the crowbar was invaluable this time. When we were pulling up the plywood under the waste pipe, we discovered more quality workmanship by the prior owner -- the waste pipe wasn't glued! Stinky! Tomorrow we both work on the walls. If we're lucky, we'll get it all down. Cross your fingers. TOP
|
End of Day 11

|
Photos:
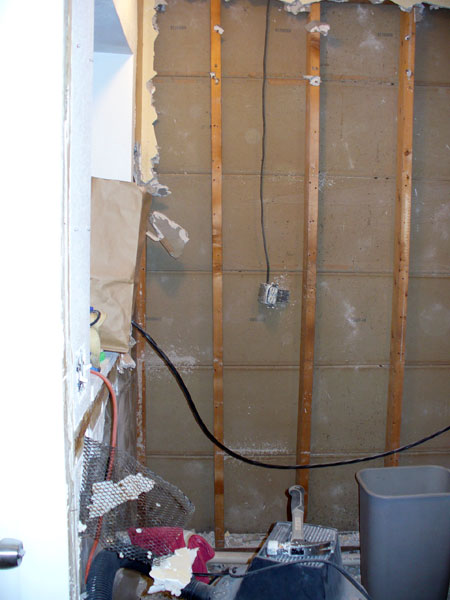
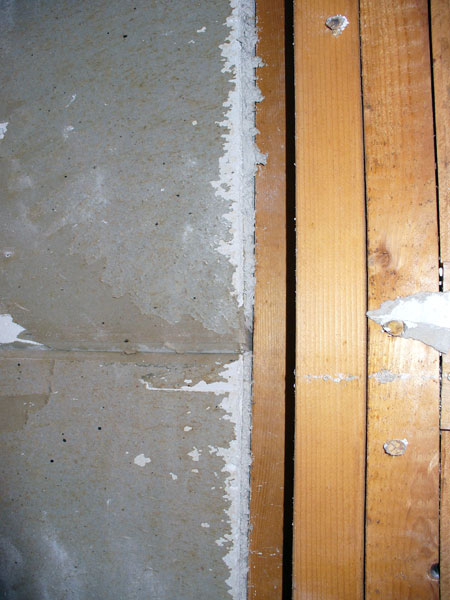
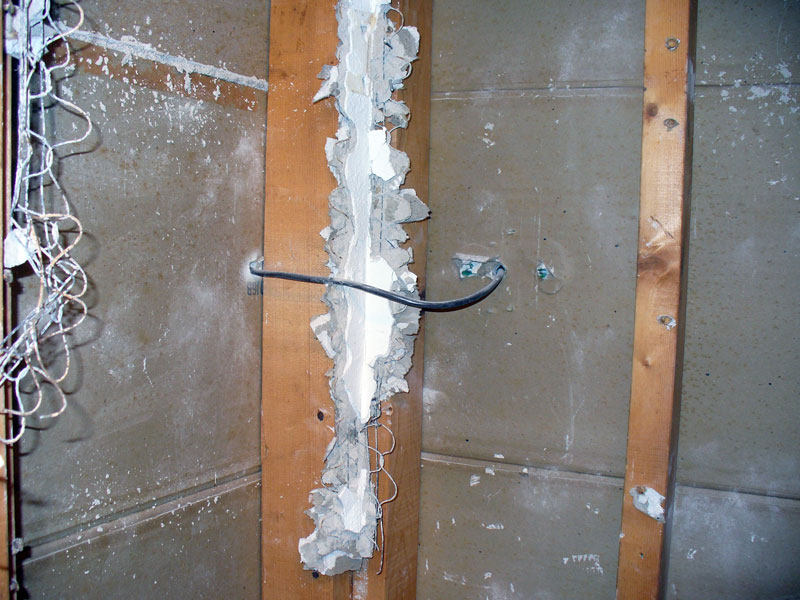
• This is a close up of the unusual wire that's used in the corners. I'm used to modern-day corner bead. These walls have about a 1/4" of plaster on top of the qhite thick wall board. Even a small chunk of this stuff is mighty heavy. Despite its weight, it holds onto that wire for dear life. I just wasn't strong enough to pull this and a few other pieces down.
• We're also finding this mesh in unusual places. It's like what you would see behind stucco. Here you can see a strip of it ran down vertically near the corner (over the pocket door). You can also see it in the upper portion still left. Ugh!
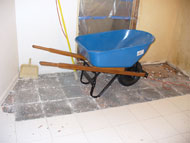
• Besides the two photos in the sidebar, here's one more showing what was accomplished today, along with an already overflowing wheelbarrow. The only part I didn't shoot was the portion of the wall left of the door to the family room. |
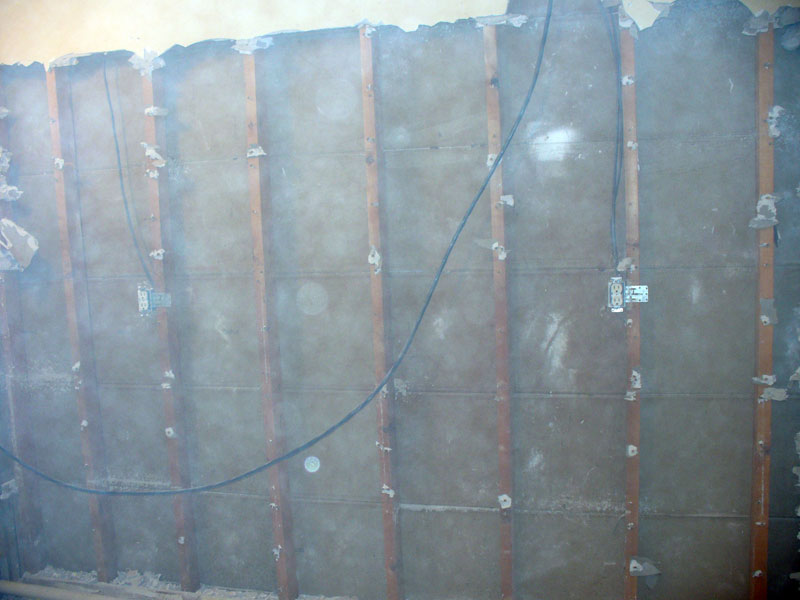
Day 12: Look what I did!
July 1, 2007: Well, today didn't go quite as planned. Jenn (our daughter) just bought her first house this week and I went over there this morning to take them Paul's 8' ladder, along with more boxes and newspapers for packing. They're painting every room and most have vaulted ceilings. I don't envy them... but at least they're younger than we are! After I got back home I had to finish the laundry and Paul was talking to his mom (he calls her every Sunday). Then we started talking about what to do about the floor and time quickly slipped away. By the time we finally had lunch, it was already well into the afternoon and Paul still had various paperwork to handle. So I went into the kitchen and whacked away by myself. As you can see from the new photos, I got most of it down. All that's left is about 18" all around the top where I can't reach, a small strip by the window into the family room, and the very skinny section between the 'closet' and the opening to the dining room. Not too shabby for an out-of-shape old lady! You'll see a bunch of wires in the walls. Way back when apparently this house had some kind of radiant heat that ran in the ceilings. All the old dials were replace with cover plates, but you see the wires everywhere. TOP
|
End of Day 12

|
Photos:
• Here's the wonderful framing that will have to come down.
• Okay, we're both getting pretty tired of this demo, and during the week we only have about an hour to work. We're getting lazy about fully cleaning up. But we did take two very full wheelbarrow loads out, plus the pocket door itself.
• What's wrong with this picture? No, it's not a trick of the camera or some kind of odd perspective. The stud that's second from the left is anything but straight. If we don't do something about that, it'll make installing the upper cabinets interesting. |
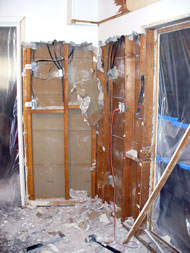
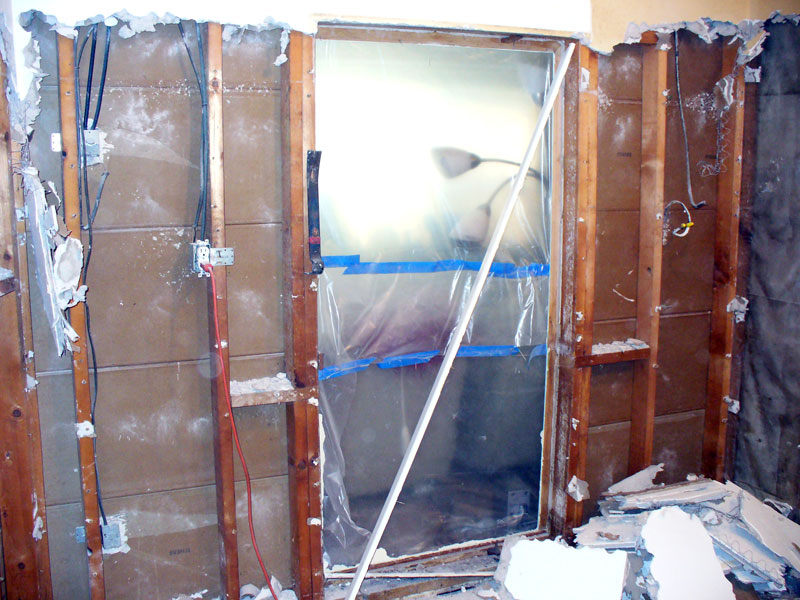
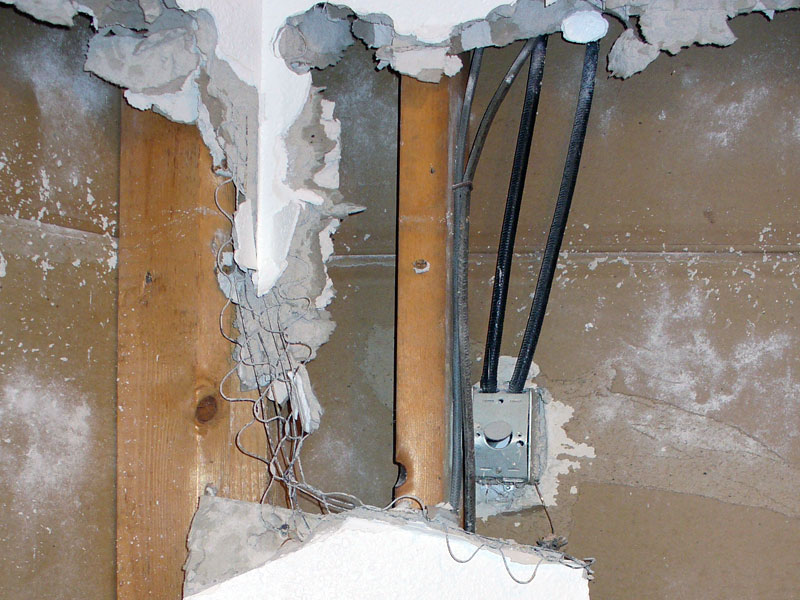
Day 13: Look what Paul did!
July 2, 2007: Tonight it was Paul's turn to whack away. While I went around pulling nails from the studs, he got down about half of that upper portion I couldn't reach, took out the pocket door framing, and the wall board on the first inside wall of the closet. As you can see in this photo, demo'ing this wall is not going to be fun. See that framing up there? Above the former pocket door are two 2x6s back to back. Above the other opening, it's two 2x8s. Ugh! That entire wall is going away altogether; and the coat closet (on the other side of the now partially demo'd closet in the kitchen is being moved and reoriented to face the front door. Well, moved is a nice way to say, "completely torn down and reframed." Are we having fun yet? TOP
|
End of Day 13
 |
Photos:
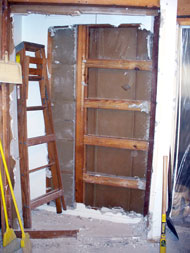
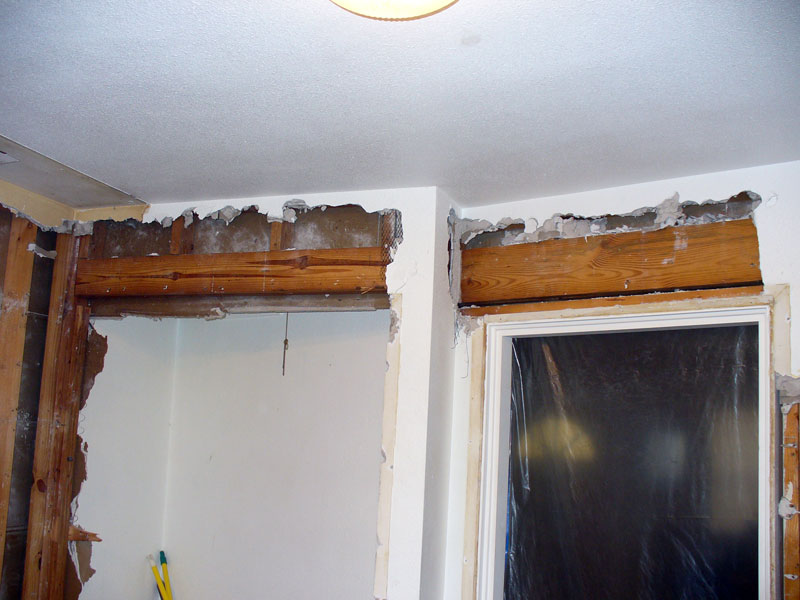
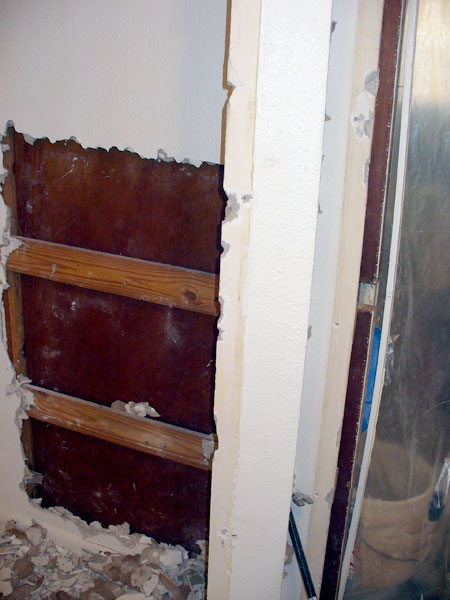
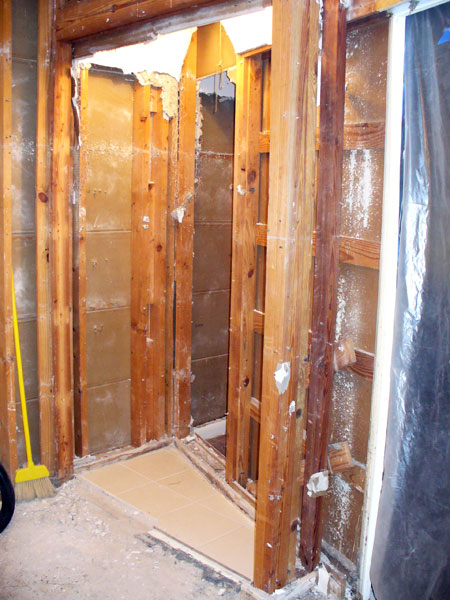
• Surprise number one, the hidden pocket door. If you look to the right in the photo, you can see we've removed the framing and pulled the door out somewhat. About the mid-point along it's edge you'll see a chunk missing. This was probably where there had been a sunken handle.
• Another oddity -- unsecured wall board. What you're looking at here is what should be the backside of the outer wall. Notice you can see the vertical edge of the wall board and it isn't attached to anything. It's not resting on a stud. What you can't really tell in this photo is that there appears to be a second layer of wall board behind it. Just on the other side of this portion of wall should be the coat closet. We'll be tackling it tomorrow.
• Surprise number two, poured concrete in the wall. If you look carefully above the doorway on the right you can see it's a solid section of concrete (versus the obvious blocks elsewhere). |
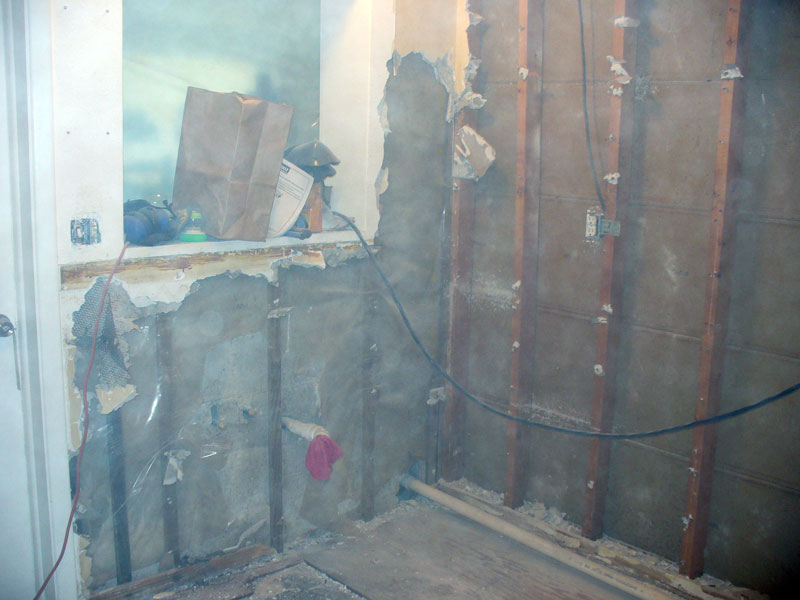
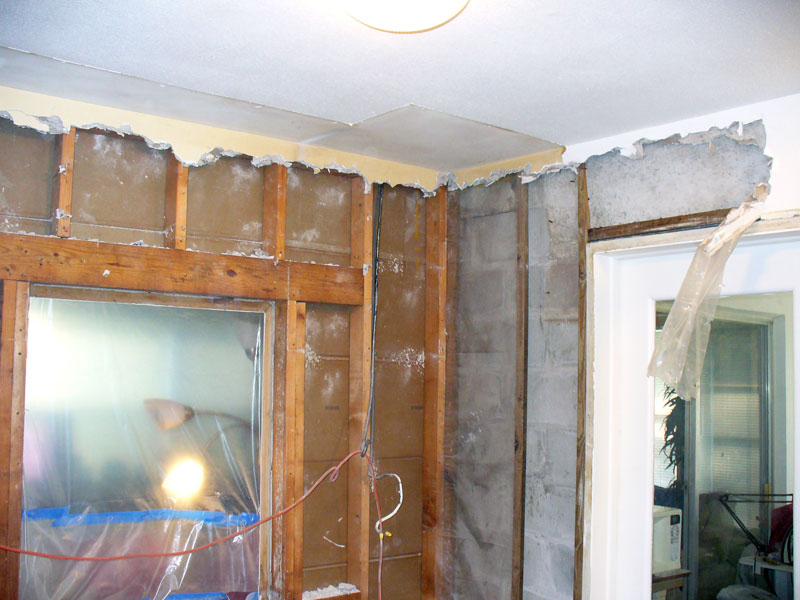
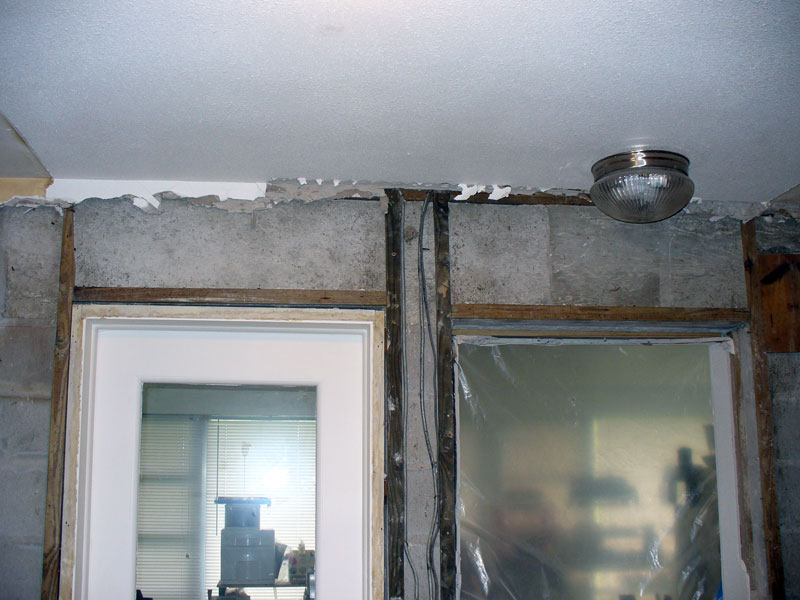
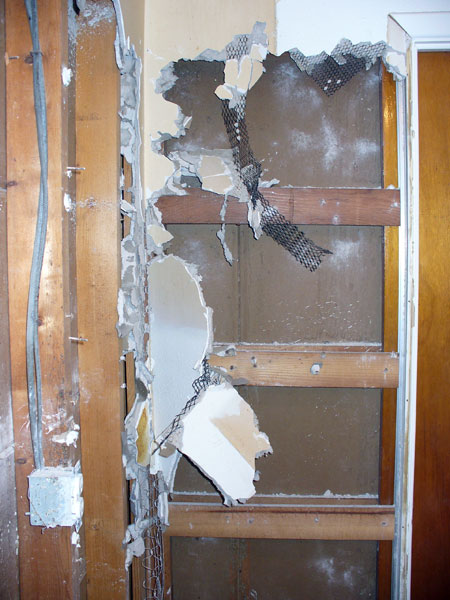
Day 14: Surprise!
July 3, 2007: It's amazing what you might find closed up inside a wall. While Paul was whacking at more of the wall board near the ceiling, I started on the back inside wall of that ridiculous closet. As I was hitting the wall with the hammer, it sounded odd... a bit too solid. As I got an opening large enough to see in, instead of seeing the back of the opposing wall, I saw shiny wood. It looked like a glossy-coated door. Sure enough as more of the wall was removed, our suspicion was confirmed -- it was a door. Paul pulled away the framing around the opening to the dining room, and hidden behind it was the edge of another pocket door. So apparently at some point you could close off the kitchen with this door, but someone later decided to frame over it. Go figure. By the end of the night we'd removed that door and most of the wall board inside the closet, as well as most of the remaining wall board in the kitchen itself. There we found another surprise. The wall next to the family room is a former external wall, so it's concrete block. But the portion over the door and extending outwards is poured concrete. Interesting. We plan to leave the door framing (it's helping to support that concrete) and just stud up the opening, so we can attach drywall on the family room side. We'll be doing a floating wall just inside the concrete block on the kitchen side. TOP
|
End of Day 14
|
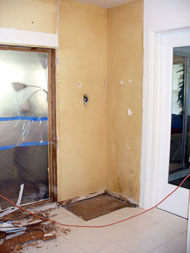
Photos:
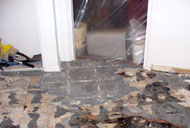
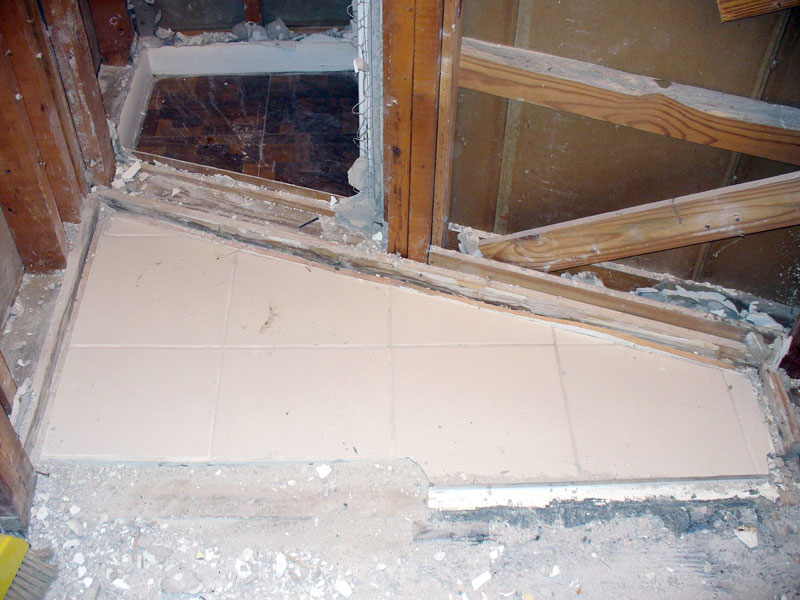
• No more closet! You can see we even got that little section of wall between the closet and the opening to the dining room.
• The remaining ceramic tile. Now you can get a good feel for just how ridiculous this pantry/closet was.
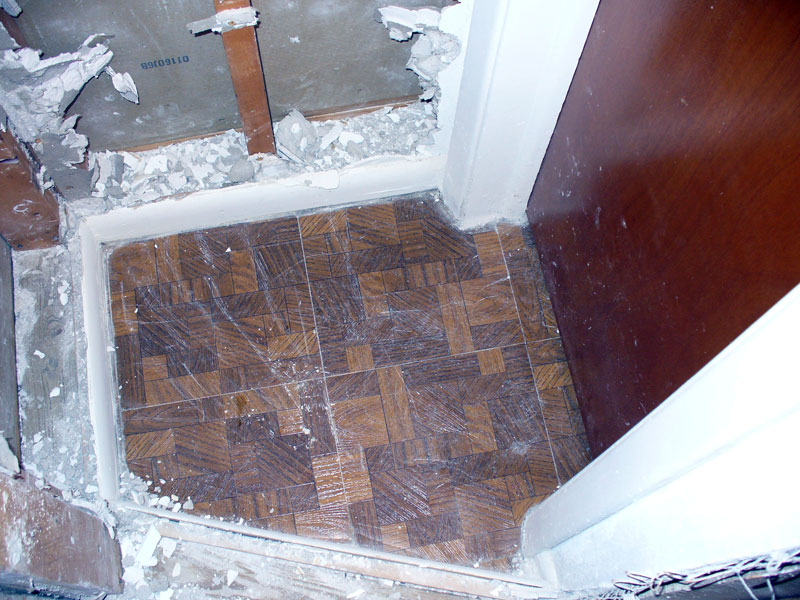
• And here's what passed for a coat closet. Those cheesey vinyl parquet tiles are 12" squares.
• The wire you see is to the thermostat. It comes from the air handler closet into the back of the coat closet, then out the side of that closet, mounting on the wall. Paul has to come up with a temporary solution to this one!
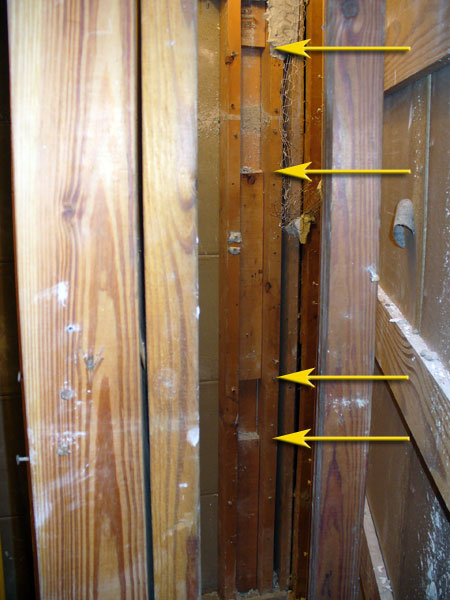
• Another day, another oddity. The arrows in this photo point to the starting/ending of pieces of 2x4. Why are they there? Why not use a full one?
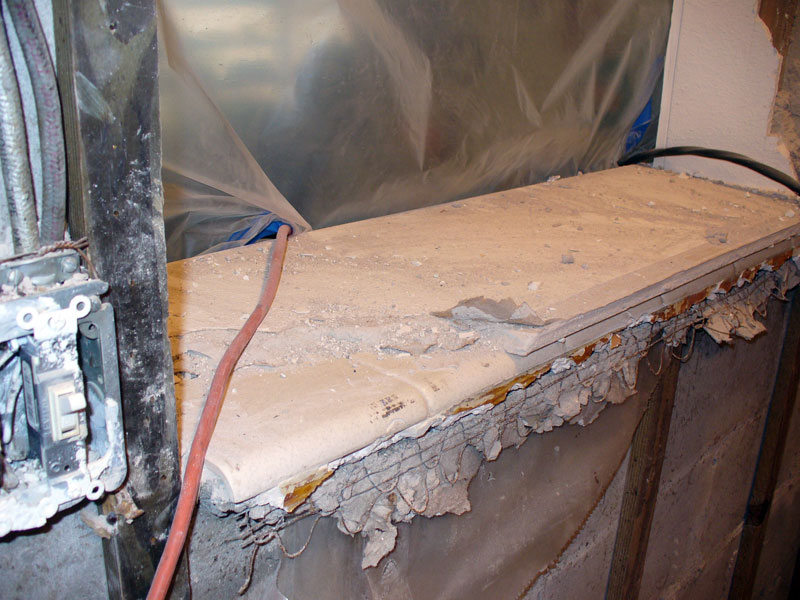
• Surprise! The original ceramic tile for the window sill was under drywall. |
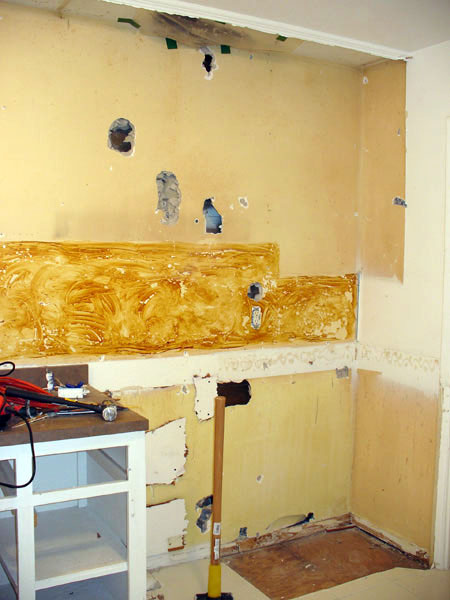
Day 15: What closet?
July 4, 2007: Happy Independence Day! How did you spend it? A picnic in the park? A backyard barbecue with family and friends? Bet you didn't have near as much fun as we did! And if you believe that, have I got a bridge for you. All sarcasm aside, the day off work was still a workday for us and we made good progress. The two miserable excuses for closets are pretty much history. The final outer walls are still up for now, but that's only because at that point we can't keep the area sealed up. We'll be going to the Lowe's this weekend looking for something to create a temporary plastic wall around those areas. For now, though, we've draped most of the furniture in the living room and dining room. Since the air handler closet is next to the soon-to-be-moved coat closet, we've rigged a sheet over the hallway opening by the air handler's louvered door. Hopefully this will keep most of the dust from getting into the unit. Over at the wall adjoining the family room, Paul got down the rest of the wall board. Now you can see just how far that poured concrete header goes. And he discovered another surprise. That window opening was such a pain because the former owner had textured and painted (with a flat paint!) the deep sill. It was impossible to clean. As Paul removed the wall board, he discovered the surface of the sill was modern-day drywall instead of this monster plaster wall board we've been dealing with. And under it was the original ceramic tile! Why didn't they just leave it? My guess is it was damaged by an actual window there, but Paul still has more to remove. TOP
|
End of Day 15
|
Photos:
• If only we'd gotten the compressor and its air hammer at the beginning of this project. It made pretty quick work of the final section of ceramic floor tile.
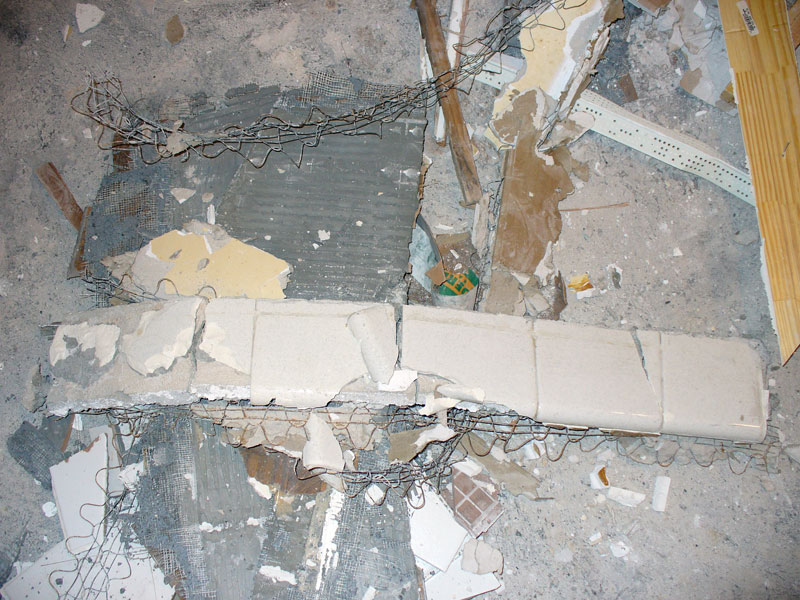
• It also came in handy on the window sill. It cut right through the caulk they'd used to attach the drywall to the ceramic tile sill. Then without much effort, it helped remove the tile portion in mostly one piece.
• Okay, I got a bit carried away and used the air hammer to get rid of the 1" high ridge separating the sloped portion of the sill from the 'inside' portion.
• Paul was on the ladder getting down the remaining wall board up to the ceiling on the one long wall.
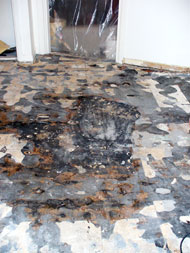
• Guess what was under the floor tile in the closet? There's the terrazzo! |
Day 16: The joy of power tools
July 5, 2007: Boy does time fly when you're having fun. I was going to town with the air hammer when Paul said it was already 6:30. Whoops! We usually try to end off by 6:00 because cleaning up takes so long. We didn't do too much cleaning tonight.
While Paul continued removing the upper portion of wall board, I used the air hammer on the closet floor. It made pretty quick work of the tile. It wasn't as much help on the concrete backer board. Under that was the same vinyl floor tiles you see in the coat closet. And under it, the terrazzo we've seen throughout the rest of the house. Why was the kitchen different? Good question. Once I finished that piece of floor, I went to work on the window sill. Paul suggested I use the air hammer there, too. It certainly made the task pretty simple, and more than a little fun. Nothing like power tools!! The ceramic tile that was under the drywall only went back as far as a window used to be. Once I removed everything, we could see the slope of the original outer sill (remember this used to be an exterior wall). The air hammer cut right throught the 1" ridge in the middle, too. There's still a definite 'hump' there, but it will be much easier to work around now. We're going to drywall the kitchen side, but on the family room side, we're going to turn it into a built-in bookcase. To finish cleaning out the opening, Paul had to come to my rescue with his drill. The wood on either side and the top was screwed with tapcons. Once the sill area was all cleaned up, we put the plastic back up, but on the kitchen side this time.We didn't do anything to clean up in the kitchen itself, but I'd made quite the mess into the family room as I demo'd the sill. I took the time to vacuum up that area (and wiping down the stove which is right under that opening). TOP
|
End of Day 16
|
Photos:
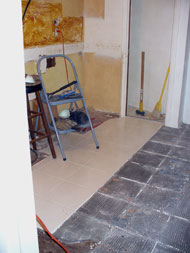
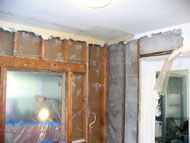
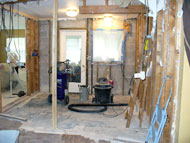
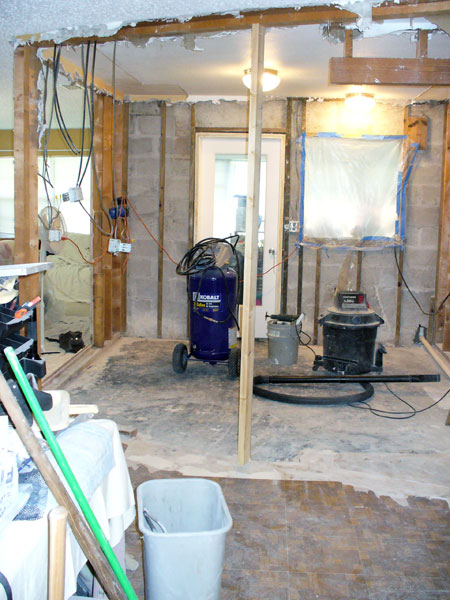
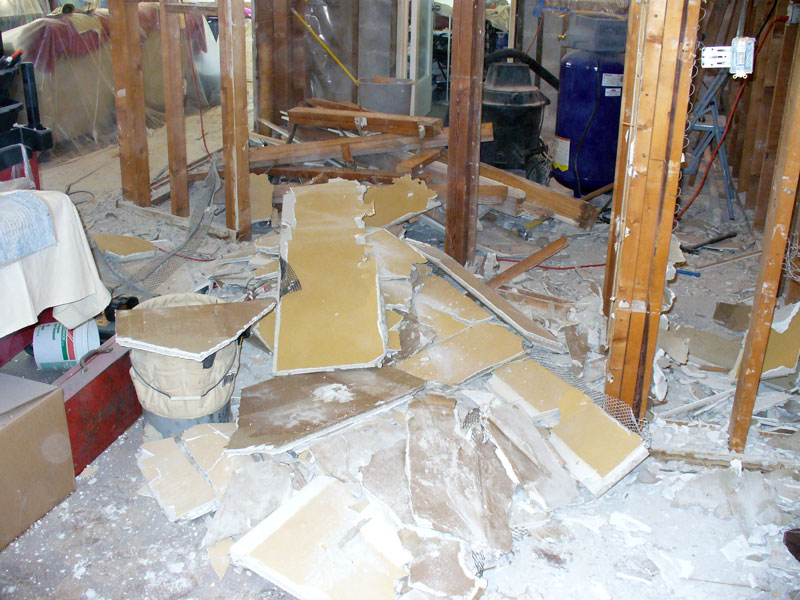
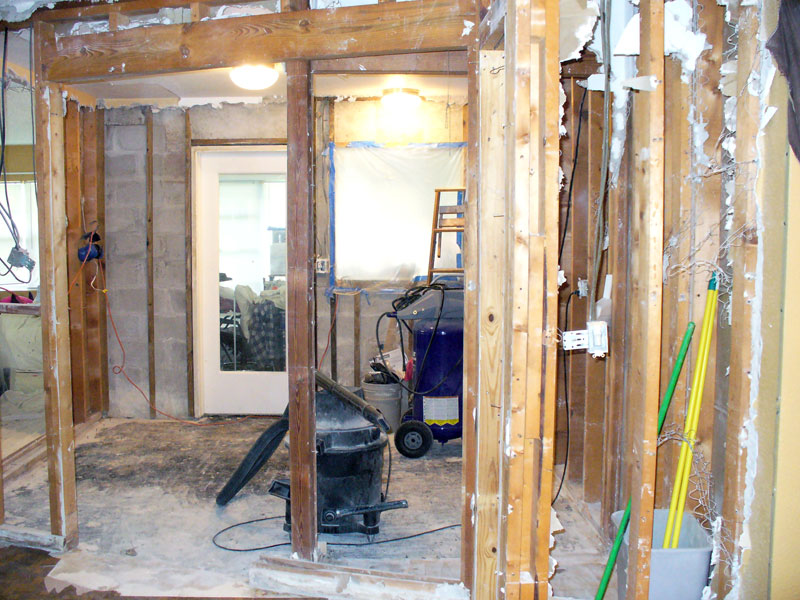
• Ever curious what this place looks like in the middle of a full work day? Here you go. There was so much on the floor, we had to stop and start taking garbage out. It was two wheelbarrow loads of wood. Before the day was done, I lost track of how many loads of wall board pieces and dust!
• Here was one of my favorite irritations in the old kitchen. I've outlined the footprints of the pitiful excuses for a pantry (left) and coat closet (right).
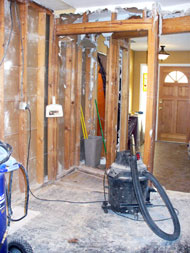
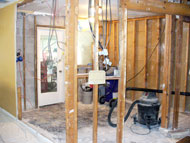
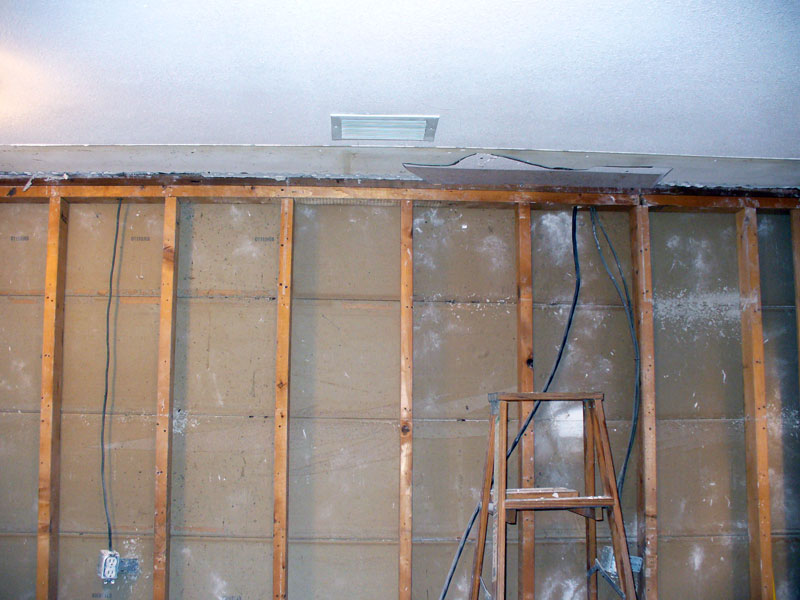
• Now that all the wall board is down, here's a view you haven't been able to see. I stood at the front door for this one. Those studs on the near wall will be going away too, and we'll be framing out a new closet to the right. |
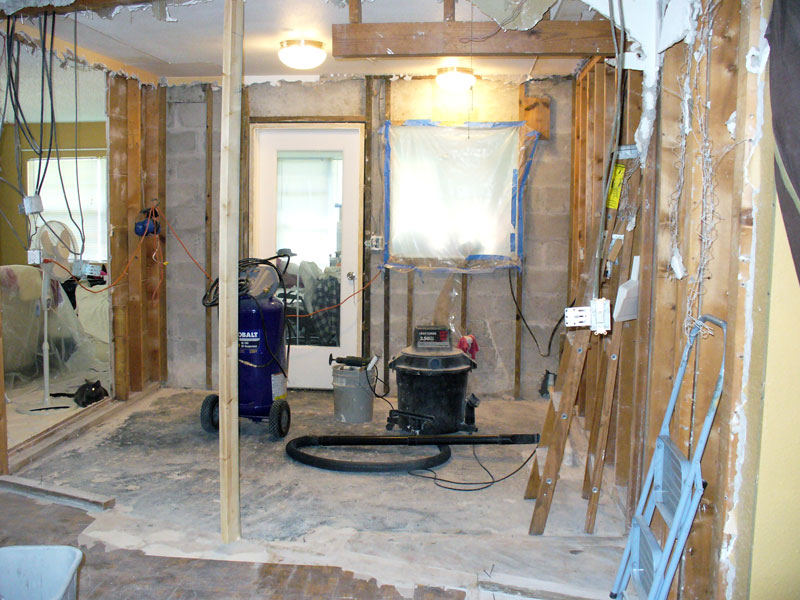
Day 17: Demo!
July 7, 2007: Know how we take Friday nights off from working on the kitchen? Well there wasn't an entry for last night, and we didn't knock anything down, but we were at Lowe's for about two and a half hours!
We made some serious progress today. It's funny -- we've done a lot more prior to today, but seeing the last of the wall board down, and some of the studs gone, made it feel like so much more. We couldn't find anything at Lowe's that would enable us to put up a temporary plastic "wall" to contain the dust -- it's really like volcanic ash -- so instead we've draped almost everything. (Once we have the new walls drywalled and sanded, we've got a major cleaning job in store.) We also turned off the central A/C -- ah, hard physical labor in Florida's July heat and humidity! Got to love it. In the second end of day photo, you'll see we removed a portion of the west wall (next to the living room. The portion that still has wall board up will remain with full upper and base cabinets. The countertop and base cabinets will extend all the way to the clump of studs you see just left of center. All those studs to the right of that clump will also be going away and stay fully open. We're still debating whether to remove that clump of studs. We were told by a General Contractor (G.C.) neither of these two walls are load bearing, but Paul's still concerned about the ceiling sagging. We may leave it, drywalling around it. We're also still debating whether to have short upper cabinets over the peninsula portion of the countertop here.
We had only one minor setback today. We'd bought a pair of nippers last night to cut off the nails sticking out of the concrete (from the plywood subfloor). Unfortunately they didn't even come close to cutting the nails. If you try to pull them out, the heads just pop off. We'll have to come up with a different solution. We ended up not finishing until pretty late and we were both bushed. We went out for dinner! TOP
|
End of Day 17
|
Photos:
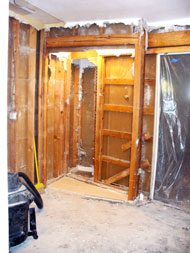
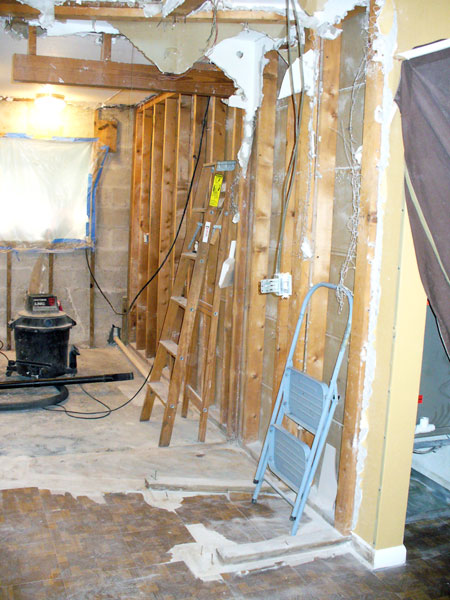
• If a picture is worth a thousand words, this one tells the story of today. Paul had to work pretty hard to wedge this 2x4 in place. Those header 2x4s had sagged about 2".
• Here's the full view of the temporary support. By the way, that kitty guarding the living room (to the left) is the youngest and most fearless of the bunch -- Skeeter.
• Only thing left to demo are those two footers on either side of the stepstool and the studs on top of them, along with the remains of that upper section from the old kitchen pantry/closet.
• Now those are some serious nails. This photo gives you another look at the terrazzo that's under the vinyl. That arrow on the floor was apparently put there long ago. |
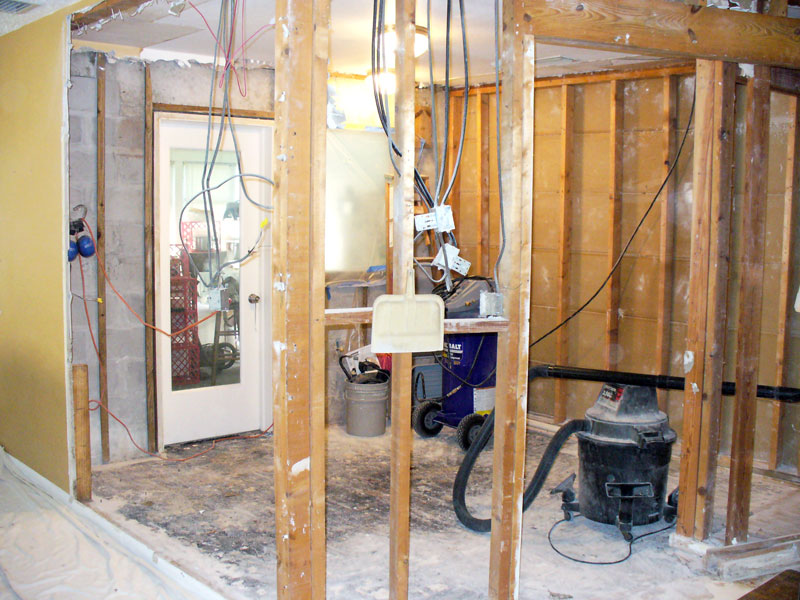
Day 18: Back to the drawing board...
July 8, 2007: Today was not a good day. The first end of day photo sums up the problem. See that fresh 2x4 all by itself? It's holding up the ceiling. When we removed the majority of the southern wall (by the dining room), Paul stood back and noticed the 2x4 headers were sagging drastically. Remember yesterday I said the G.C. said it wasn't a load bearing wall? Well, yes, if you look in the attic (as he did), you see it's not holding up the roof. That's resting on the exterior walls. But after we noticed the sagging, Paul went up there to investigate further. Turns out the rafters weren't made long enough to span the whole space. They've sistered two together, with those overlaps following an angular line that just so happens to match up to the odd angular wall of the old kitchen. So it's back to the drawing board. If we have to re-support that section, it throws a major monkey wrench into the plans for the new kitchen. The refridgerator was going right where that old angular wall ended at the eastern wall. We're going to have to call the G.C. back out and see what suggestions he may have.
There was one bright spot today. We got the right tool for handling those nails coming out of the concrete -- a cut off blade for the drill. It throws out a lot of sparks, but does a good job. Most of the nails are pretty ordinary concrete nails, but a few look like minature railroad spikes. Here's a photo of a couple. TOP |
End of Day 18
|
Photos:
Didn't bother with any as there's really nothing to shoot.
|
Update
July 15, 2007: We haven't been able to do much since the last entry. The G.C. came out Thursday and gave us a solution for shoring up the ceiling without having to put that wall back. Unfortunately he's booked right now and we can't wait for him to be free to do the job. We were out of town yesterday (Saturday), so today Paul lost about ten pounds in sweat up in the attic looking at the situation and getting the area prepped (moving insulation out of the way). Then it was off to Lowe's for a slew of 2x6s. We have eight ceiling joists to shore up. Paul will be sistering an 8' 2x6, centered on each overlap joint, then inserting bracing between the joists to ensure they don't twist. Because of this issue we have to make one change to the plans. We'll have to leave the cluster of studs at the end of the future peninsula. They're holding up two 2x12s that are supporting the ceiling beyond the kitchen. Not sure when Paul's planning on doing the attic work. I hate the thought of him up there after work, but we're running out of time. My recommendation is to finish cutting off the floor nails, remove those last studs (around the old closet), and frame up what we can during the week, and save the attic work for Saturday morning. TOP |
|
Photos:
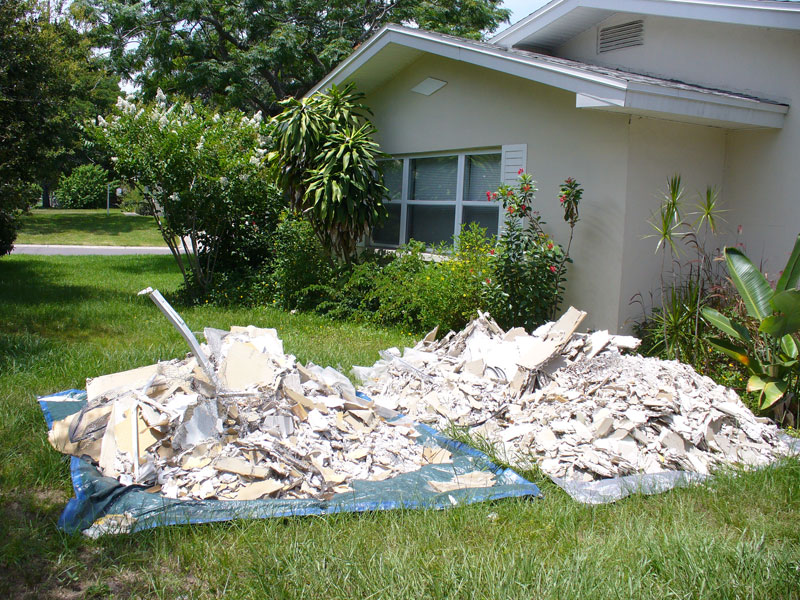
• These two piles contain all the wall board, ceramic tile, and backer board we removed. Pardon the overgrown shrubs!
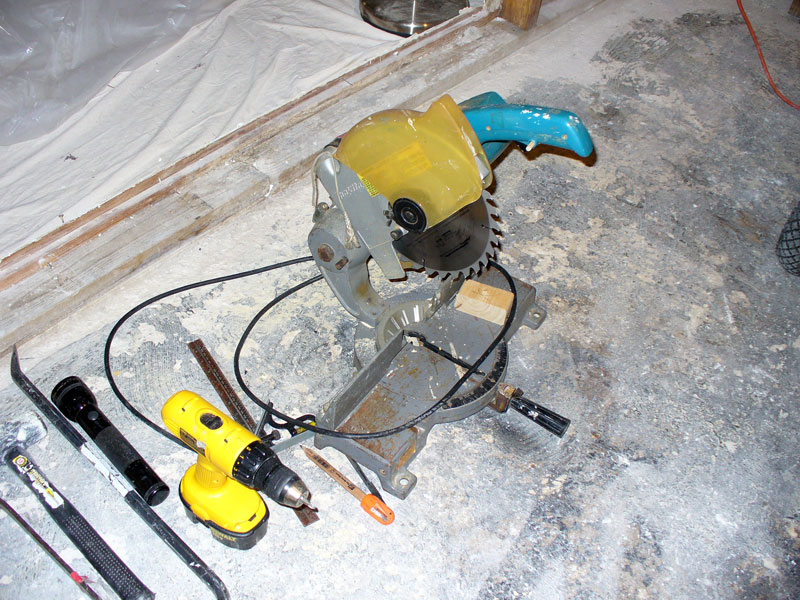
• I got to use Paul's chop saw. I still want a sliding compound miter saw!
• Paul's current domain -- the attic. Here's the first sistered joist. You can easily tell the new wood. The arrow points to the overlapped joint of two original joists.
• Here's a view from the other side of the overlap.
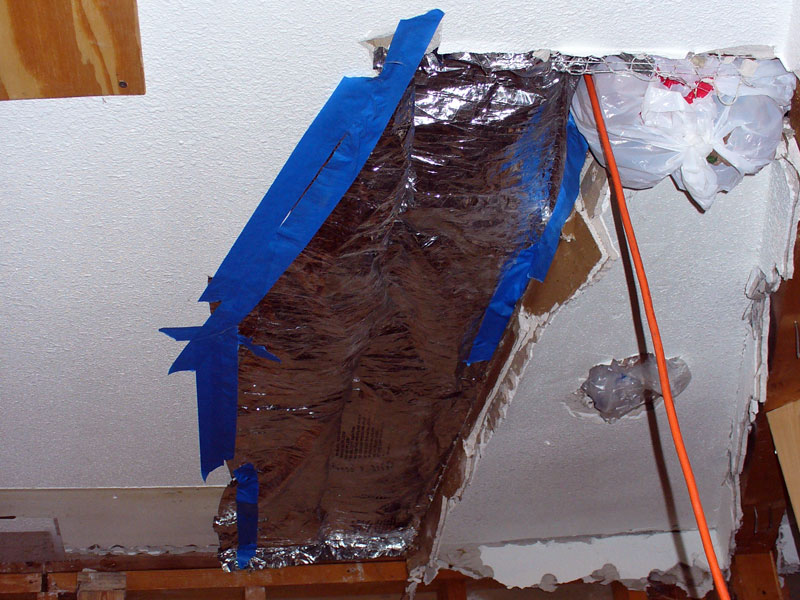
• The temporary access panel.
• And one very fancy temporary ceiling patch.
|
Day 20: Another detour
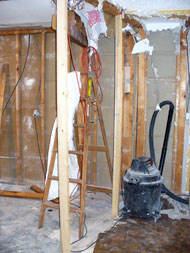
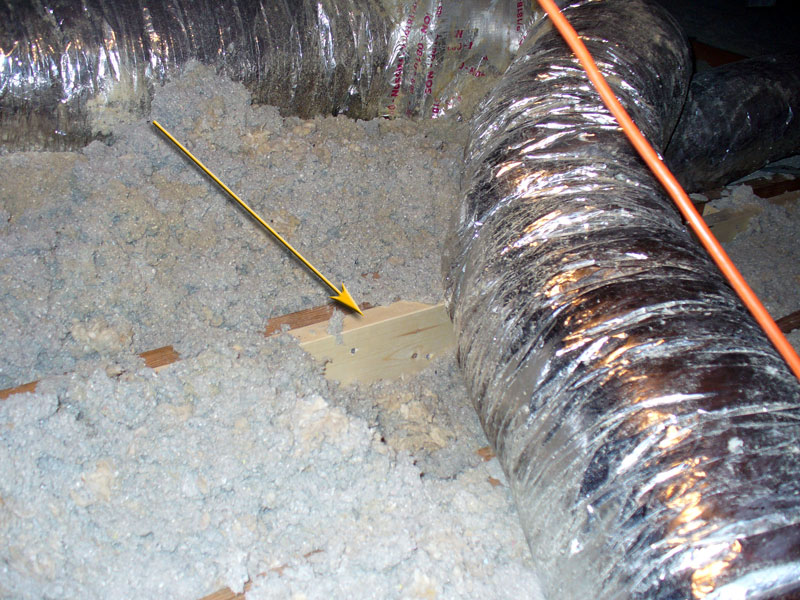
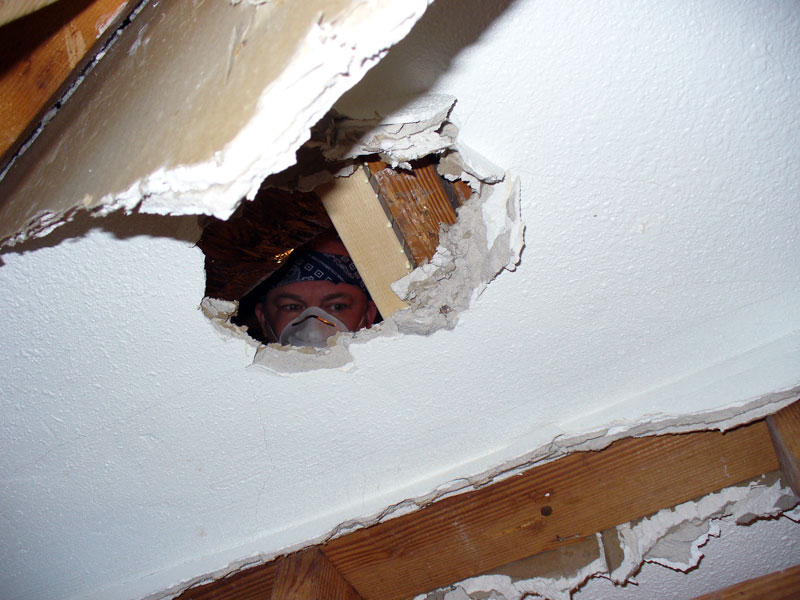
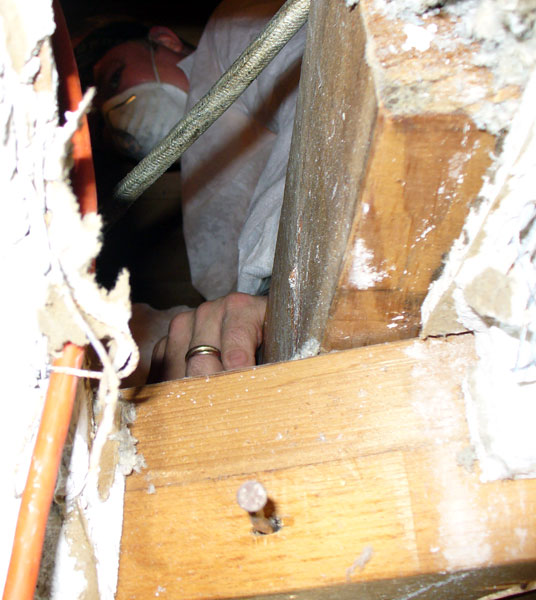
July 19, 2007: Didn't do an entry last night. There's not much to say or show, but we are back at work. Paul had to make a temporary attic access opening in the kitchen for passing the 2x6s through. Last night -- yes, he's doing this after work anyway -- he got the first joist done. He came down totally soaked. To help with the heat, he just wore a painter's coveralls over his underwear, but it only helps so much. This is Florida in the summer after all. I went out today and picked up a few more pairs for him (they tear easily). To keep the insulation out of his eyes, he wears his swim goggles. They're uncomfortable, but the do a better job of protecting his eyes and are less prone to fogging up.
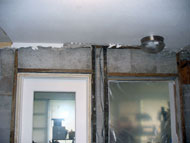
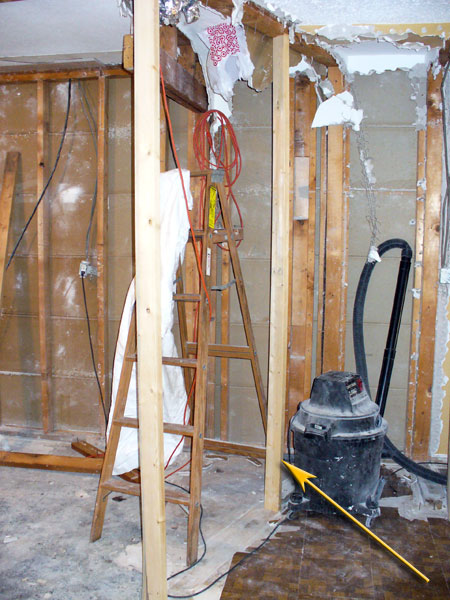
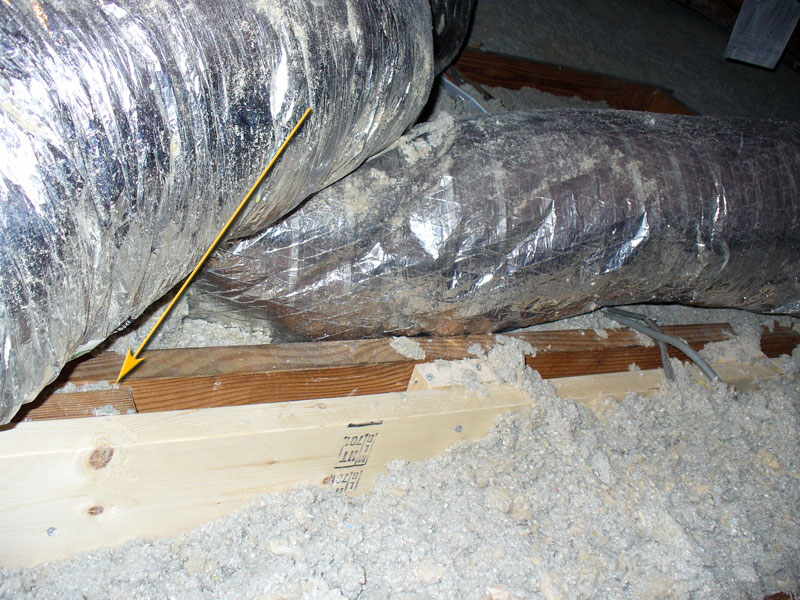
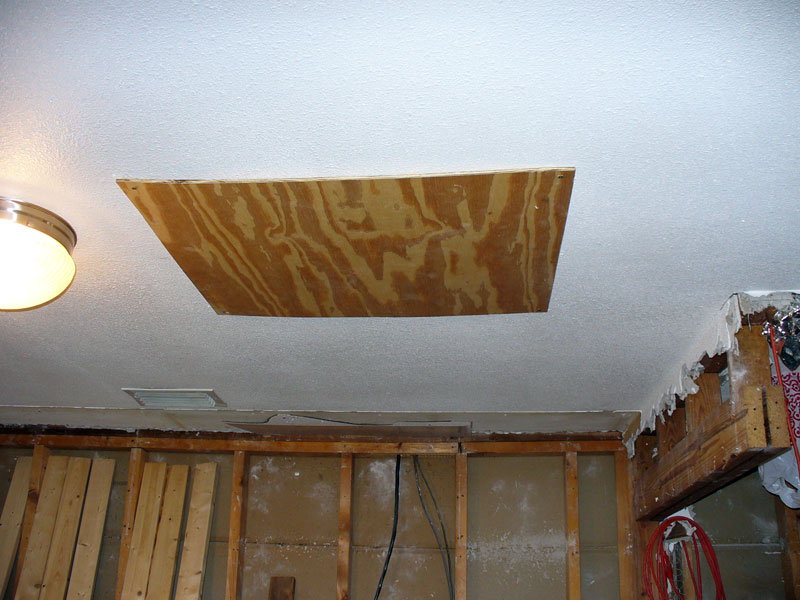
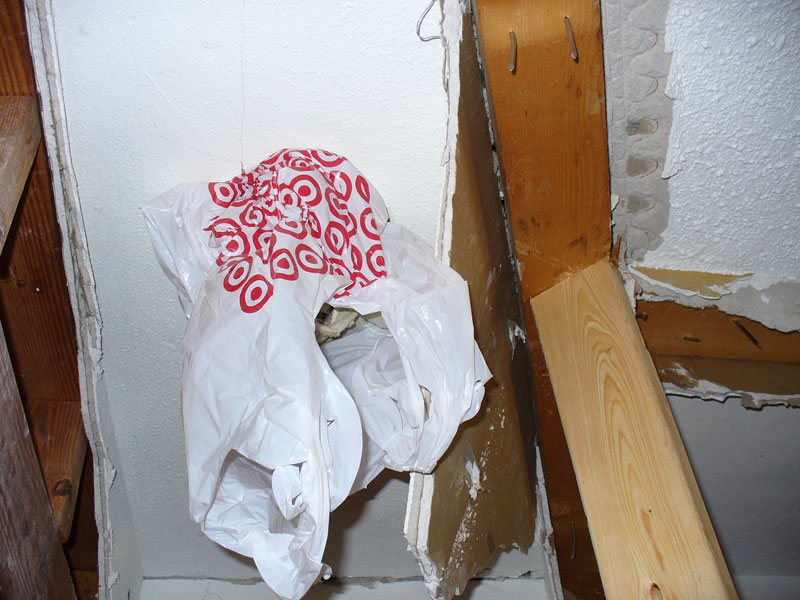
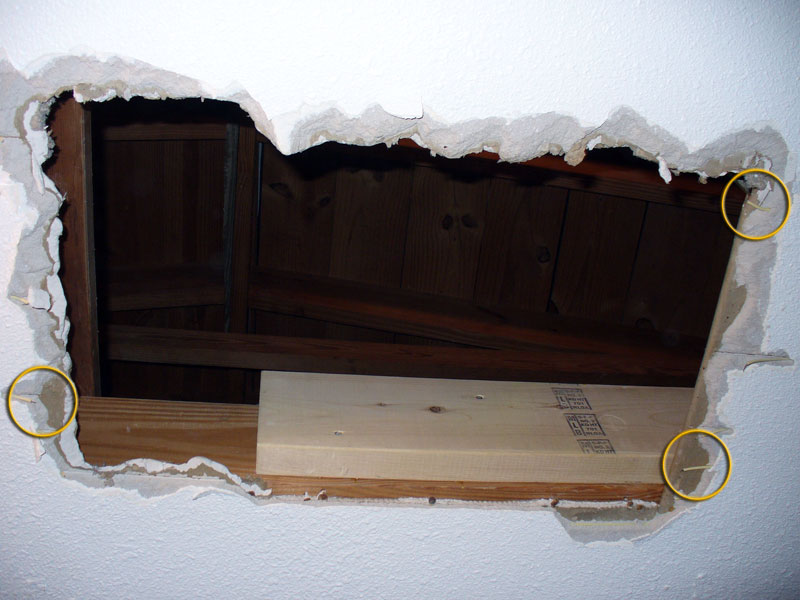
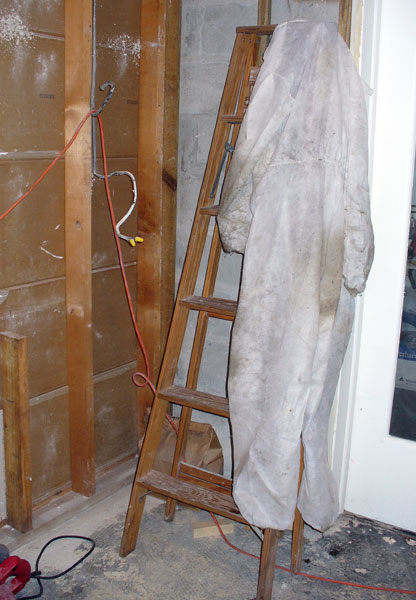
I got to use a new power tool; a chop saw. I cut up a 2x4 into 5.5" lengths for him to use as fillers. In this photo you can see a couple of them between the new 2x6 and the old one. Tonight though, Paul ran into more problems. Attached to the next joist was a box that held the light fixture in the old kitchen closet. It was in the way, so we demo'd that, only to have to deal with another problem -- a 2x4 header from the old coat closet was also in the way. Paul had to come back down and insert a second vertical 2x4 support under that joist. You can see an arrow pointing to it in tonight's end of day photo. He then went back up and removed the 2x4. It's one of those on the floor by the ladder. (That's his painter's coveralls hanging to dry on the ladder.) By that time, it was already late. As we were' cleaning things up, Paul had to temporarily patch the hole from the light fixture we removed. Fancy, huh?
Tomorrow's Friday and our traditional night off. Hopefully we'll make good progress over the weekend, but Paul will have to take breaks. It's just too hot up there! TOP |
End of Day 20
 |
Photos:
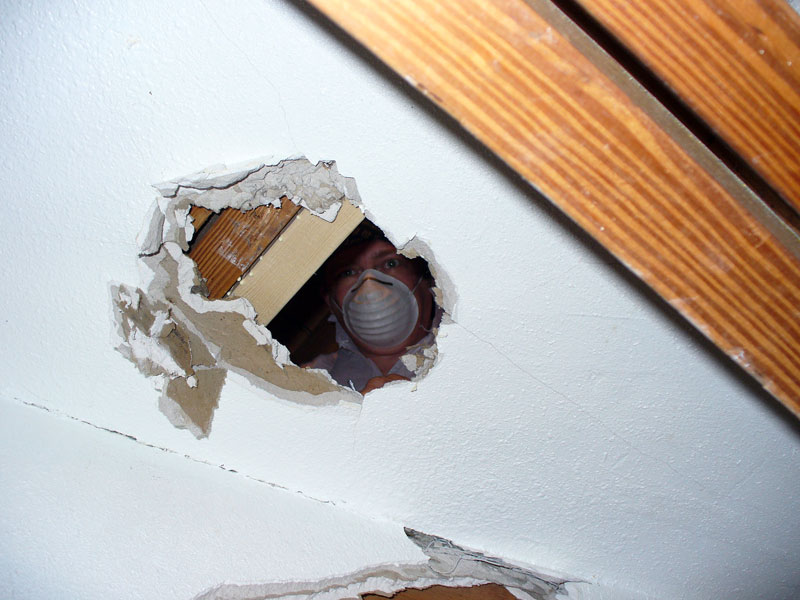
• My hero! A peephole view of my honey at work.
• Here he is again...
• And one more shot.
|
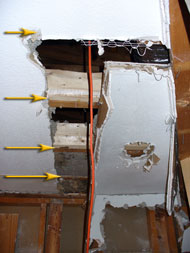
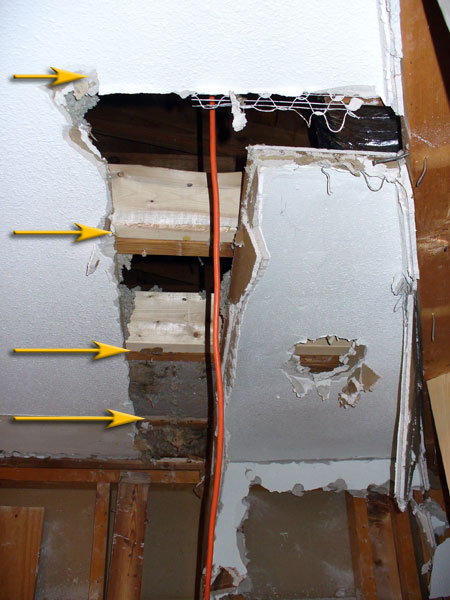
Day 21: Getting there
July 21, 2007: Over one month without a proper kitchen. This was my bright idea, wasn't it? Paul spent a good part of the day up in the attic and got three more joists done -- halfway there. In tonight's end of day photo I've got arrows drawn to the newly sistered joists. You can't see the fourth one, but trust me, it's there. That big hole is where the header to the kitchen closet used to be. Once we get to the drywall stage, we're going to have a lot of patching and fixing to do to the ceiling. There's not a lot for me to do while Paul's in the attic. He doesn't want me to do anything loud (like using the cutting wheel to get the nails still sticking up in the floor) because I won't be able to hear him if he needs something. So my main job is to hold the ladder while he's on it, send him up 2x6s when he's ready, pass him other items he needs (and take them back when he's done), get him cold water on his breaks, and generally provide moral support. Today I had to cut some more filler pieces, but that was pretty quick. If we're lucky, he'll get the rest of the joist sistering done tomorrow, but that's not the end of it. He then needs to go back and put in blocking to prevent the joists from twisting, as well as attach some vertical supports up to the rafters for good measure. TOP |
End of Day 21
 |
Photos:
• Paul's access opening -- it became an even tighter squeeze once that particular sister went up. Note the old heating wires (circled).
• Paul's 'uniform' hung up to dry after a day in the attic. You could wring out quite a bit of sweat from that puppy.
• Here's an ingenious patch. When we had the ductwork all replaced, they left all sorts of trash up in the attic. This was a piece of the flexible duct covering. We cut it into two pieces and used it as a temporary patch.
|
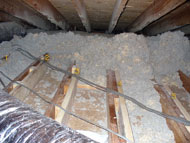
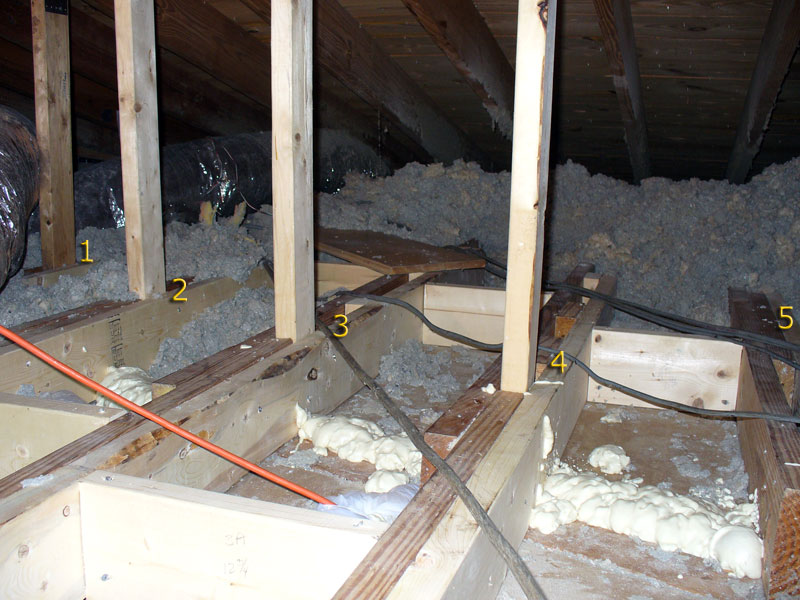
Day 22: 6 sisters
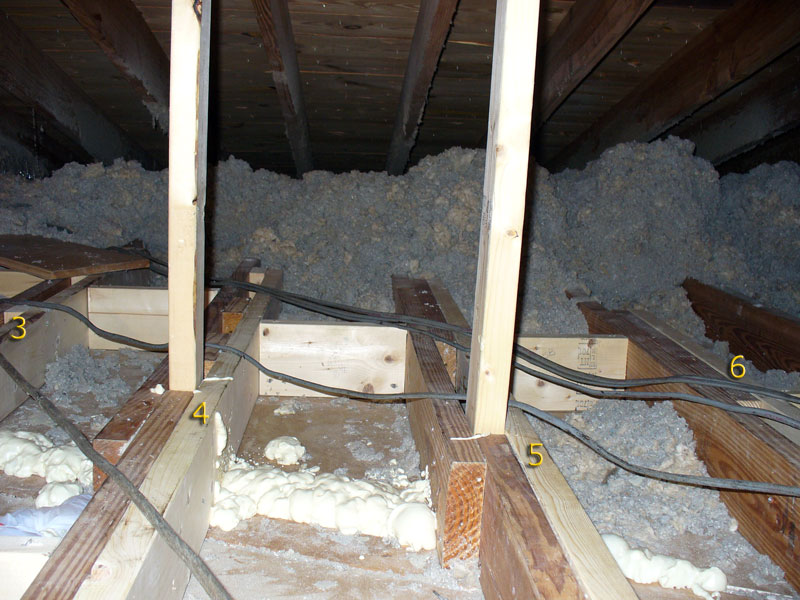
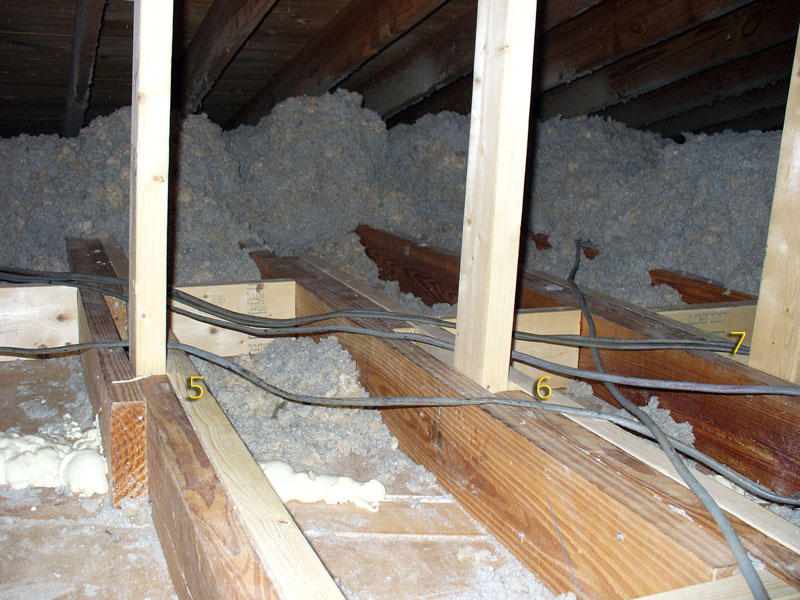
July 22, 2007: Yeah! The sistering is done! Turns out Paul only had to sister six joists. Of course, his work in the attic isn't done, but at least this phase is complete. Next is inserting some blocking to keep them from twisting, and the vertical supports just to be safe. Then we can finally get back to the last of the demo and cross our fingers the ceiling stays put! It was raining today, so it wasn't quite as hellish up there. In the two end of day photos you can see all six sisters. Paul couldn't fit them all into one shot. You can see the romex (wiring) and duct work he had to work around. What you don't see is a mixing box for the ducts that was also in the way. He had to temporarily rig it up so he could get the sister in. There was also some blocking in his way, so two of the sisters had to be notched (numbers 3 and 6).
I also took a shot of the access Paul cut for this work. I've circled three of the more noticeable old heating wires. These ran between the wall board and the very thick layer of plaster, all over the place. How unusual. Glad they're no longer live. TOP |
End of Day 22
|
Photos:
• The first of four photos of the finished joists. In this one you can see 1-5. You can also see some foam insulation Paul used to temporarily block up some of the gaps from around the header that's going away.
• In this shot you can see 3-6.
• Here's 5-7.
• And the last one has a better view of 6 and 7.
|
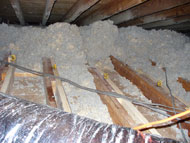
Day 26: All blocked up
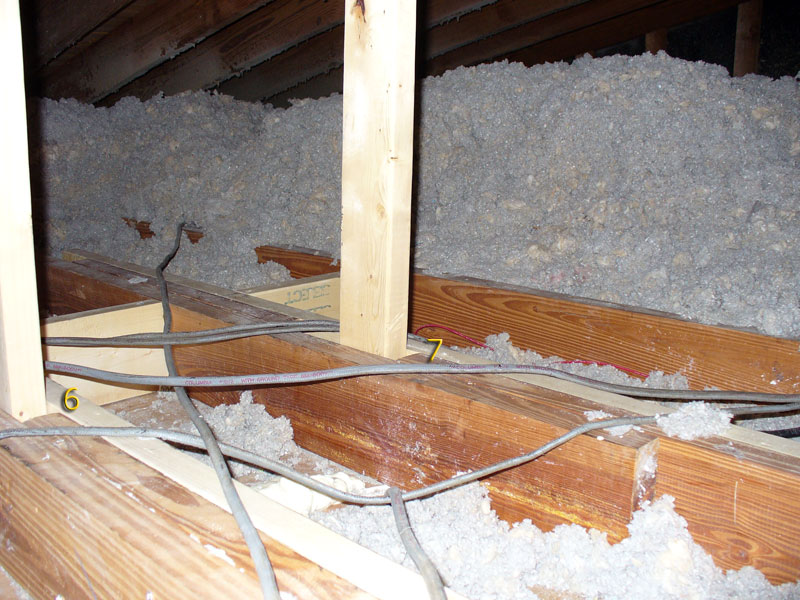
July 26, 2007: Paul spent the last four nights working on the blocking and vertical supports for all the sistered joists. Oh, and I was wrong last time -- there are seven sistered joists, not six. In each bay next to a sistered joist, Paul put in two perpendicular 2x6 blocks. These should keep them from twisting. He gave me the measurements and I got to use his chop saw to make the cuts. Once all of that was done (yesterday), we started on the vertical supports. Paul used 2x4s for this. They're screwed into a void between the original joist and the sister, then with a nail plate they're attached to the corresponding rafter overhead. Once Paul took the measurements for the first one, we had the angle needed for all the rest. Paul cut the first couple and installed them last night, then he took all the measurements for the other five. I cut those tonight and he got them all in. He took four photos to get shots of them all. You'll see the wiring he's been working around, and some of the ductwork. He left the insulation piled up for now -- he still has to go up there to run new wiring. Once that's done he'll replace the insulation. This weekend we can finish up the demo and start framing. Yeah! TOP |
End of Day 26
 |
| |
Next > |
|
| |
|
|


