|
Demo/Framing Index |
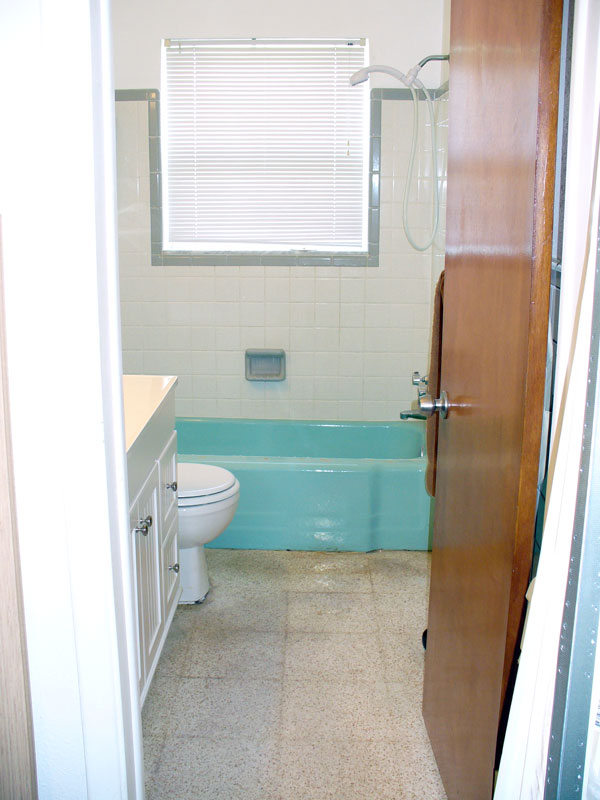
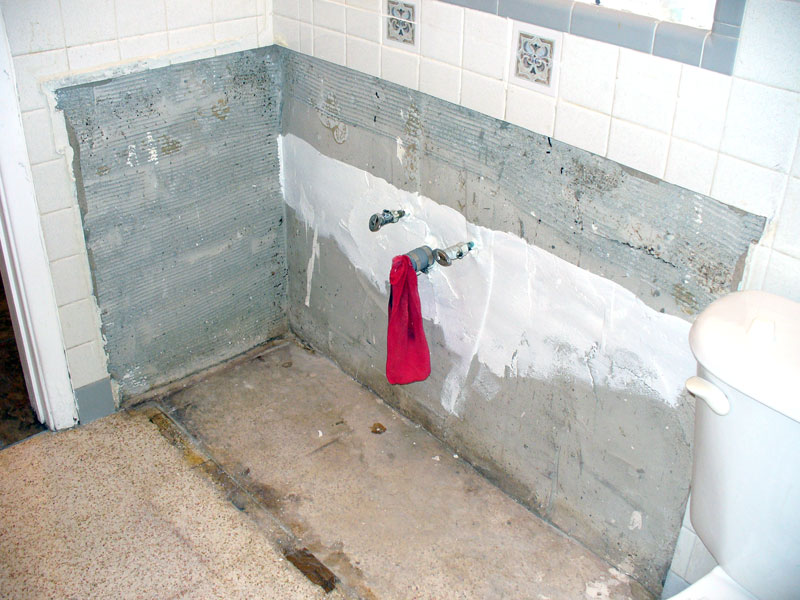
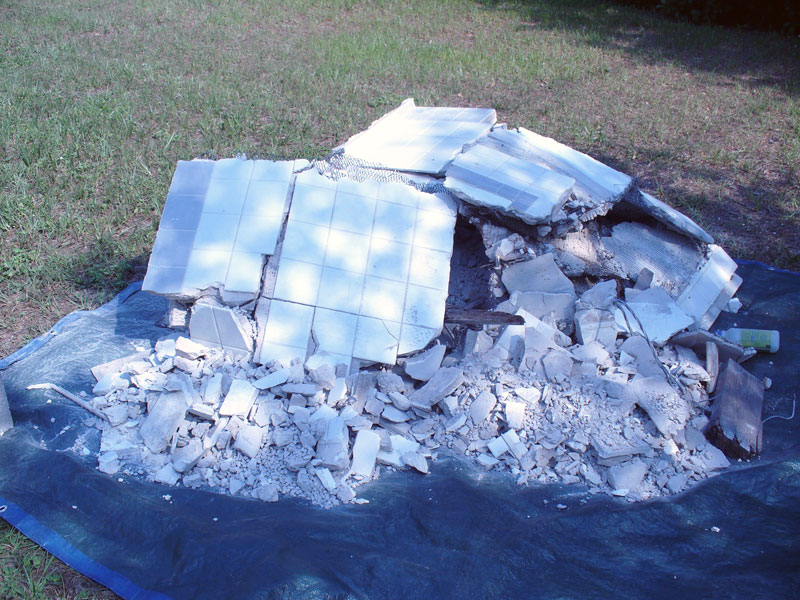
Homeowners Nancy and Paul share their bathroom remodel nightmare... Back Story When we removed the vanity, we discovered more issues. The prior owner had cut away all the wall tile where the vanity was going, then filled all that with concrete! And not even a smooth job of it! As Paul and I discussed how best to handle the transition between wall tile and the planned bamboo wainscotting, we talked about how difficult it was going to be replacing some of those cut tiles, then matching up bullnose to finish things off, plus making up the thickness on the removed portions… it was getting more and more real just how difficult all that would be. In the end we dropped the plans for the bamboo, and agreed to take it all down to studs, just leaving the tub. No!!! I swore after the kitchen there'd be no more gut-jobs! The saving grace is this is a much smaller space. And hey, I won't have to finish removing all that nasty texture with a scraper. So here we go again… |
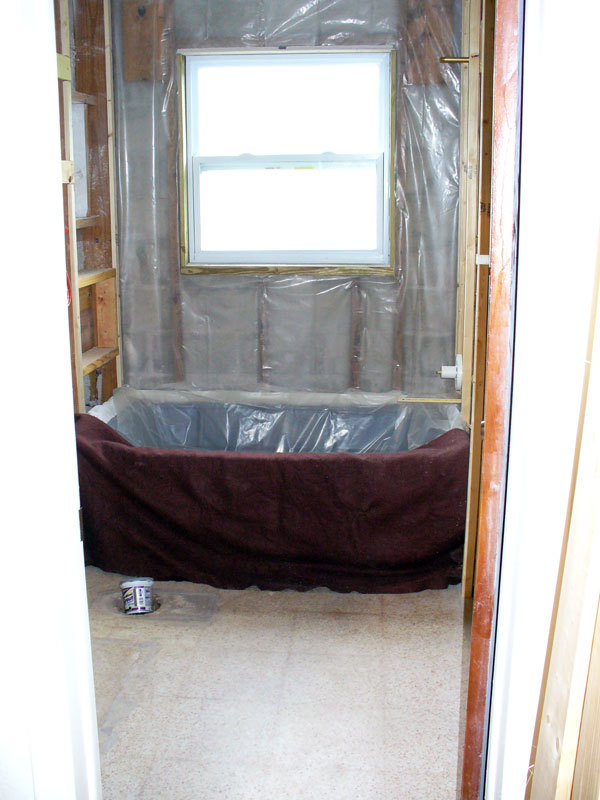
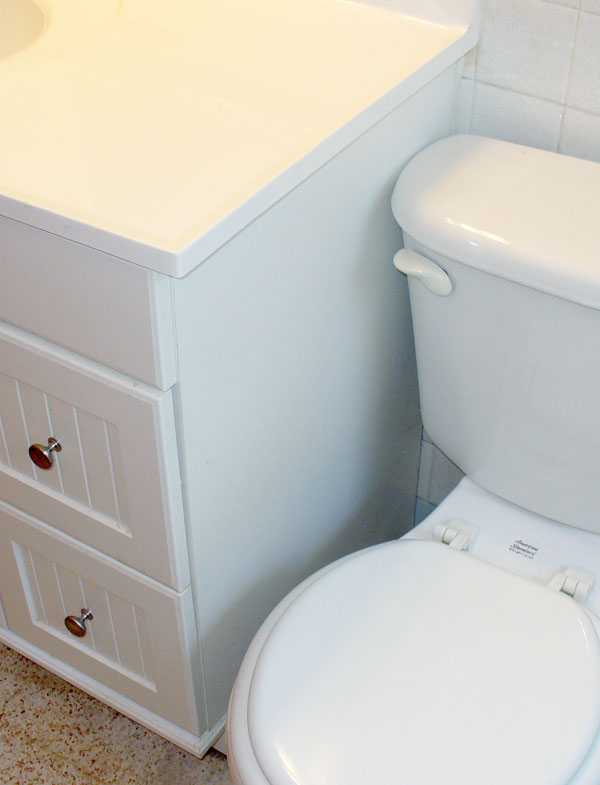
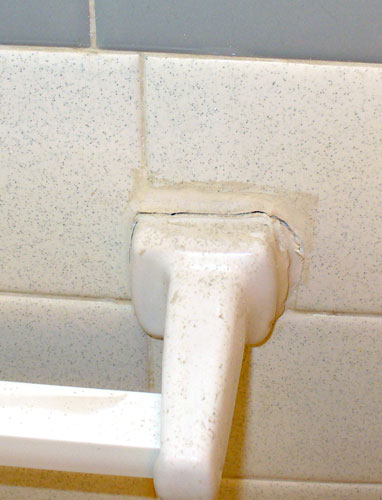
Click thumbnails for a larger view. Bathroom Before
|
Photos: • Here's that pitiful towel bar. Looks like the prior owner already tried to 'repair' it. • Now you can see what was left behind after we removed the vanity. Nice, huh? |
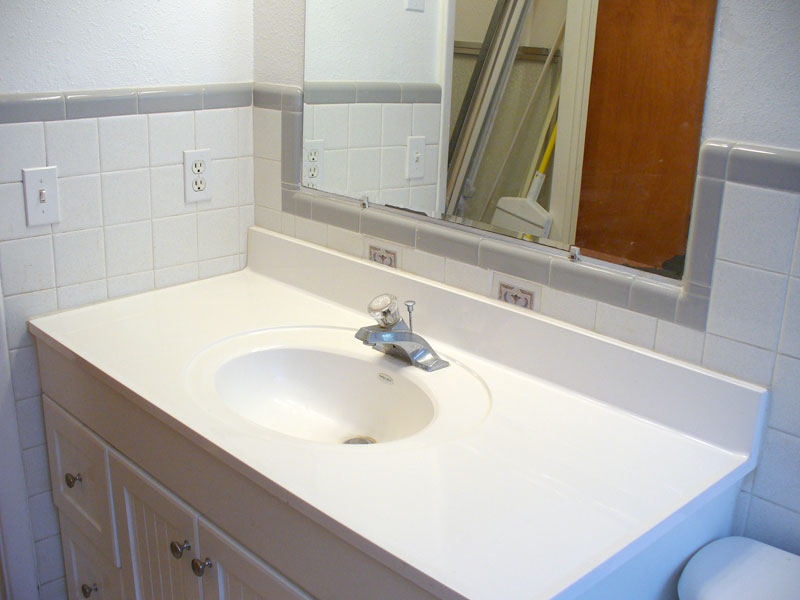
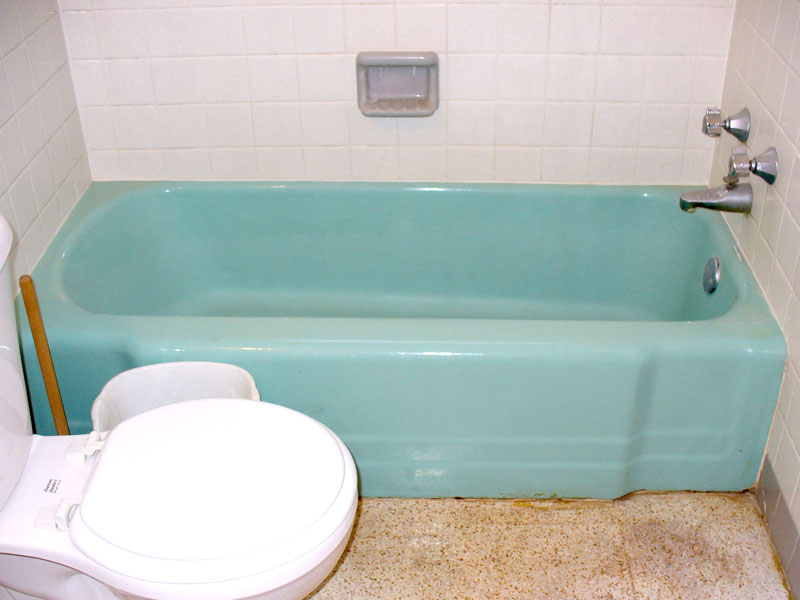
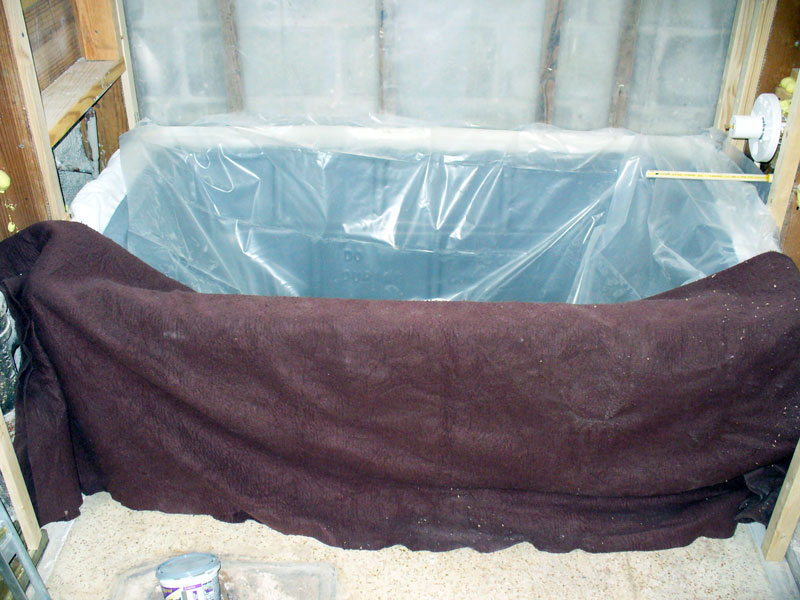
06/06/09: And so it begins… again! So this project begins by removing the shower door, vanity, light, and mirror. We're spending next weekend having a yard sale (to help defray some of the cost of the remodel) and I want those pieces to go out there. Getting the vanity out was not easy. We really wanted to keep from damaging it. After a whole lot of work, we succeeded. It was after getting it out that we realized the countertop wasn't affixed squarely on the vanity. Yes, that's so indicative of all the fine workmanship we've witnessed in this house! The mirror came down with no problems — just four clips holding it up. Paul replaced the vanity light with a single temporary, pull chain fixture. I cleaned away the leftover caulk from where the shower doors once stood. We're going to try and save the tub; just have it reglazed white.
|
06/06/09
|
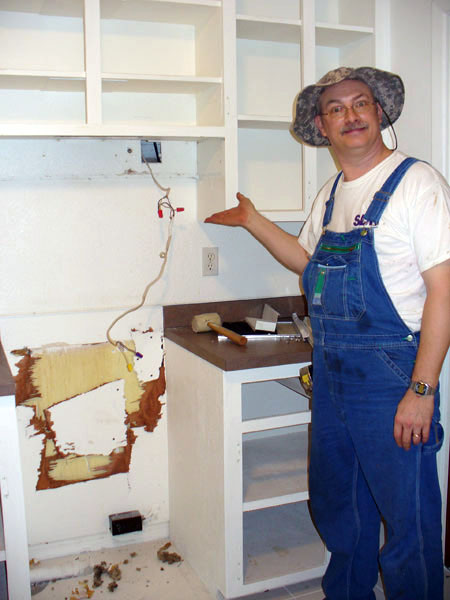
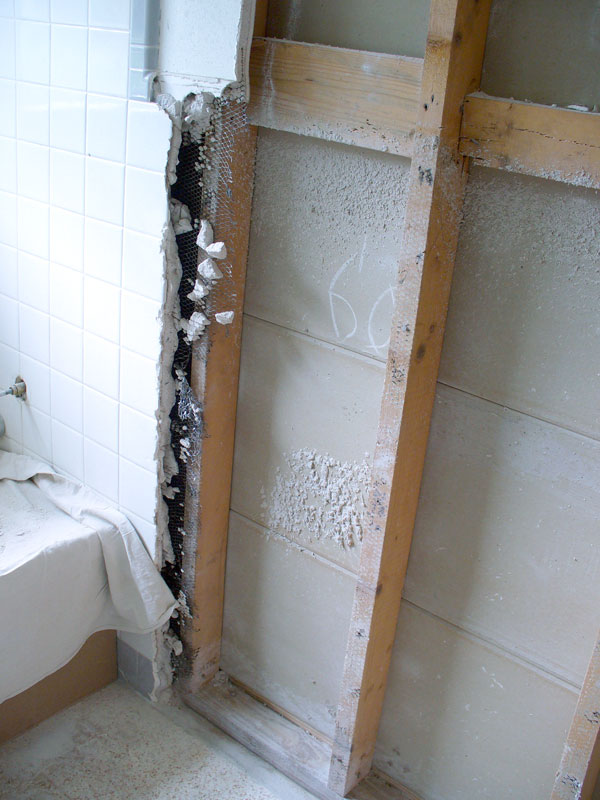
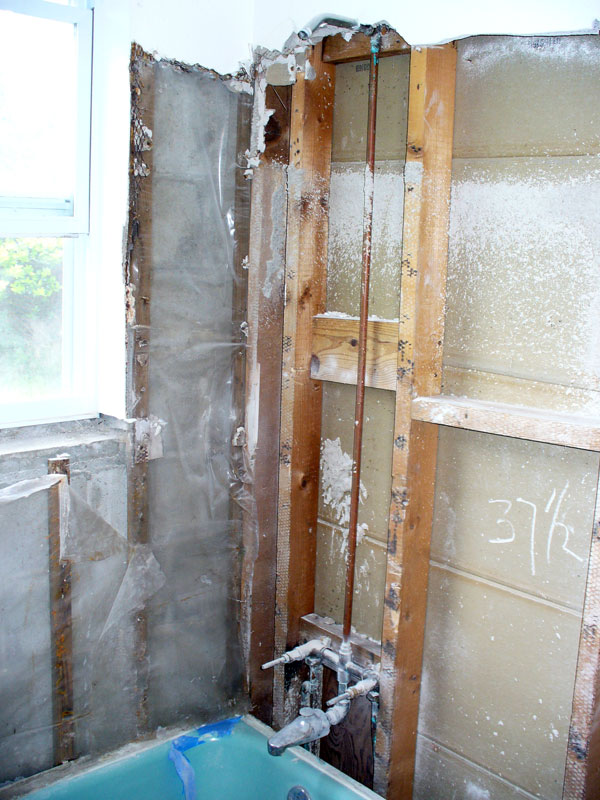
06/20/09: Demo, part 1 We couldn't just take a sledge hammer to the walls as we didn't want to damage the tiled wall of the master bath just on the other side. Removing the tile one small section at a time was very slow and tedious. Paul had the bright idea of just using the air chisel beside the studs, then he'd come through with the reciprocating saw and cut the mesh backing. He hoped we could remove large sections that way. Boy, did that work! After Paul pulled the first 'bay' of tile (just beside the tub), he thought he'd give the other roughly 5' of tile a yank. Since the mesh was just tacked to the studs, the enormous weight of the tile help pull it away. We just had to fight with where it met in a corner. Then we turned our attention to the wall portion where the vanity plumbing comes in. Paul did that part. And what did we find? Yep, water damage! Of course! This wall has 2x6 studs and the lower portions of the ones on either side of the pipes were damaged. The footer between them was nearly dust. Thankfully this appears to be old damage. I guess when they repaired the leak, they didn't bother to fix the damage. Figures. Since we'll need something to attach the drywall to, we'll have to repair that area. Once we had most of the walls removed from the 'easy' areas (not around the toilet and tub), we called it a day. |
06/20/09
|
|
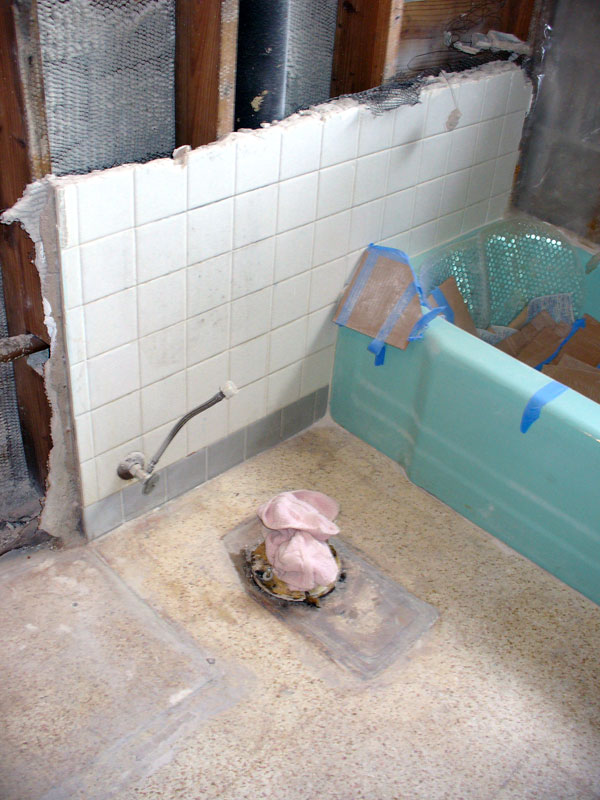
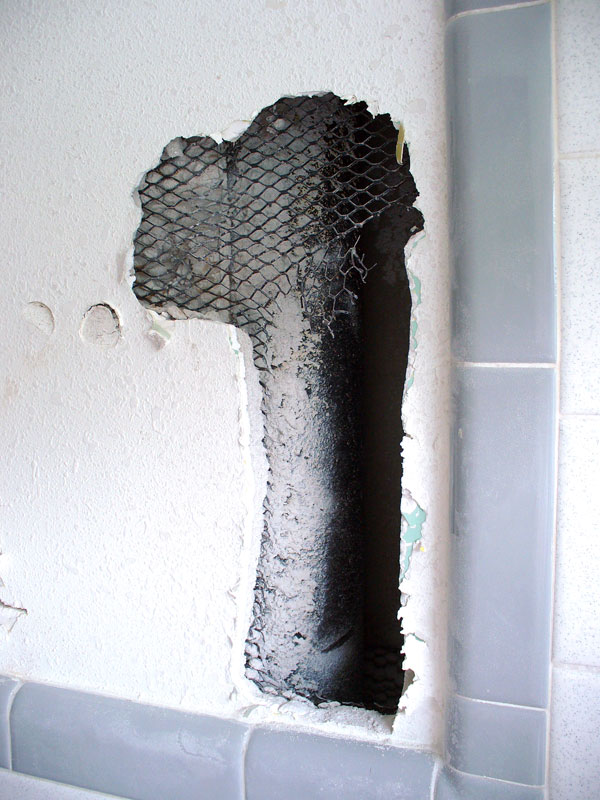
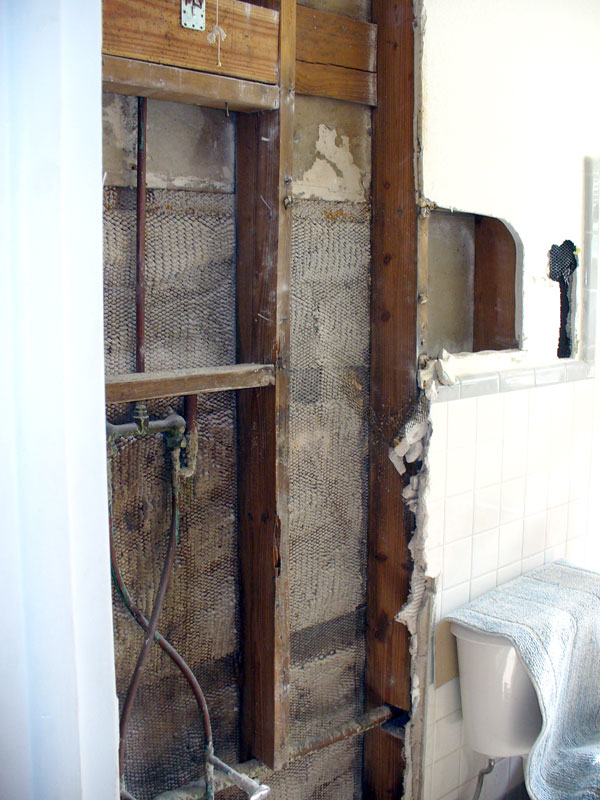
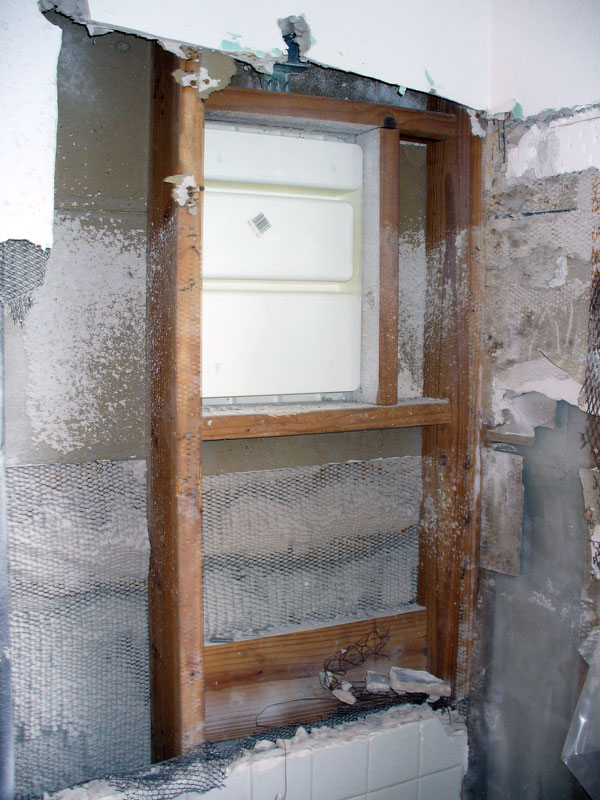
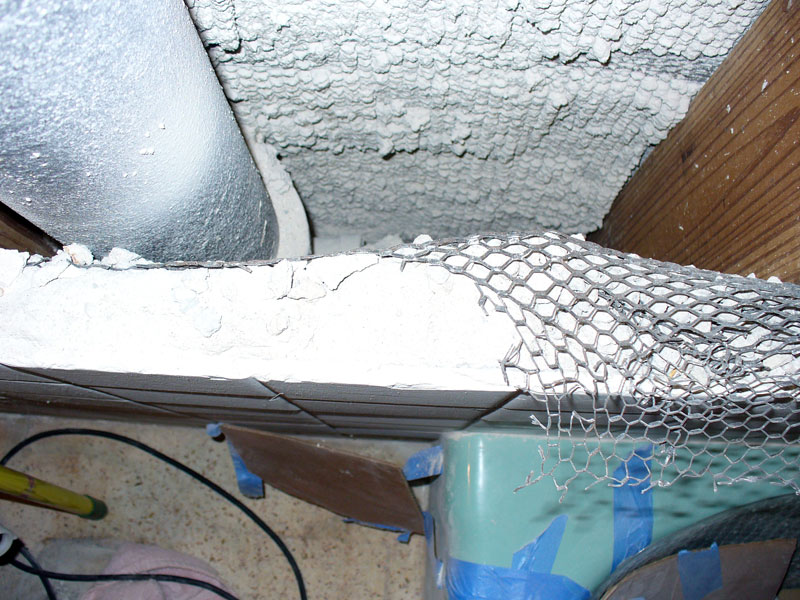
06/27/09: Demo, part 2 We started the day by protecting the tub with a bunch of corrugated cardboard taped all around, but it didn't want to stay put. By late in the day, we mostly gave up. But on the bright side, we managed to get most of the remaining tile down. There's just a section from behind where the toilet was and along the back of the tub. Plus there's a bit more upper wall left. And have I pointed out just how thick the walls are in the tiled area? Here's a close up of part of the remaining section. The flash blew it out somewhat, but it's about two inches thick!! Even with the pneumatic chisel, it takes a while to make it through all that. As I mentioned earlier, we can't just take a sledgehammer because we don't want to damage the tile in the master bath on the other side. As we removed the tile around the window, there was no way to easily remove the marble sill. Paul ended up just taking the small sledge to it. That led to a small surprise. Beneath the marble sill was tile that matched the wall. Don't know why they put the marble over that. There are other sills in the house that are tiled. We'll have to replace the vapor barrier on the east (window) wall. It was suggested that we insulate it, but I don't know if we can find insulation thin enough to go between the furring strips. I'll have to check at my next run to Lowe's. With a good chunk of the wall at the back of the tub down, we could see how the medicine cabinet is framed up on the master bath side. This is the wall that will be getting a niche and I need to work around that. To make it as deep as possible, I'll position the niche below the medicine cabinet. One of the last things we did this day was remove the toilet. It was loose already, so that wasn't too difficult. For now there's a rag stuffed in the drain pipe. If you've ever removed a toilet, you'll understand why. |
06/27/09
|
|
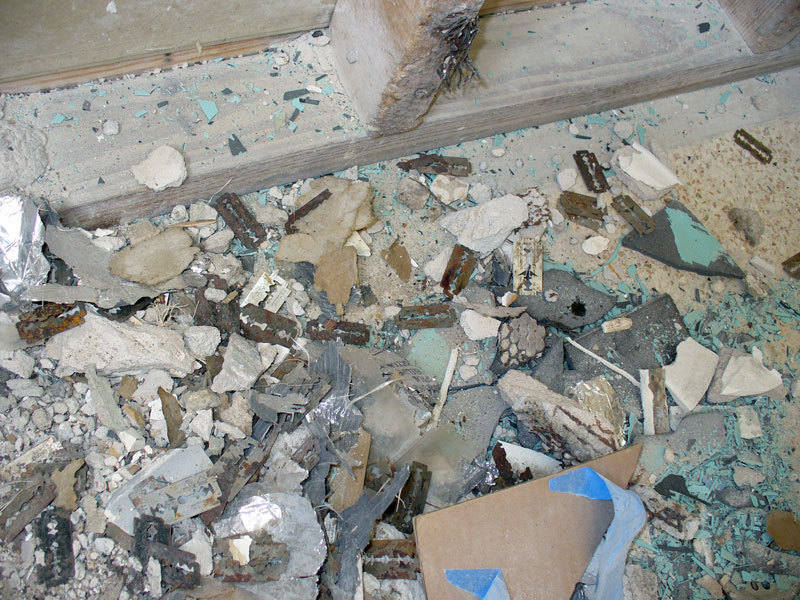
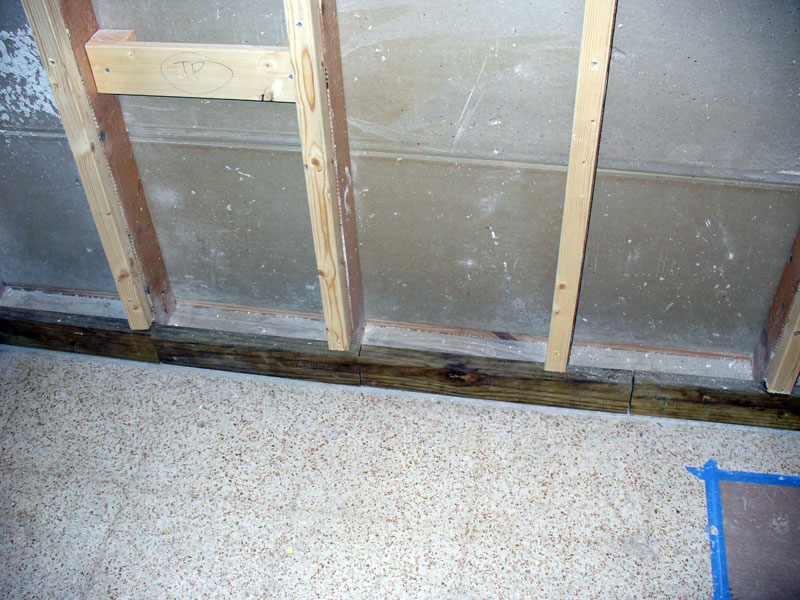
• Need a razor blade? We found lots of them in the area around the tub drain. Go figure! • This photo combines two shots to show the footer that's virtually shot. That will be fun to replace. |
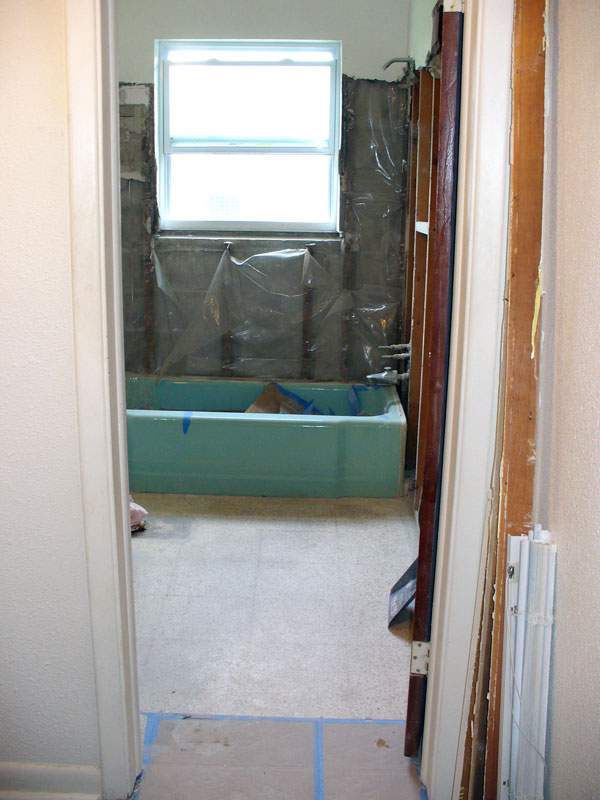
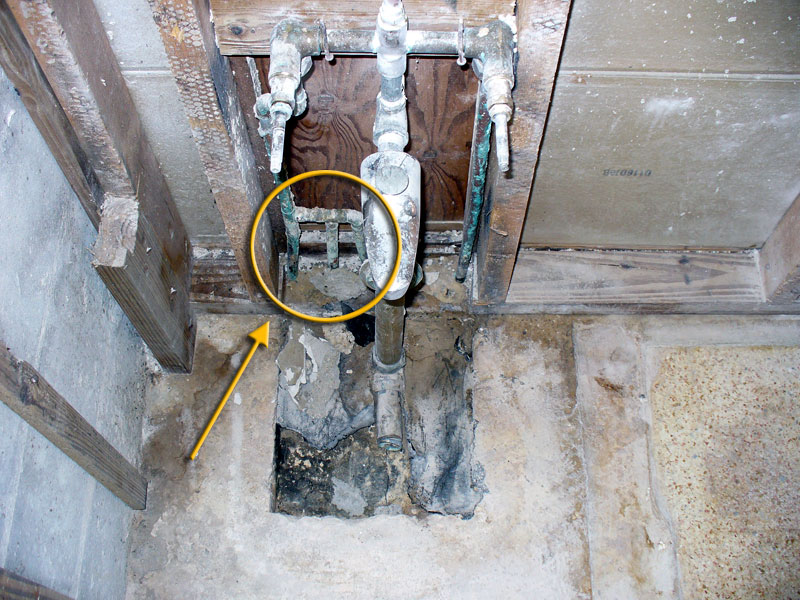
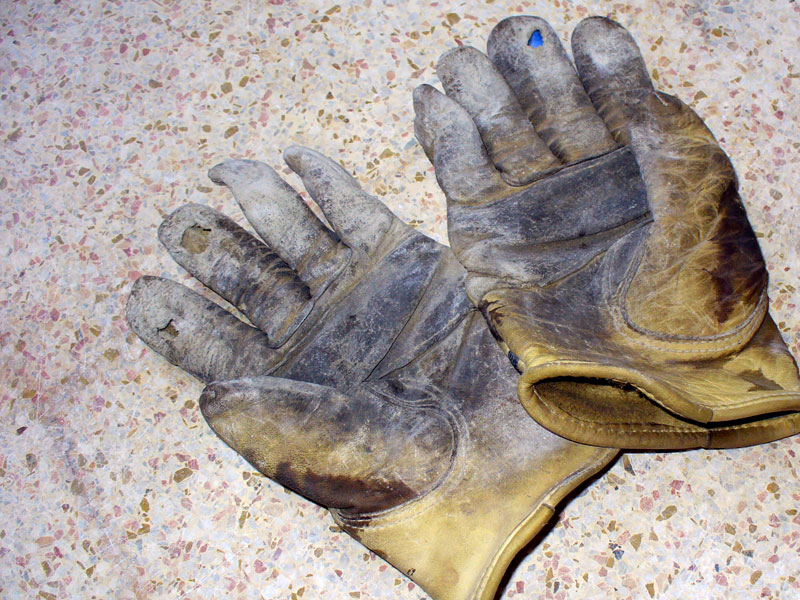
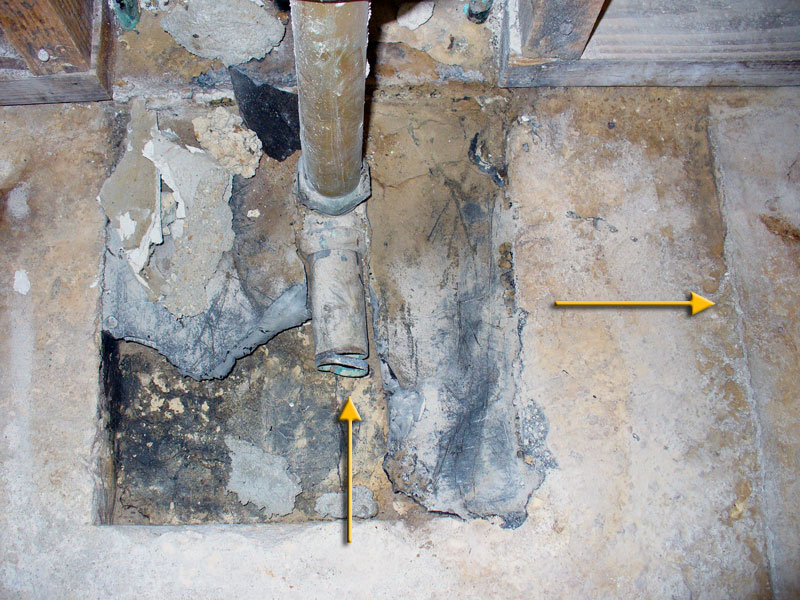
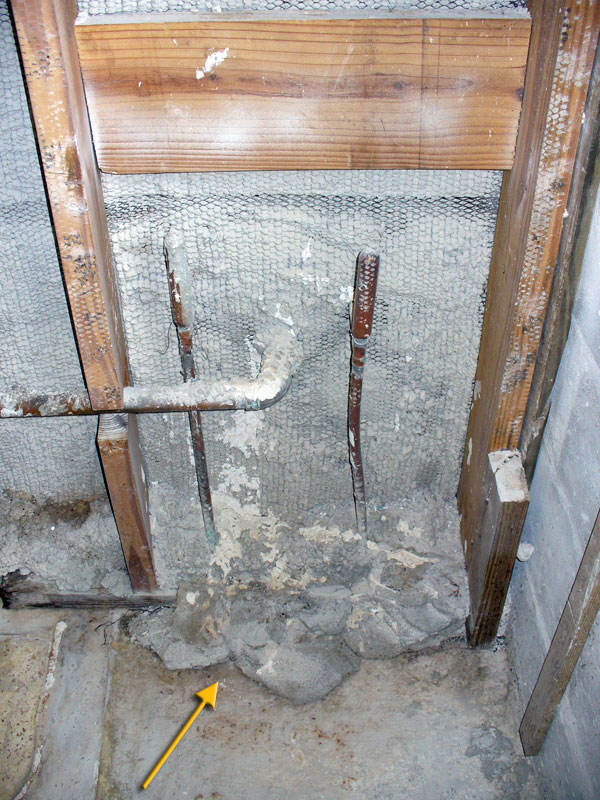
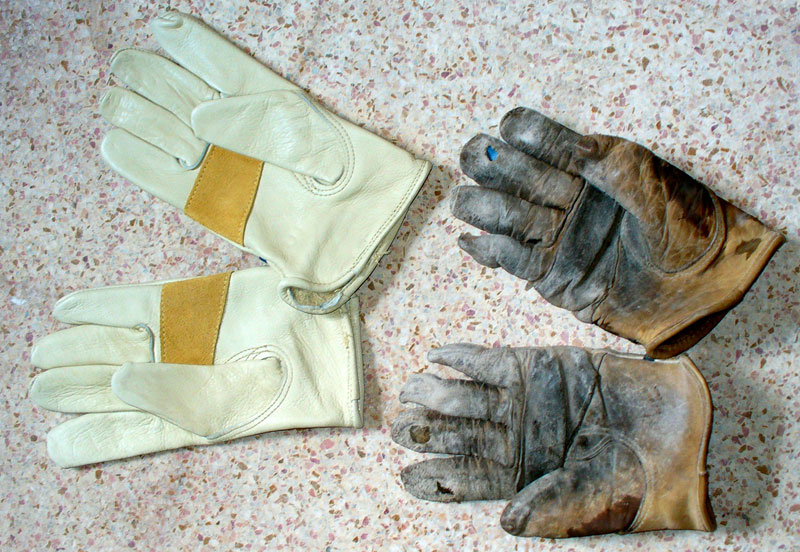
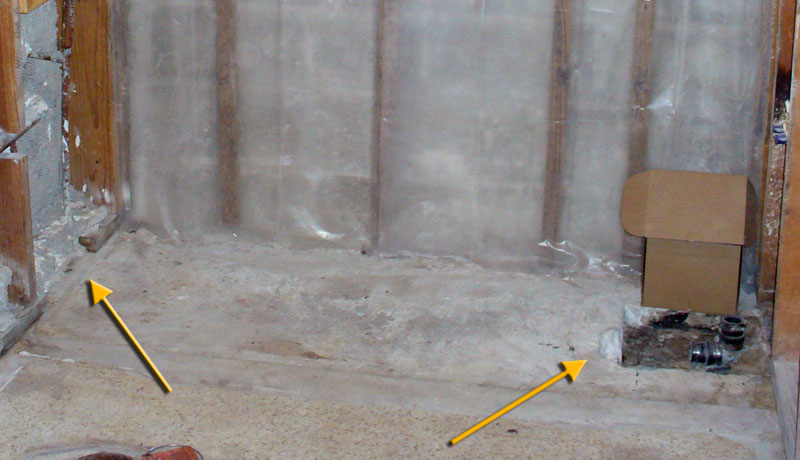
07/04/09: Demo, done! The biggie was getting the tub out. Have you ever removed a cast iron tub? It's serious work. Paul was slugging away with the big sledge, but it was very stubborn. I relieved him for a bit and, man! That's some hard work! This tub really didn't want to go. Paul broke off many little pieces until he could finally weaken it enough to do some serious damage, breaking it into two large and heavy chunks. Once we got it out of there, we were greeted by a few surprises. First, we found the terrazo layer of the floor had been removed, starting a few inches past the apron. The right arrow in this photo shows the line where the terrazo stops. Second, we found literally dozens of razor blades, not at the backend like we expected (that's where the master bathroom's medicine cabinet sits as well), but by the tub's drain. So there must have been a medicine cabinet there at some point. But that must mean the tub wasn't always there. Curious… Lastly, at the backend of the tub, there's a rather large mound of concrete coming out of the bay between the studs. Now why on Earth is that there? Add one more mystery to the many we've uncovered in this house. I've got a message in to the plumber on the the missing terrazo and concrete mound. Don't know if either or both will cause a problem with the installation of the new tub. With the demo pretty much complete, I've retired my work gloves. I'd bought a pair of leather gloves when we started the kitchen remodel, and they were in pretty rough shape by the end of that project, with a big hole at the fingertip of the left-handed middle finger. I'd bought a new pair, but wanted to wait until demo was done before making the switch. That single hole quickly got a couple of friends—it's right-handed twin as well as the left-hand index finger. I'd taken to wrapping painter's tape around those finger tips before putting on the gloves to avoid scratching them up on all the sharp dangers (that mesh can be nasty!). In this photo, you can see some blue showing through on the right-hand glove—the tape stayed in the glove when I took them off for the last time. Next up, we need to mark the layout of the room. The plumber (Harris Plumbing) will be coming in soon to do his rough-in, and we need to spec where the sink and faucet will be. We need to get the texture down from the ceiling—that will be a lot easier to complete before the new tub in installed. And, of course, we need to do some framing. We have to repair the water-damaged studs, then frame in for the medicine cabinet, two sconces, and a niche in the wall at the backend of the tub. Plus Paul wants to add some framing for where the shower rod will go as well as towel bar. He hates using anchors. |
07/04/09
|
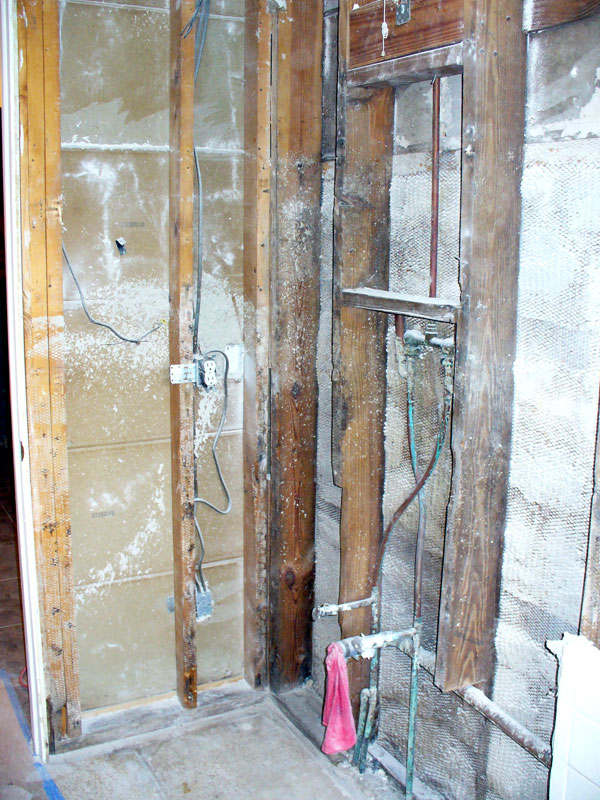
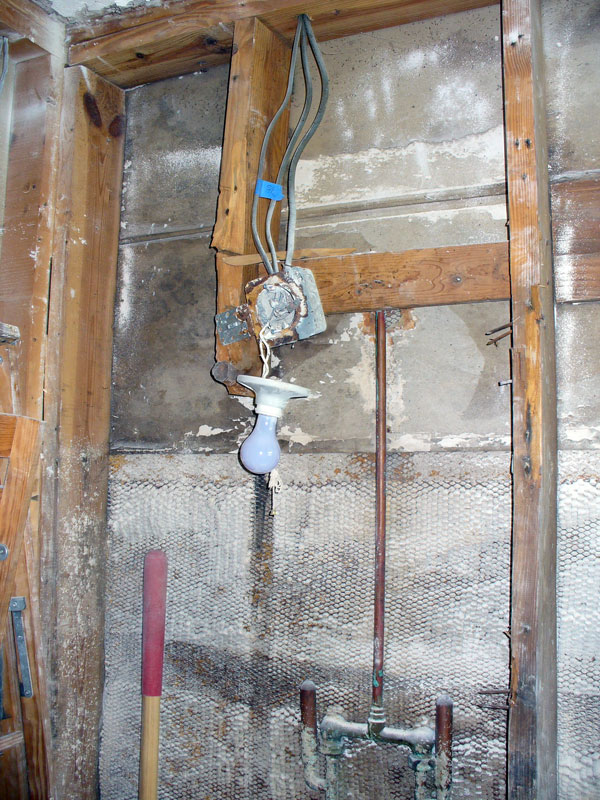
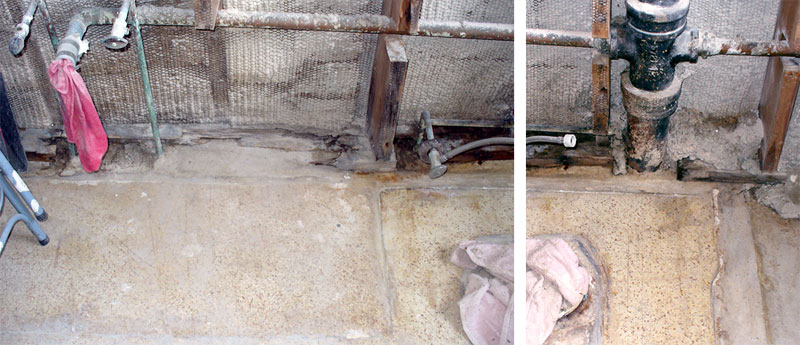
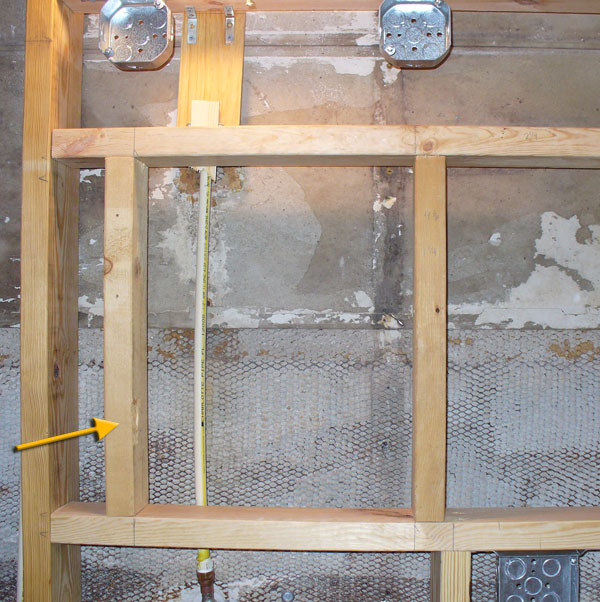
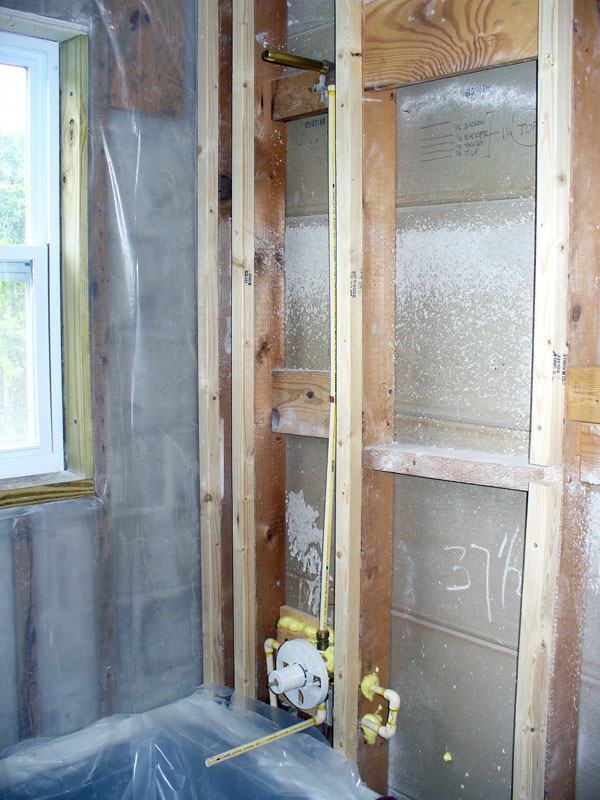
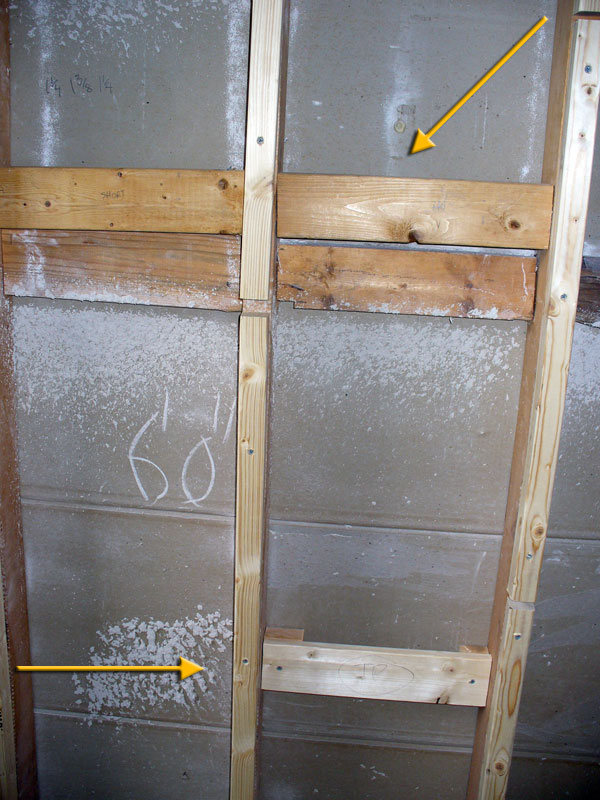
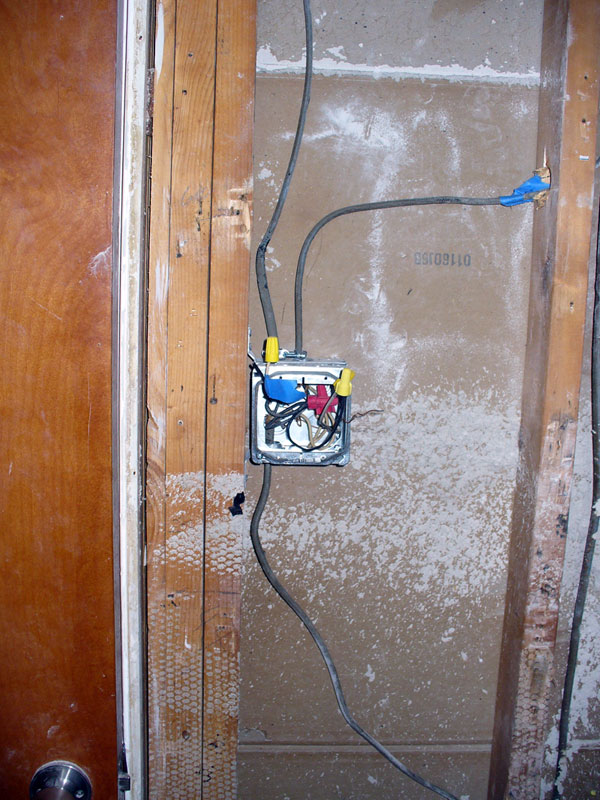
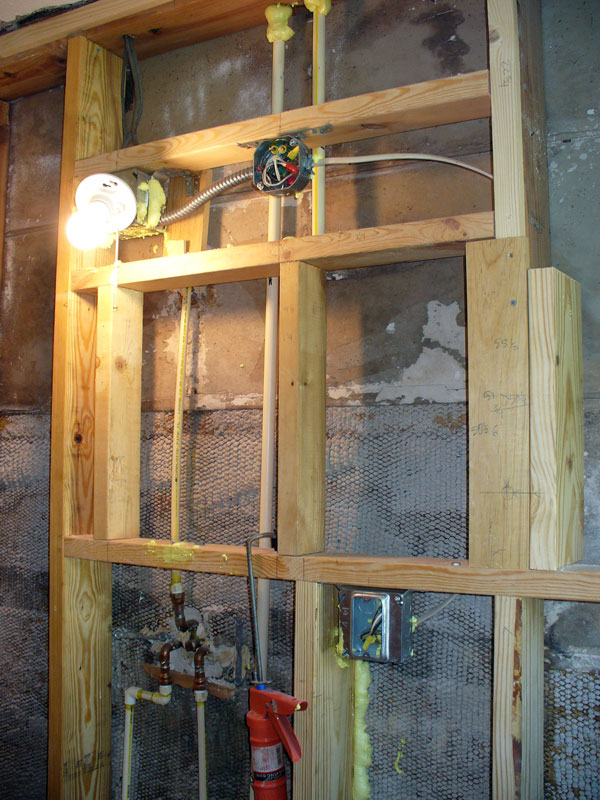
07/11/09: Fun with Framing The main project for the day was framing. We had to replace the damaged footer and 2x6s in the north wall. But since we also needed to frame in for a new medicine cabinet, it wasn't a simple process. Plus, in order to have the right width for the new tub, we'll have to fur out both the north and south walls (what had been there was a 2" thick 'wet bed' and tile on both). Initially we'd planned on doing the full 2" of furring we were going to need just on the south wall and just at the tub. Sadly, as we uncovered the old cast iron vent pipe, at its connections, it extends out 3/4" farther than the existing studs. Figures! So the north wall will be furred out 3/4" and the south wall will get the rest. Besides doing the stud work and framing in the medicine cabinet and wall niche above the tub, Paul had to put in framing for the various electrical boxes: two sconces above the cabinet, a light switch/receptacle combo, and a second receptacle. Paul doesn't like using anchors in a wall, so he also put framing behind an eventual 18" towel bar. We didn't get to it yet, be he'll be doing the same for a second 24" bar, the shower rod, and the toilet paper holder. While Paul was working on framing, I had a few projects I could handle. First I had to chip away at the surplus concrete that was spilling out from the bay that holds the vanity plumbing for the master bathroom. It could have been in the way of the new tub. Then at the other end of the tub, the plumber asked if we could remove a little more of the concrete by the drain, just to be safe. There were also some miscellaneous clumps of concrete on the floor at the base of the east wall to remove. I also cleaned away the tons of caulk all around the window frame, pulled the few remaining nails from existing studs, and replaced the plastic vapor barrier on the east wall. Then I just helped Paul until we were both pooped! Hopefully the plumber will be in this week to finish his rough-in. I want to make a second trip to the stone yard to finalize the countertop choice. Paul needs to order a dumpster (as demo is virtually done). Next weekend we hope to finish the framing and get the electrical done. If we're really lucky, the tub will come in during the week, so we can do the furring out as well. If we can get all that done, we should be able to start buttoning up the walls and preparing for tile. Just one word if you're considering any remodeling: If you can afford it, hire the job out! Unless you can just take off work and go at it pretty much non-stop, it's going to take a long time. Forget about how hard the work can be—and we're not spring chickens or even in good shape; we're desk jockeys during the week!. I can't put into words just how aggravating it is to live in a construction zone. There's dust on everything! We have tools all over the place. Life is just a mess. If you hire the job out, it can be completed so much faster. It's not in our budget, but oh, how I wish it was! |
07/11/09
|
|
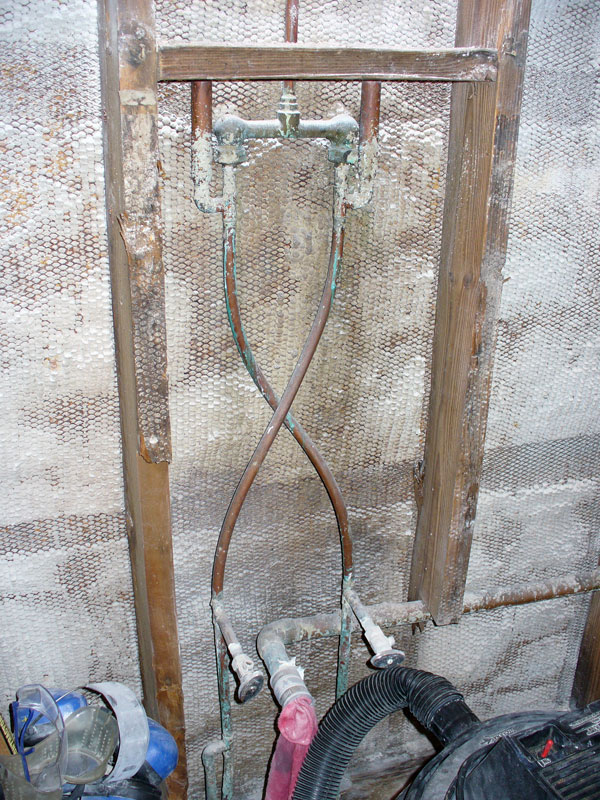
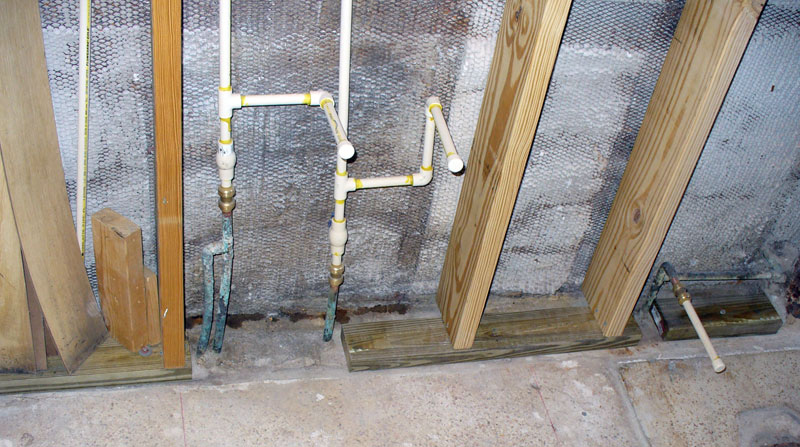
• Here's the plumbing for the tub and shower. • Here's the lumber support pieces for towel bar (top) and toilet paper holder (bottom). • This shot shows a few of the furring strips in place on the south wall. |
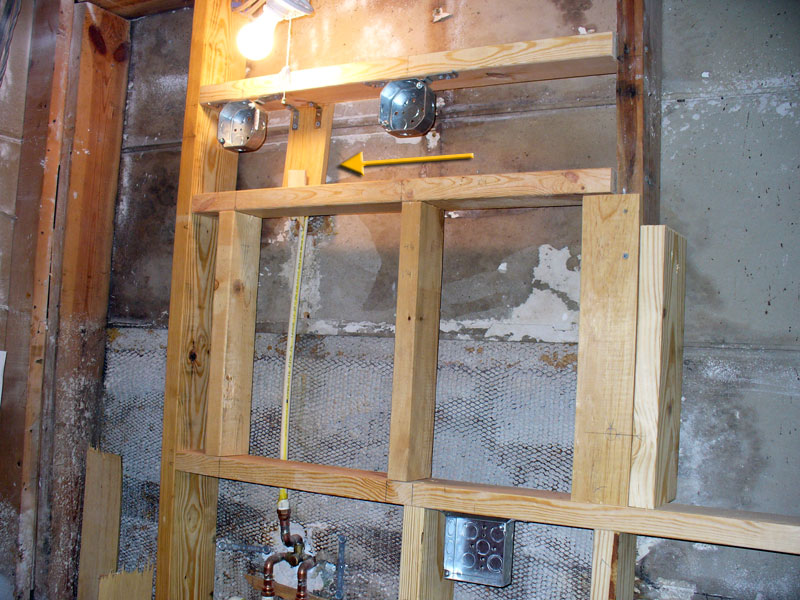
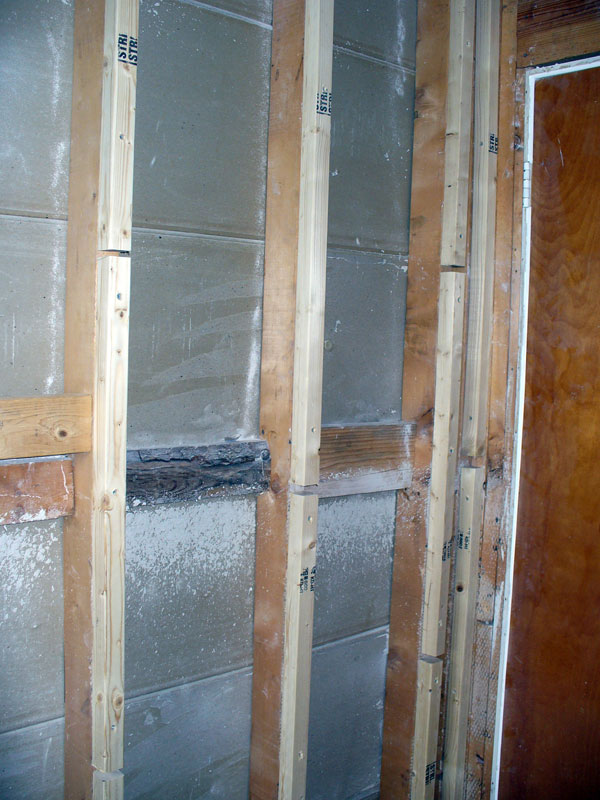
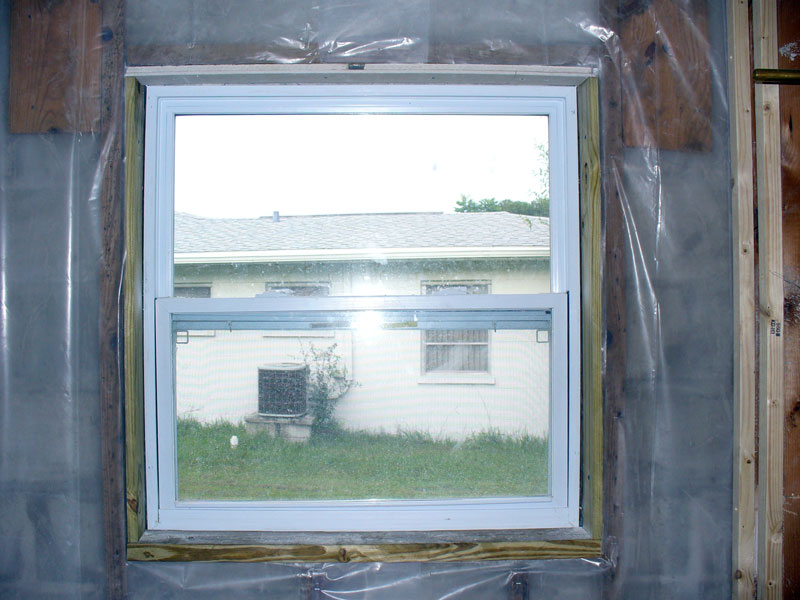
07/18/09: Framing, part 2 When Paul called the city about getting a dumpster (like we had for the kitchen), they refused, saying tile can't be put in them. So now we're scrambling to come up with another solution. The huge roll-off the city would provide is massive overkill and a big unnecessary expense. The plumber recommended someone who could haul it away. That's still to be decided. We virtually finished the framing Saturday. There's just one stud at the back of the tub that needs a bit more than a 2x2 furring piece along the lower portion (the existing stud in that position is twisted, throwing things off). Paul got supporting lumber in place for the shower rod, the 24" towel bar, and the recessed toilet paper holder. Framing around the window was fun, including maintaining the slant to the bottom sill. But the trickiest part of the day was the furring on the south side of the wall. on the studs at the head of the tub, we needed just under the depth of the 2x2 furring strips. Have you ever tried ripping an 1/8" off a 2x2 with a circular saw? Making matters worse, some had twisted and warped in the week they waited for us to put them in place. Once we got past the tub, we just used the full pieces. Paul also managed to get the electrical in the combination switch and receptacle by the door done. Next week he'll wire up the two boxes for the sconces and the other receptacle. Then we should be able to start buttoning up the walls. |
07/18/09
|
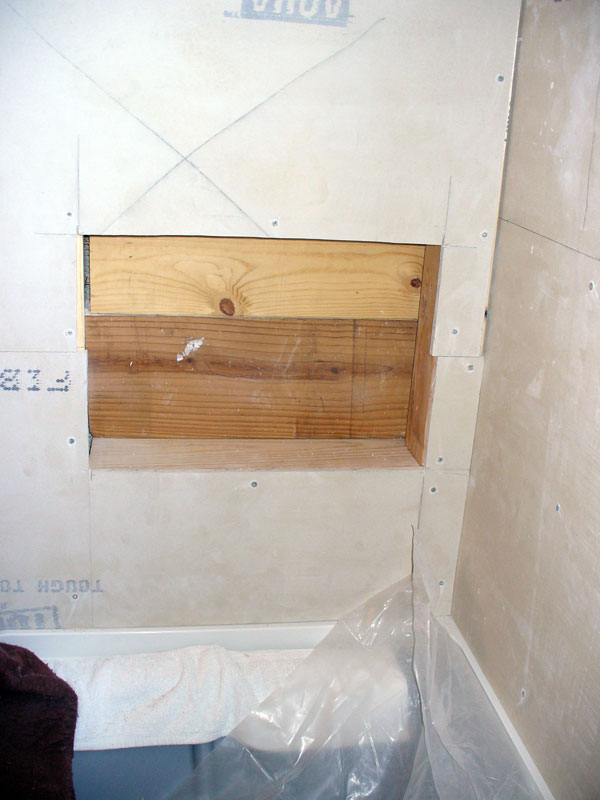
Photos: • We still need to put 1/4" backer inside the niche. • We had to cut this pressure-treated 2x4 in several smaller pieces to compensate for its twisting. |
07/25/09: Walls, part 1 We finally broke for a late lunch after all that was done, then started buttoning up the walls aftwards. We have to use backer board on the three walls in the tub area. The backer board we bought has to be cut with a saw and we had some tricky cuts to make. For the first cut, Paul used the reciprocating saw, but that wasn't a very pretty cut. He switched to his circular saw after that. We got the back wall covered — after figuring out a solution for missing furring strips. As we were working on the first piece on the north wall, another issue came up. The vent stack created a void where a stud was really needed to secure the backer board. To compensate, we scrapped the first piece we were going to put there (it got used above it), and used a larger piece, taking it to the next stud over. By the time we got the other piece that surrounds the niche done, we had to call it quit. It takes quite some time to clean up everything, and it was already getting late. It was seven before we were totally done for the day. I had hoped we could have gotten all the backer board up today, but now that's pushed to next weekend, plus we have even more wall area that needs drywall. |
07/25/09
|
Photos: |
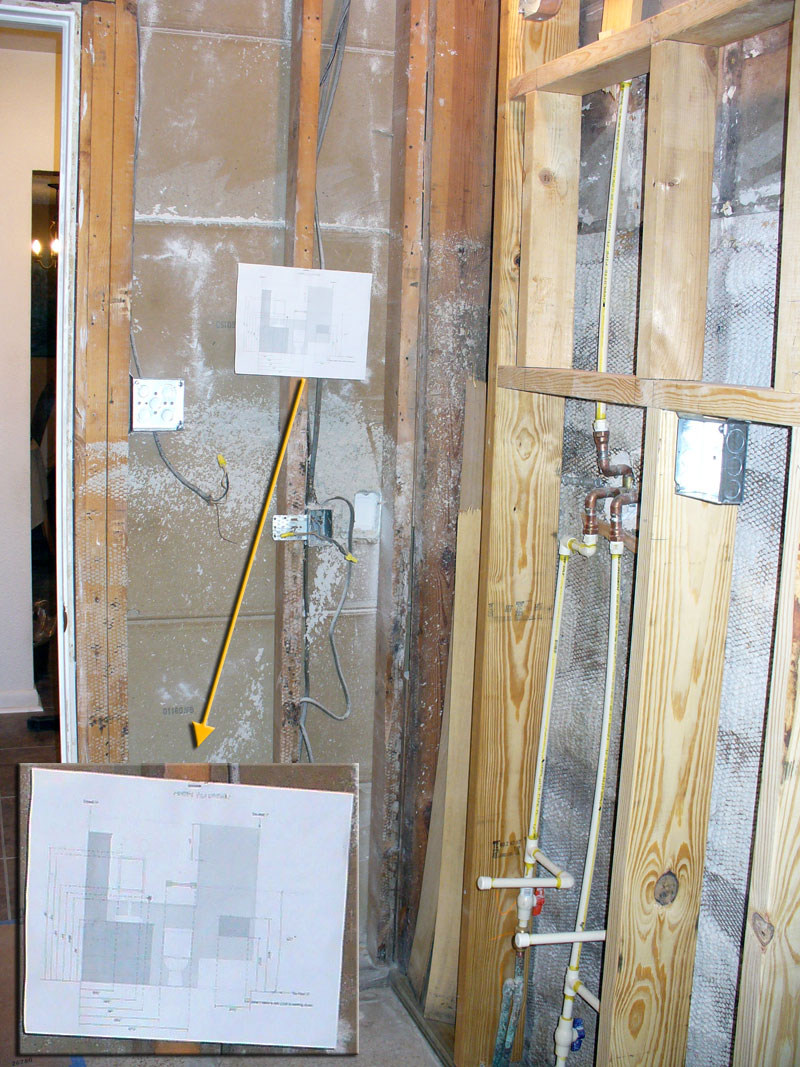
07/28/09: What's that?! |
07/28/09
|
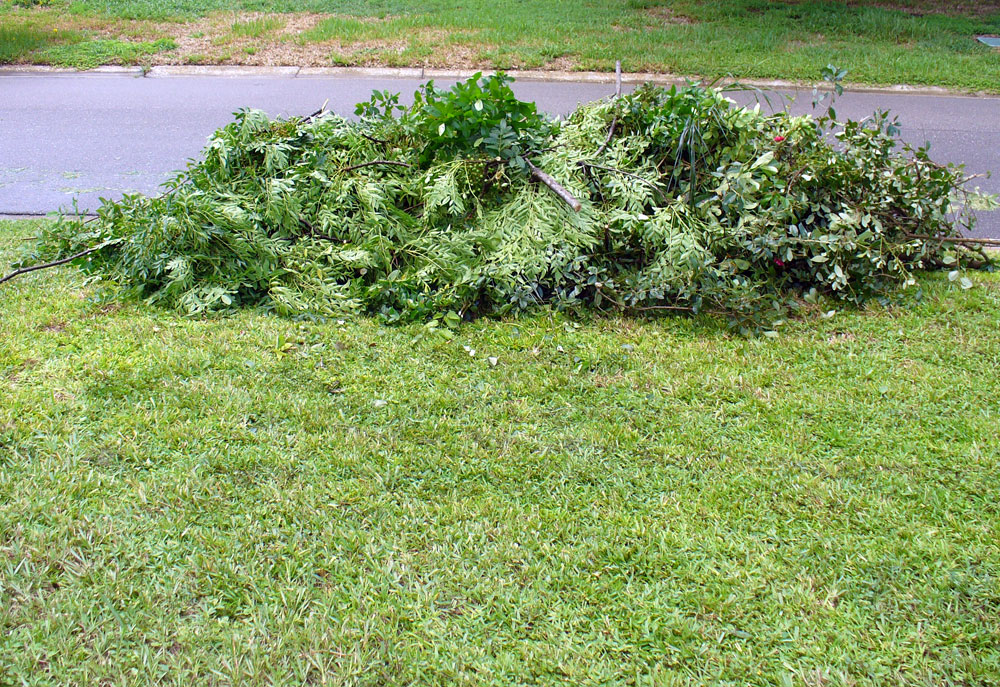
08/01/09: You call that a day off?! Anyway, I mowed the lawn while Paul weed-whacked. We've got a pretty big yard (double corner lot) so we have a riding mower. It made it a lot easier for me. Then we tackled trimming a bunch of branches and limbs. I went around cutting back the shrubs all around the house with hand clippers while Paul used the reciprocating saw to cut branches from the oak trees and a chinaberry. Despite several days of sunshine, it naturally decided to ran. Paul didn't get to finish cutting limbs off the chinaberry. We ended up getting a bit wet working around the showers to clean up the debris. And our gloves were soaked after picking up so many drenched branches off the ground. Next week back on the bathroom… |
08/01/09
|
|
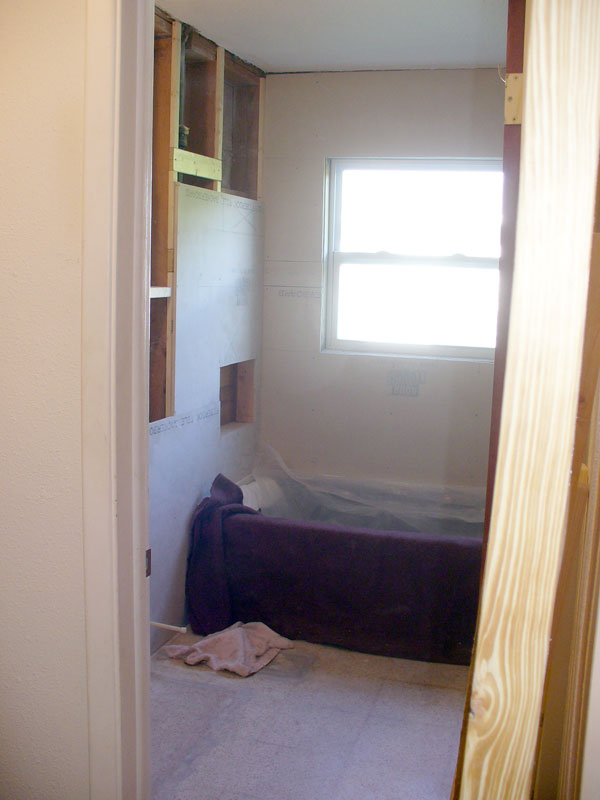
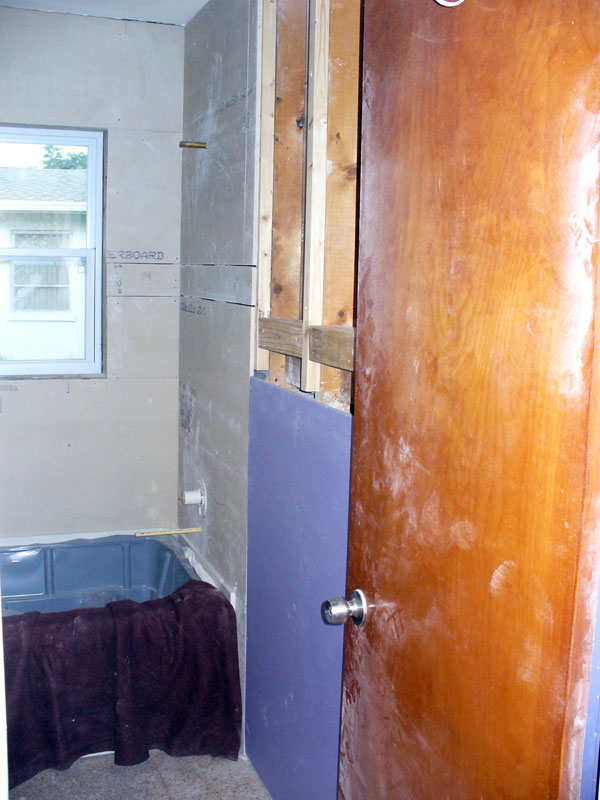
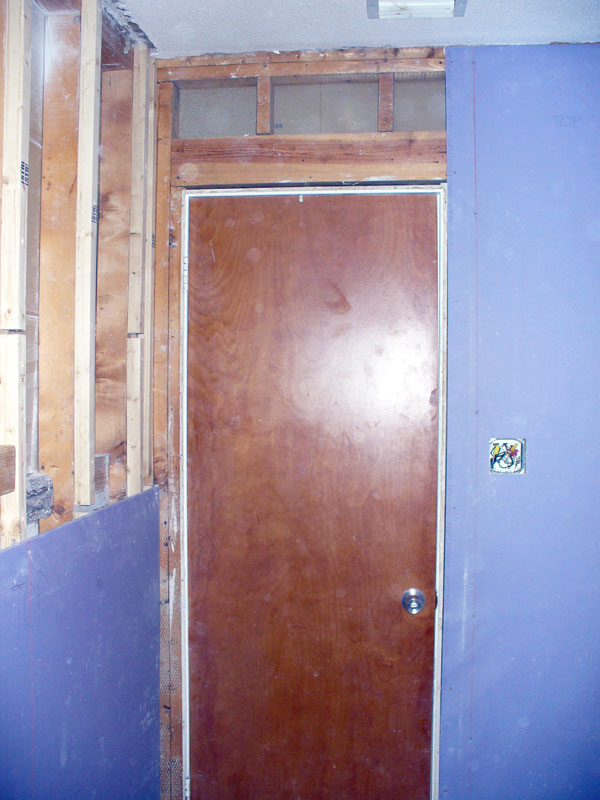
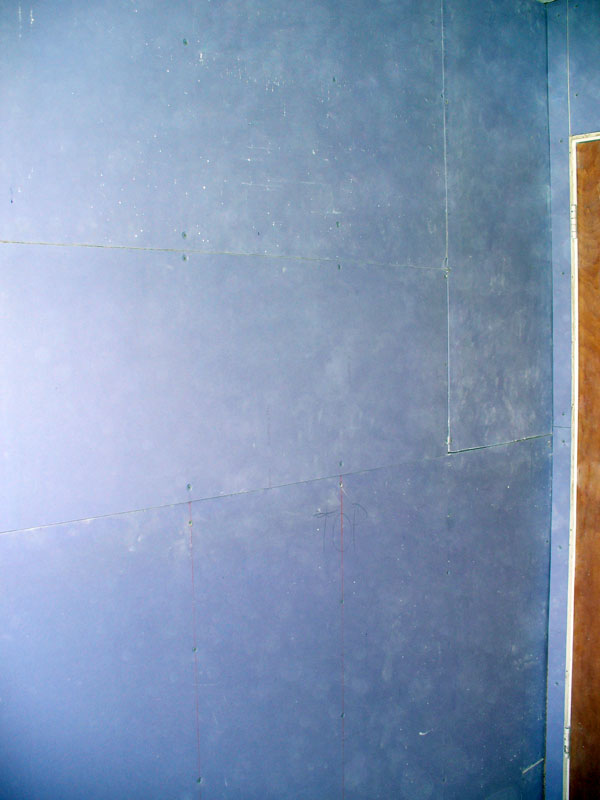
Photos: • Continuing turning to the left, you can see the rest of the west wall. • Rotate to the left last time and you can see what's left to do on the south wall. • And a closing shot looking from the doorway. That poor door is pretty covered in construction dust! |
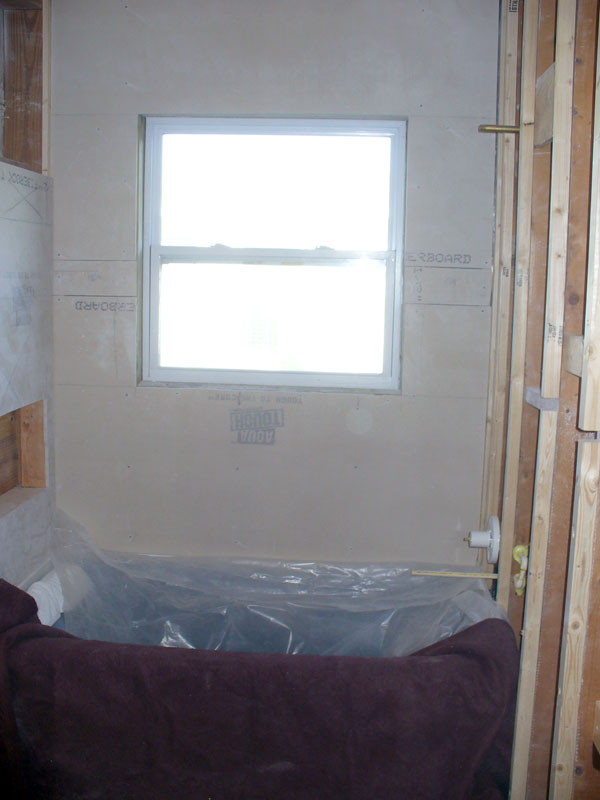
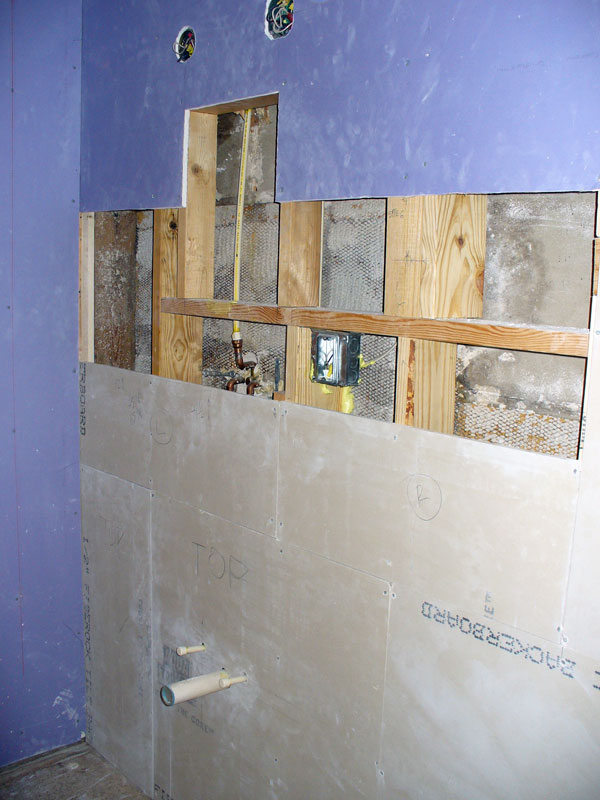
08/08/09: Walls, part 2 We finished up with the 1/2" backer board today. When we'd gone to the hardware store to get the 'mold and mildew resistant' drywall, they told us the manufacturer says you can't place tile on it. We had intended on only using backer board around the tub itself. Thankfully we had enough left over to cobble together pieces to extend all the way behind the future vanity (and where the rest of the tile will be going). Cutting the 6" hole for the tub/shower valve required the jigsaw. For the real small holes Paul needed to cut for the faucet pipe and the vanity supply lines, he used a paddle bit on his drill. His hole saw took care of the other two holes. Paul's careful measuring meant we nailed all those tricky cuts. From there we started on the drywall. We ran into a few issues. Paul's a pretty terrific computer programmer, and I'm not too shabby at graphic design, but neither of us are professional construction workers and it shows. A seasoned professional would have avoided a lot of the problems we've encountered. For instance, we put the first piece of drywall up at the top of the north wall. If we'd though ahead enough, we'd probably put it on the east wall first instead. Why, you ask? Because when we got around to that portion, we realized the drywall on the north wall meant we didn't have enough stud showing to attach the drywall where those two walls meet. Thankfully we had a spare 2x4 and Paul sistered it to the far right stud, giving us a place to screw in the drywall. Things like that slow down progress. I wish we could have finished the drywall, but it all just took too long. Come 6:00 we were losing light and we knew we still had an hour of clean-up time ahead of us. So next week we'll finish installing the drywall, and hopefully get the first round of mudding and taping done. Then perhaps we'll do the successive coats after work during the week. I have to apologize for the photos. This is such a tiny space, I can't get far enough back to take it all in. |
08/08/09
|
• And last, but not least, we polished off the northern wall with one long piece. Yeah! |
08/15/09: Hey, look, no studs! I should mention that you may notice a fuzziness in the photos, both this week and last. I take the photos after I finishing cleaning up in the bathroom and that includes sweeping up a lot of drywall dust. That tends to leave a lot of dust up in the air. |
08/15/09
|
Photos: |
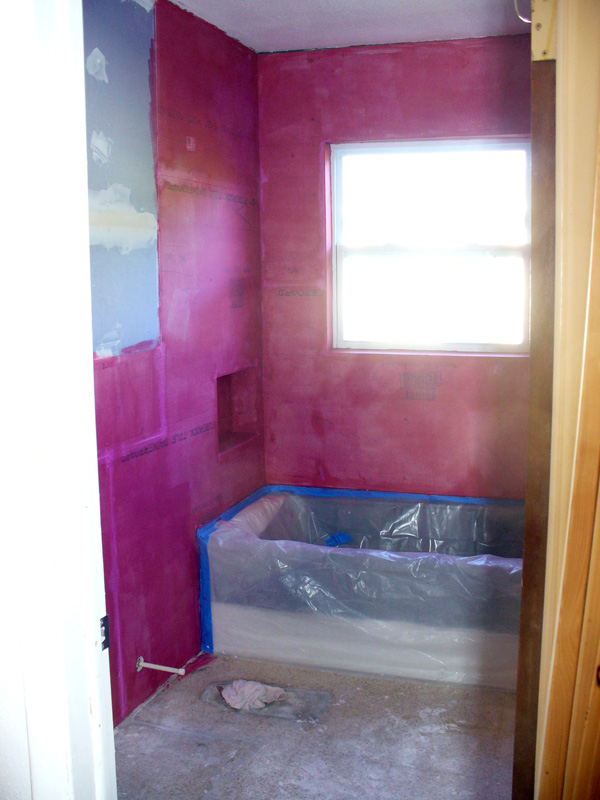
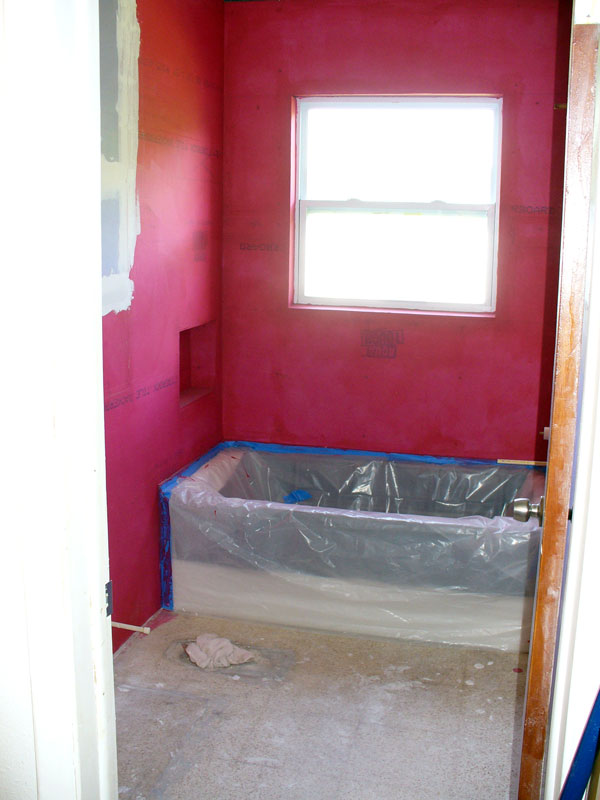
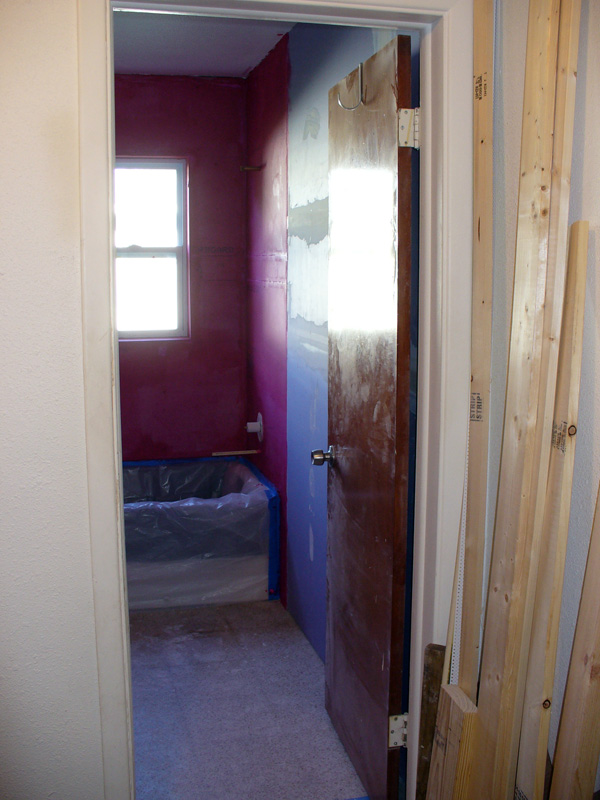
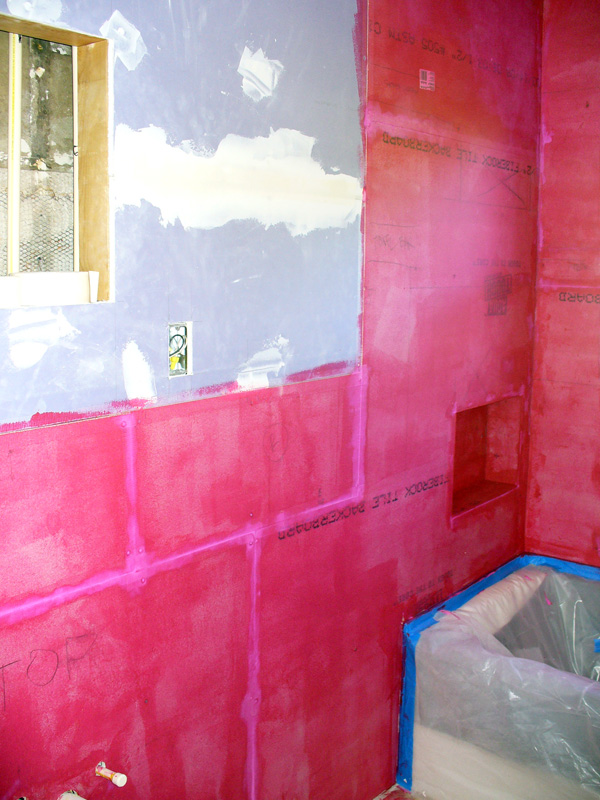
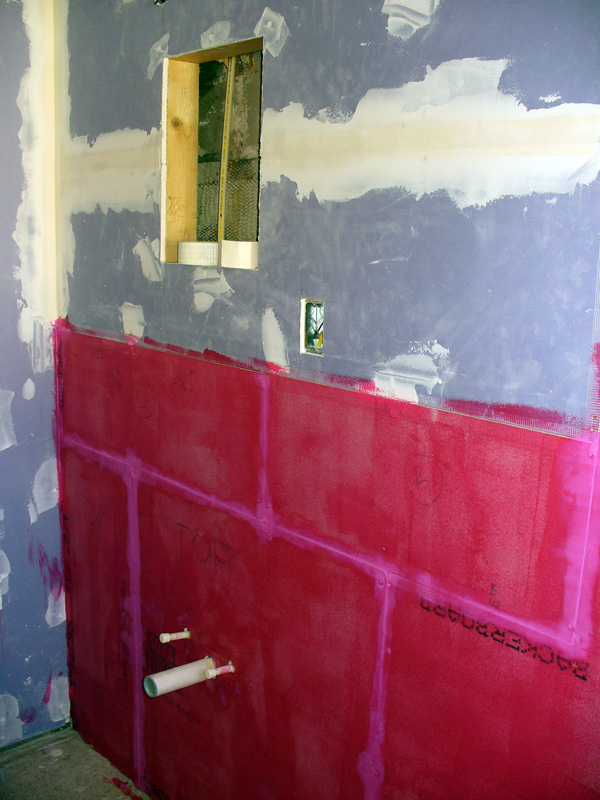
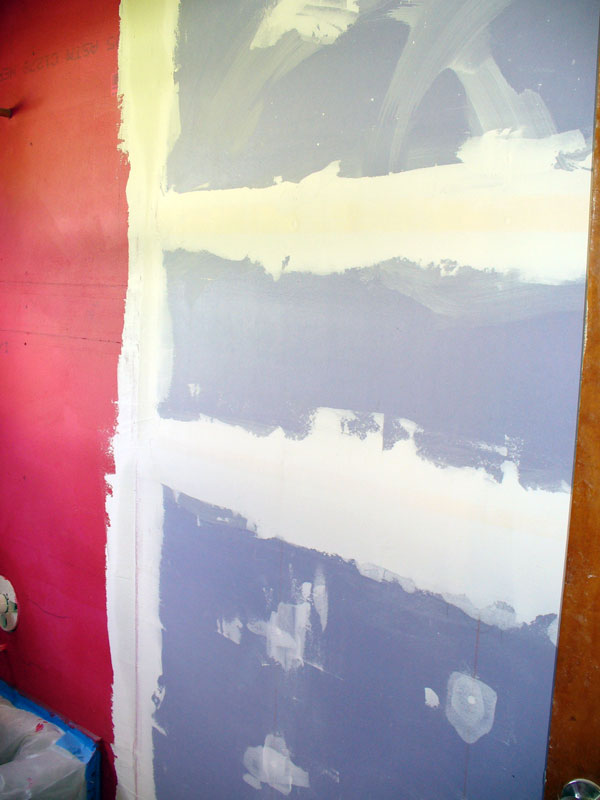
08/22/09: A 'Red Hat' bath We started by finishing off the backer, placing the pieces around the interior of the window and in the niche. From there, Paul turned his attention to cleaning the A/C coils (construction is messy business) and I re-did the protection over the tub, taping plastic all around. When I started putting mesh tape on the backer pieces, I noticed a problem in the southeast corner. A lack of a furring strip at the corner gave a section of the backer too much play. I talked Paul into fixing it, but that meant removing three pieces of backer (from the south wall where the tub plumbing is, the offending piece below the window, and the small piece above it), and removing several screws from the backer piece over the window. This way we could shimmy a furring strip in place and Paul Tapcon'd it in place. Then we had to replace all the backer and get back to what we were doing. Once Paul was finished with the A/C, he got started mudding and taping the drywall portions. After I finished with the mesh tape, I started applying the first coat of moisture barrier on the backer. Despite getting an earlier start, we still didn't get finished, stopping about 7:00. It was after 8:00 before we finally ate some dinner. There's still some mudding and taping to be done (as well as sanding and follow-up coats of mud), plus a second coat is needed on the moisture barrier. Oh, and why a 'Red Hat' bath you ask? Perhaps you've heard of the Red Hat Society? Well those ladies would love the current color scheme. The drywall is a light purple and the moisture barrier dries red. |
08/22/09
|
• Looking northwest, you see some of the transition between backer and drywall. |
08/29/09: Did we do anything? Paul sanded the first coat of mud, applied a second coat over those areas, and did first coats on the portions leftover from last week (one last wall/ceiling transition, and where drywall meets backer board). Meanwhile, I was in our family room apply the first coat of sealant to 46 pieces of slate tile and 43 pieces of Bottocino marble bullnose (pencil) trim. [Since this house doesn't have a garage, our family room is really a hobby and workshop area.] I finished before Paul, so went to help him, but he was almost done and all I could really do was provide moral support. Once he finished and cleaned up his drywall tools, we broke for lunch. And since all that we could still do was apply the second coat of sealant to the tiles, we took our time at lunch. Paul helped me apply the second coat and we were done by 4:00pm. That's a record! |
08/29/09
|
| Next > |


